# Slack Integration
The Slack integration is tedious because it requires that you create a dedicated application in your Slack space. But don't worry we explain the full process in the following!
# Create a Kitsu Application in Slack
# Create an Application
To start with the integration, we need to create an application in Slack dedicated to sending messages on your Kitsu instance behalf.
For that let's connect to https://api.slack.com/apps (opens new window)
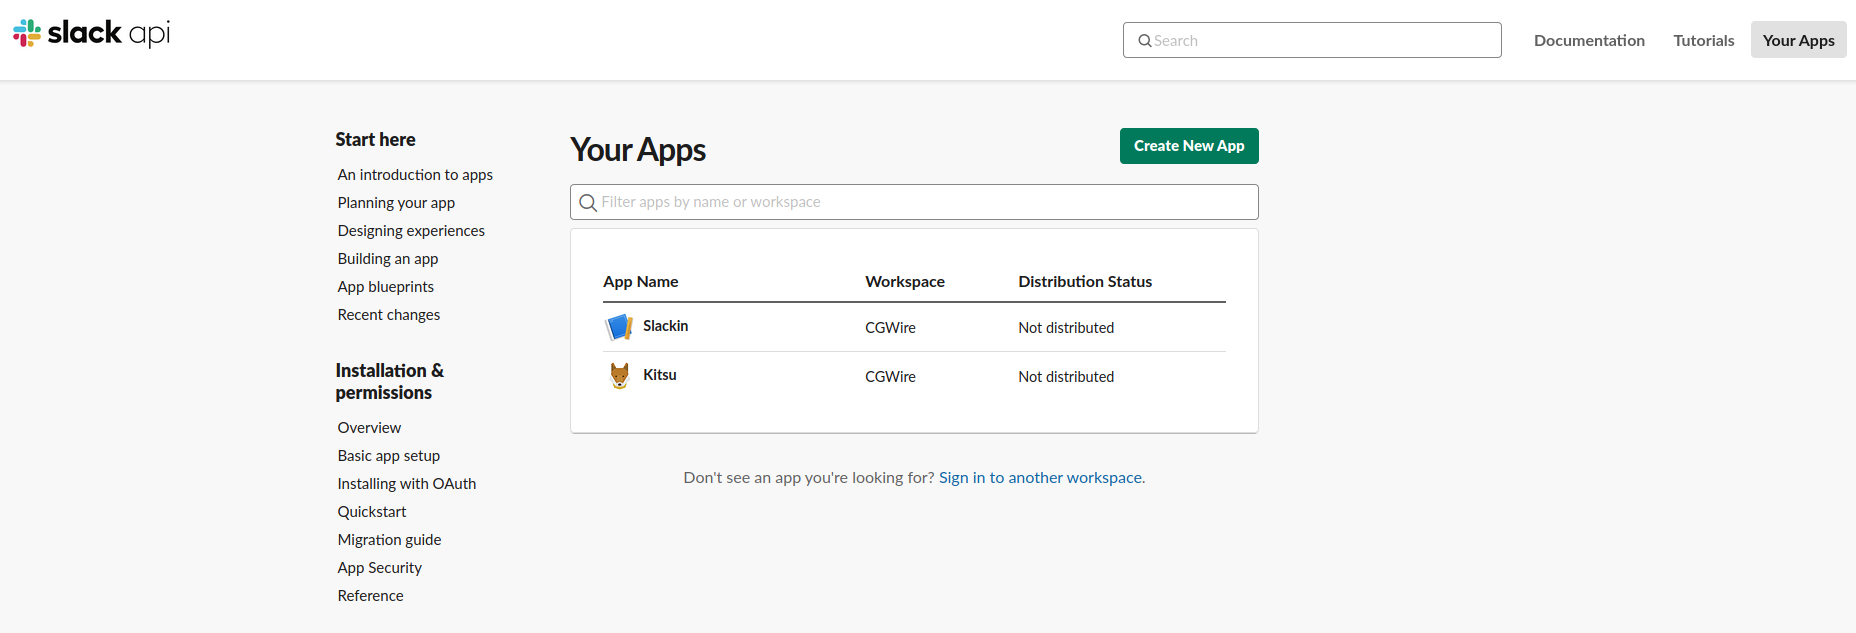
From here click on the Create new App button:
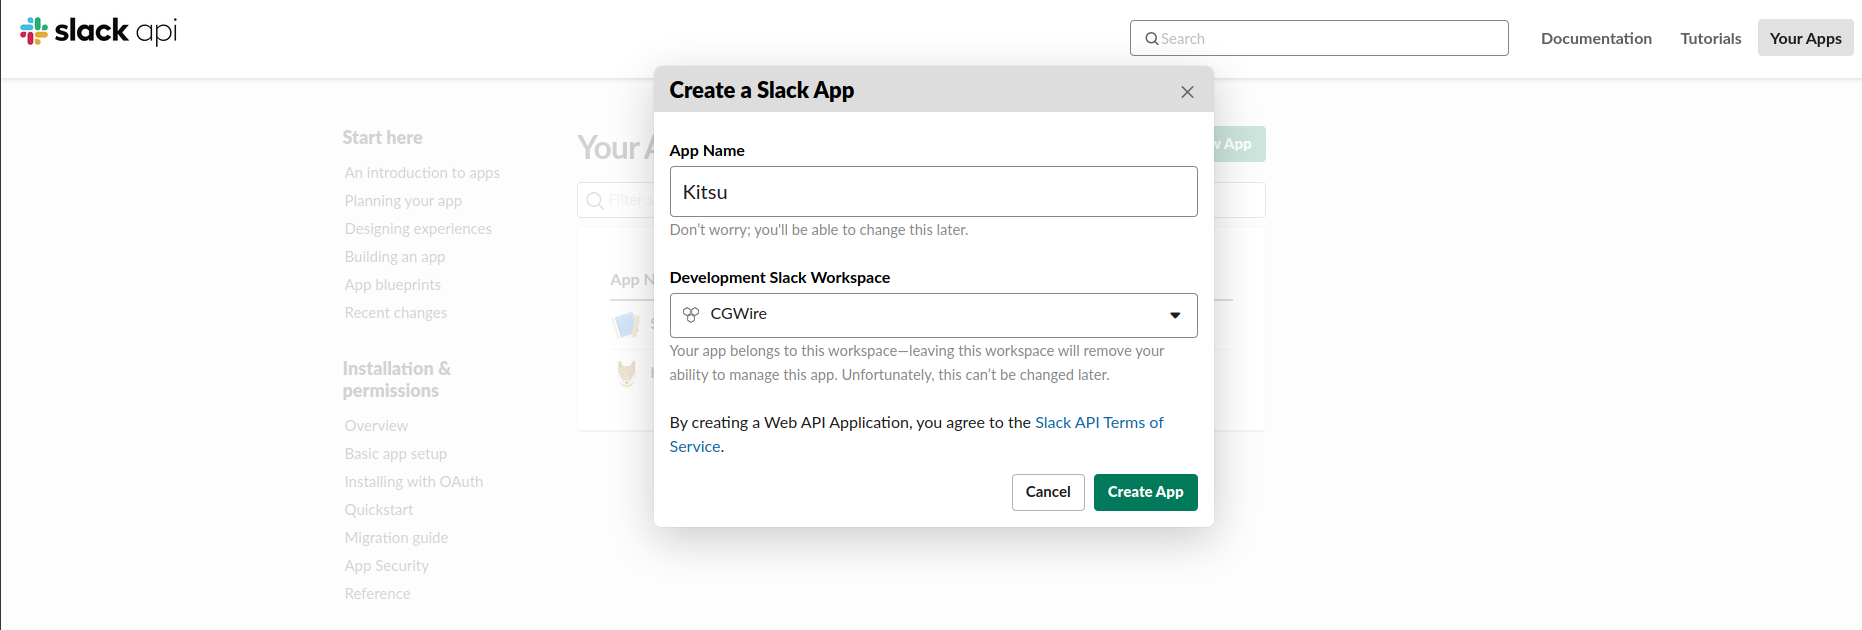
Then enter Kitsu as name and chose the workspace you want to link with you Kitsu instance:
# Set the Right Permissions
When the app is created, go to the app page by clicking on its name in the list
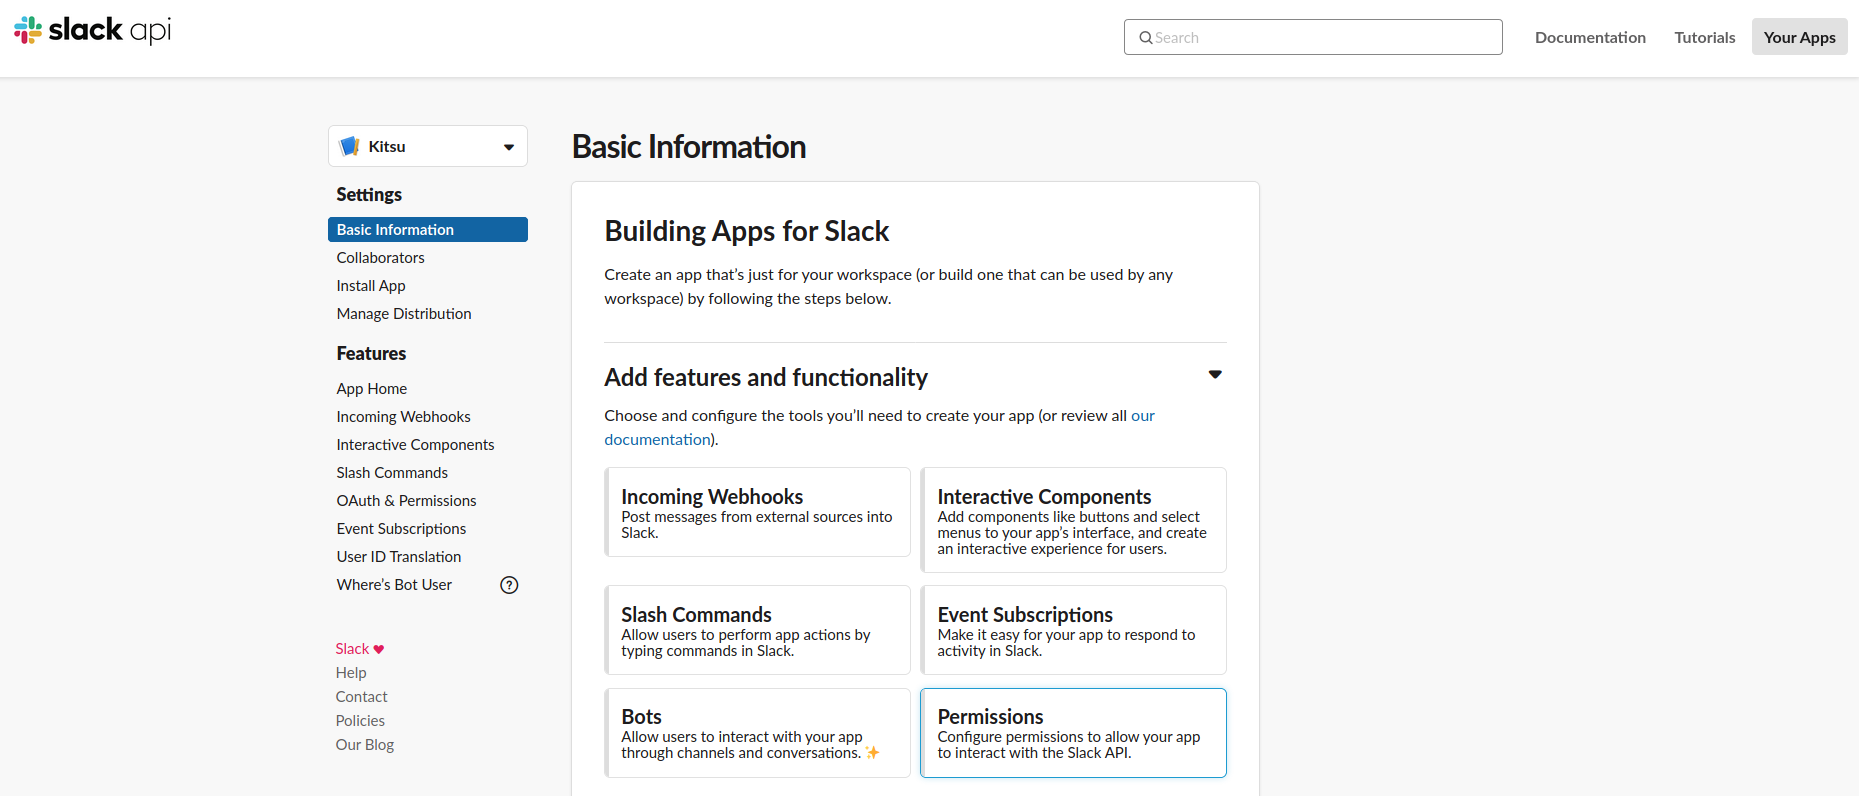
and go to the Basic information section. Then click on the Permissions
button on the bottom right:
From there, go to the scopes section to add the required permission:
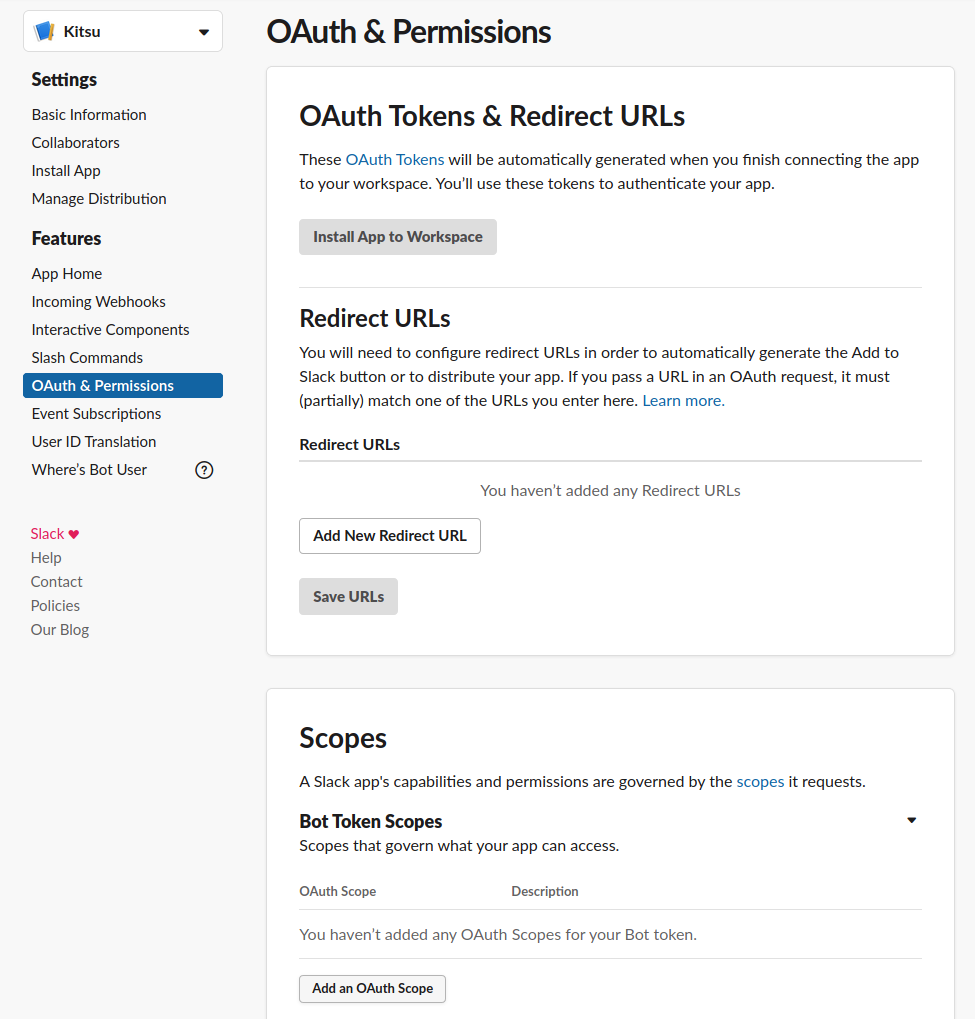
The required permission scope is chat:write:bot:

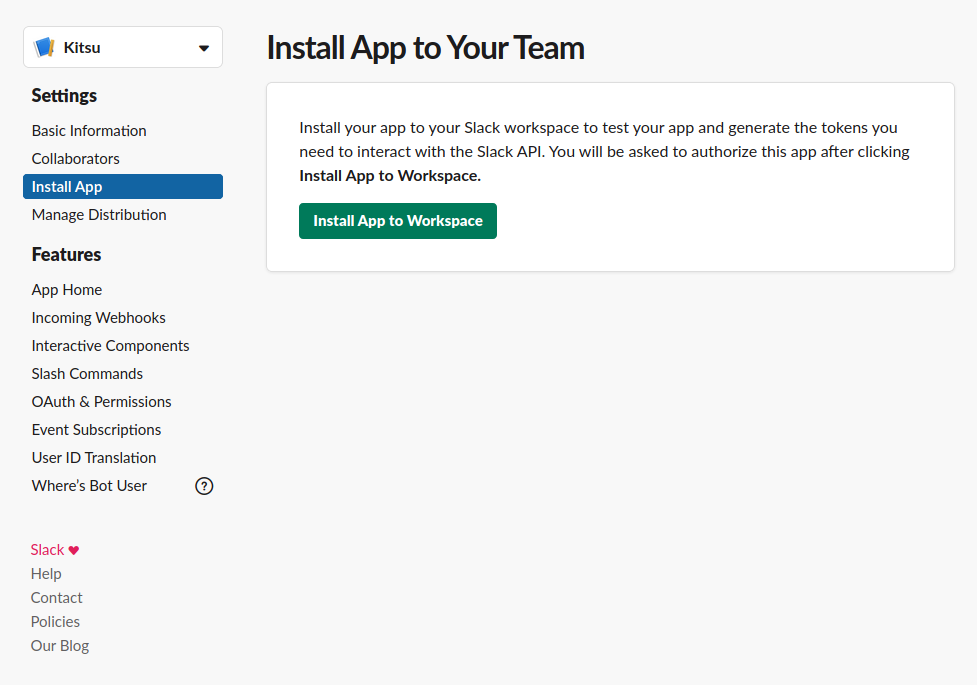
# Install App in your Workspace
We can now proceed to the app installation in the workspace. Go to the
Install App section and proceed to installation by clicking on the big green
button:
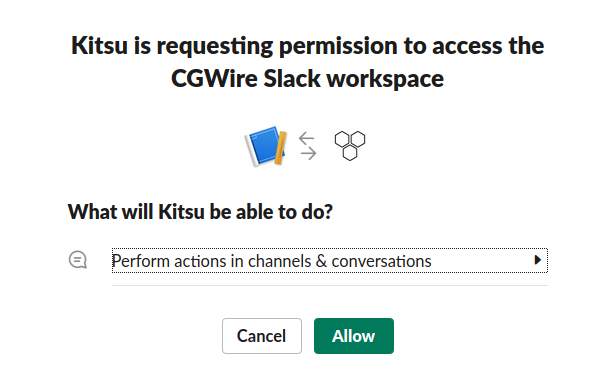
Confirm the installation:
Your Kitsu Slack App is now up and running! You just need to link your Kitsu to your notifications sent to your Slack workspace.
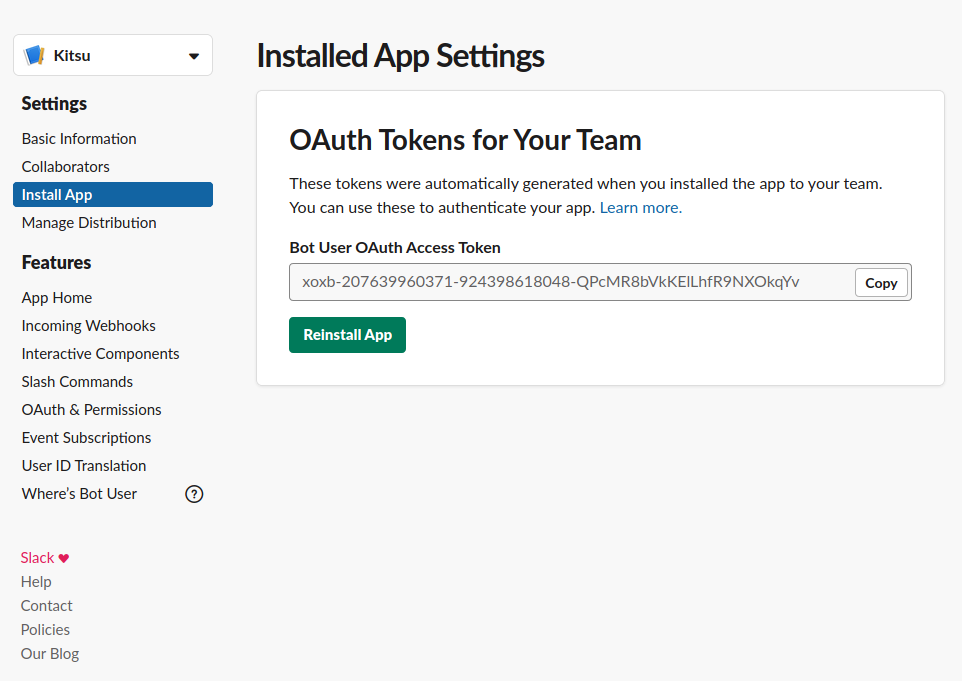
# Get the Token
Now come back to the Install app section. You should see the token to use to link your Kitsu instance to Slack.
# Change Kitsu Settings
# Link Kitsu to your new Slack Application
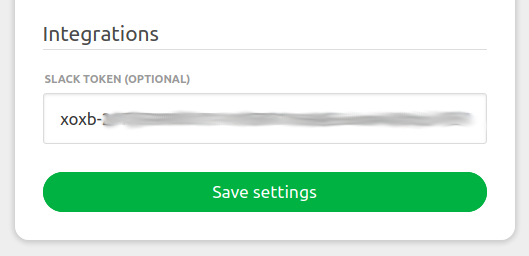
Now that you have a valid token for your Slack application, go to the settings page. There you can give the token to your Kitsu instance.
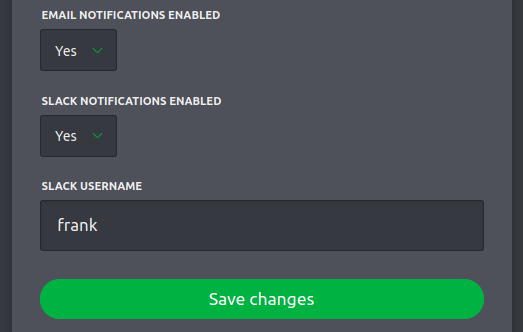
# Enable Slack Notifications in your Profile
The final step requires to go in your profile section. From there you can put your Slack notifications on. It requires a last parameter: the Member ID you use on your Slack.
You can find it in your Slack profile by clicking on More:


Then In your Kitsu profile, set the Slack notifications on and the Slack
nickname:
You can now enjoy pretty notifications right in your Slack workspace!
