# Create a Production - Advanced
# Create Tasks for Episode
In a TV Show production, you can create a specific Task type for the episode. It's especially useful when you have macro tasks to track, like the script, SFx, editing, mix, etc.
To use this page, you need to first create a dedicated task type on your Global Library with the Episode attribute.
See Pipeline customization Section to create a new Task Type.
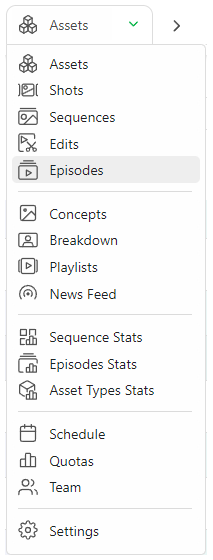
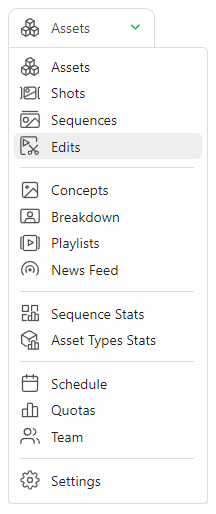
Once you have created your Task Types on your Global Library, add them to your Production Library, you will see the Episodes displayed on the navigation drop-down menu.
This new page behaves like the asset and shot global page. You can add your tasks to the
 button.
You can add a custom metadata column, fill in the description, etc.
You can Rename and Delete the Episodes entity on this page, as for the asset and shot entity.
If you click on the name of an episode, you will see the detail page of this episode.

On the detailed page, you have access to the episode's casting. You can see all the assets used in the whole episode.
You can also access the schedule, Preview Files, Activity, and Timelog of the episode tasks.
# Create Tasks for Sequence
When you are in a production, you can create specific Task type for the sequences. It's especially useful when you have macro tasks to track, like Story and color Board, Color Grading, etc.
To use this page, you need to first create a dedicated task type on your Global Library with the Episode attribute.
See Pipeline customization Section to create a new Task Type.
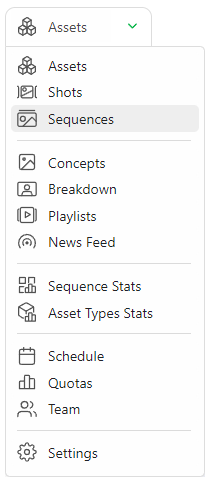
Once you have created your Task Types on your Global Library, add them to your Production Library, you will see the Sequences displayed on the navigation drop-down menu.
This new page behaves like the asset and shot global page. You can add your tasks to the
button.
You can add a metadata column, fill in the description, etc.
You can Rename and Delete the Sequence entity on this page, as for the asset and shot entity.
If you click on the name of a sequence, you will see the detail page of this sequence.
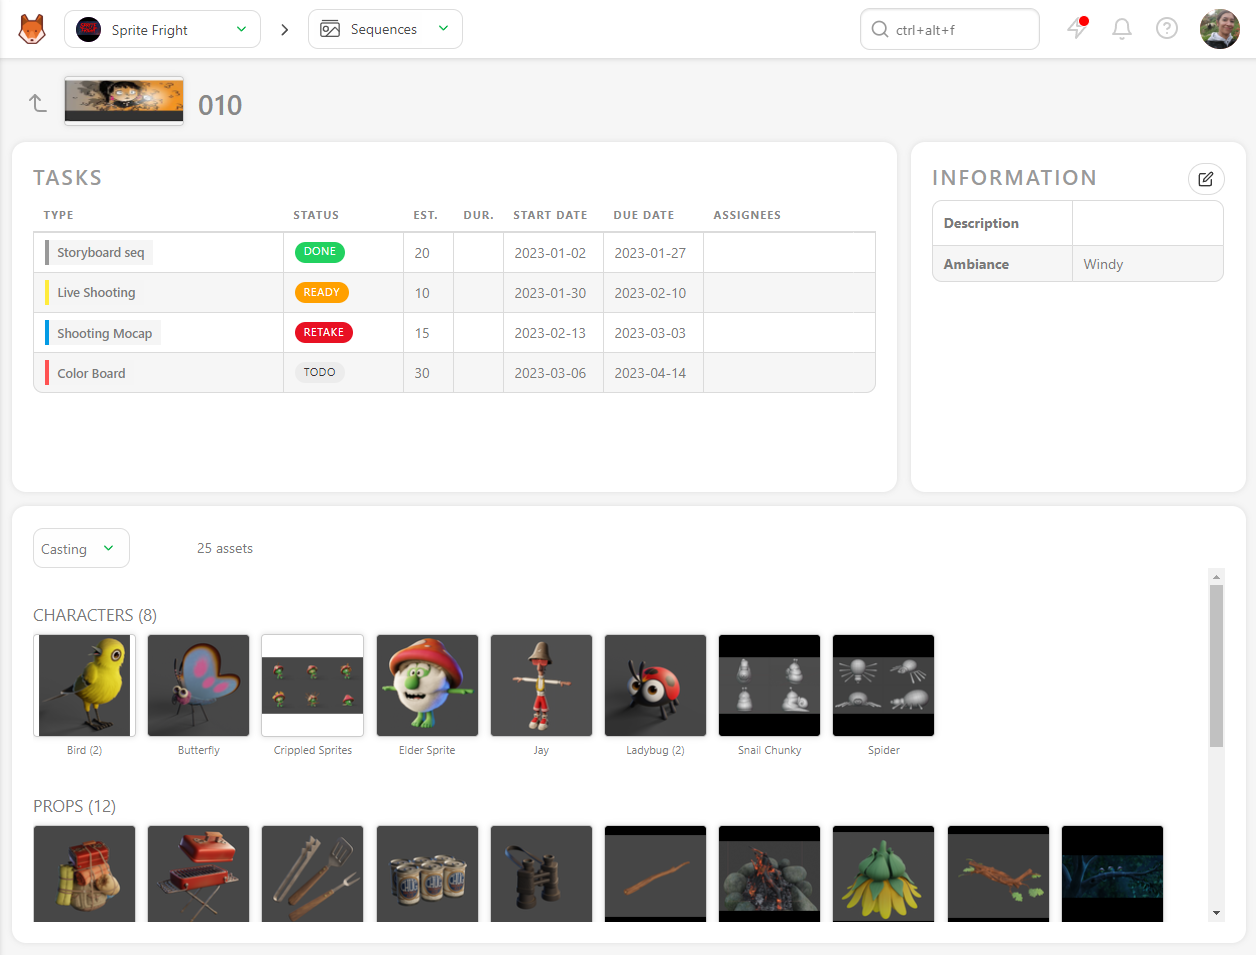
On the detailed page, you have access to the casting of the sequence. You can see all the assets used in the whole sequence.
You can also access the schedule, Preview Files, Activity, and Timelog of the sequence tasks.
# Create Tasks for Edit
In a production, you can create a specific Task type for the Edit. It's especially useful when you have several to track, like Story and color Board, Color Grading, etc.
To use this page, you need to first create a dedicated task type on your Global Library with the Edit attribute.
See Pipeline customization Section to create a new Task Type.
Once you have created your Task Types on your Global Library, add them to your Production Library, you will see the Edit displayed on the navigation drop-down menu.
This new page behaves like the asset and shot global page. You can add your tasks to the
button.
You can add a metadata column, fill in the description, etc.
You can Rename and Delete the Edit entity on this page for the asset and shot entity.
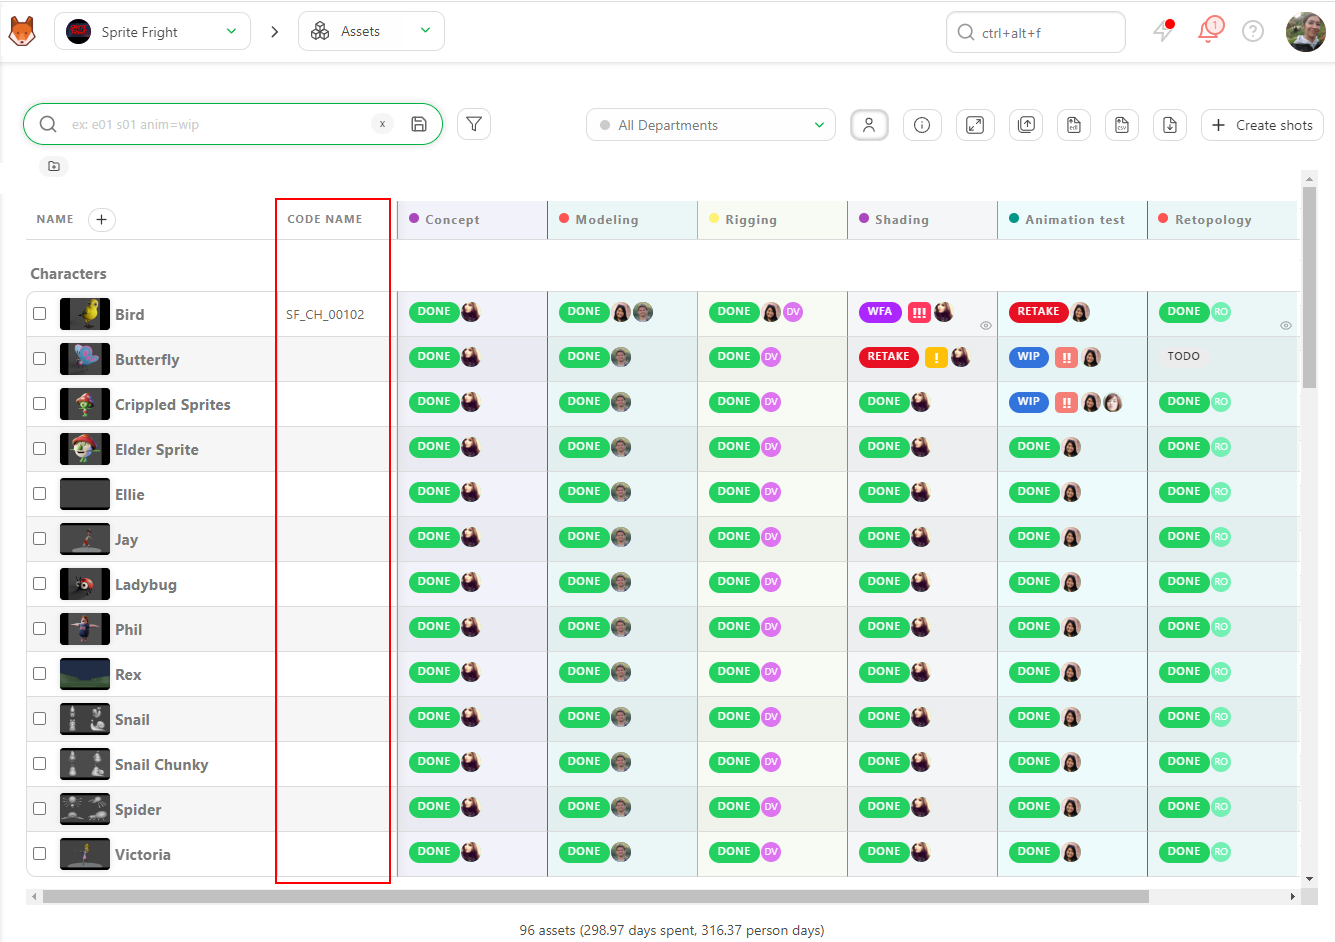
# Create Custom Metadata Columns
To add more information on the general spreadsheet pages, you must create a custom metadata column.
Click on the + near the Name column.

You may have extra information to add on your pages as the level of difficulties, the name of the studios, when a production is split, the shot order, etc.
You can store all kinds of text information in the custom metadata column: a free text, a number, a checkbox, a list of value, or a Checklist.

The text, number, and checkbox fields differ for each entity.
The list of value and Checklist give you the same choice for each entity. Moreover, it has to be filled now.

Type the list elements below Available values, and confirm them by clicking on Add value.
You can also link the metadata column to one or several departments.
If you link a metadata column to a department, the artists will see it on their to-do page and department-filtered view.
Validate the creation of the metadata column with the Confirm button.
Back on the global spreadsheets page, you can fill in this information directly on the global page. The cases are editable.
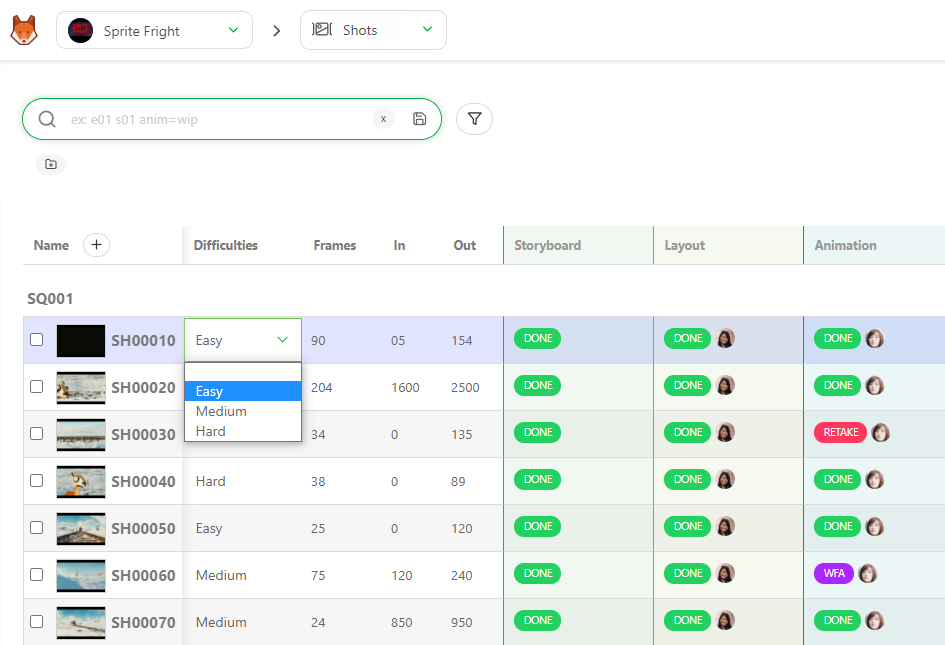
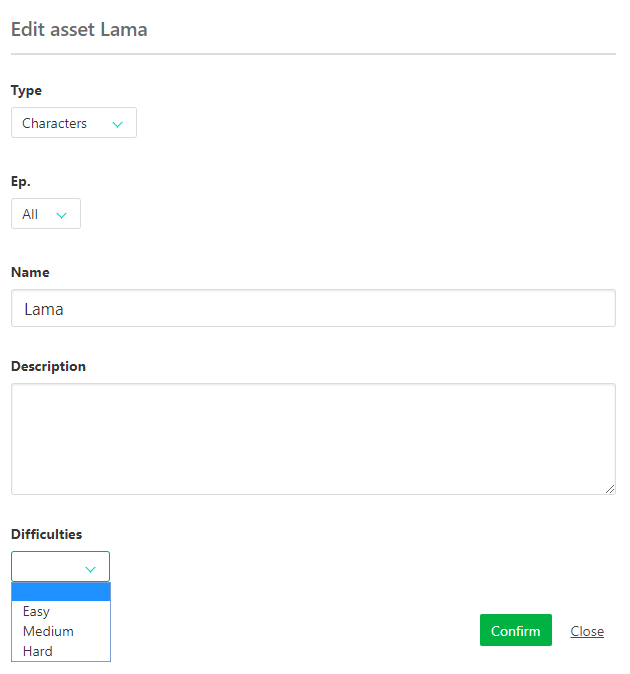
You can also modify the information with the edit button  .
.
You now see a new line on the edit pop-up. You can select the information from the list, alternatively, enter the free text or number, check a box, or use the checklist, depending on your previous choice.
Remember to press the Confirm button when you are done.
If you need to edit or delete the metadata column, go back to the general spreadsheet page.
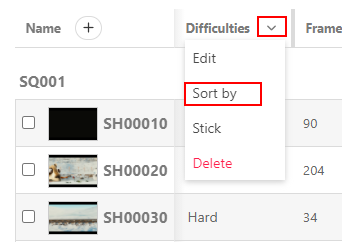
Nearby the name of your metadata column, click on the arrow .
.
You can now sort your global page with this new column. For example, let's create a Sort Order metadata column.
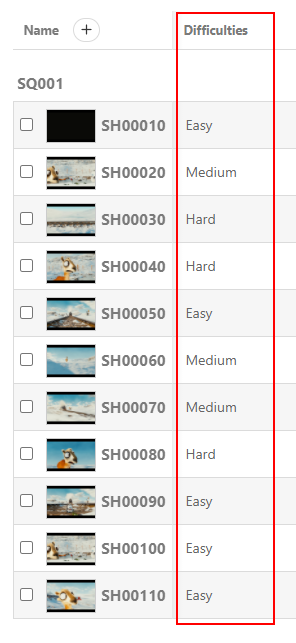
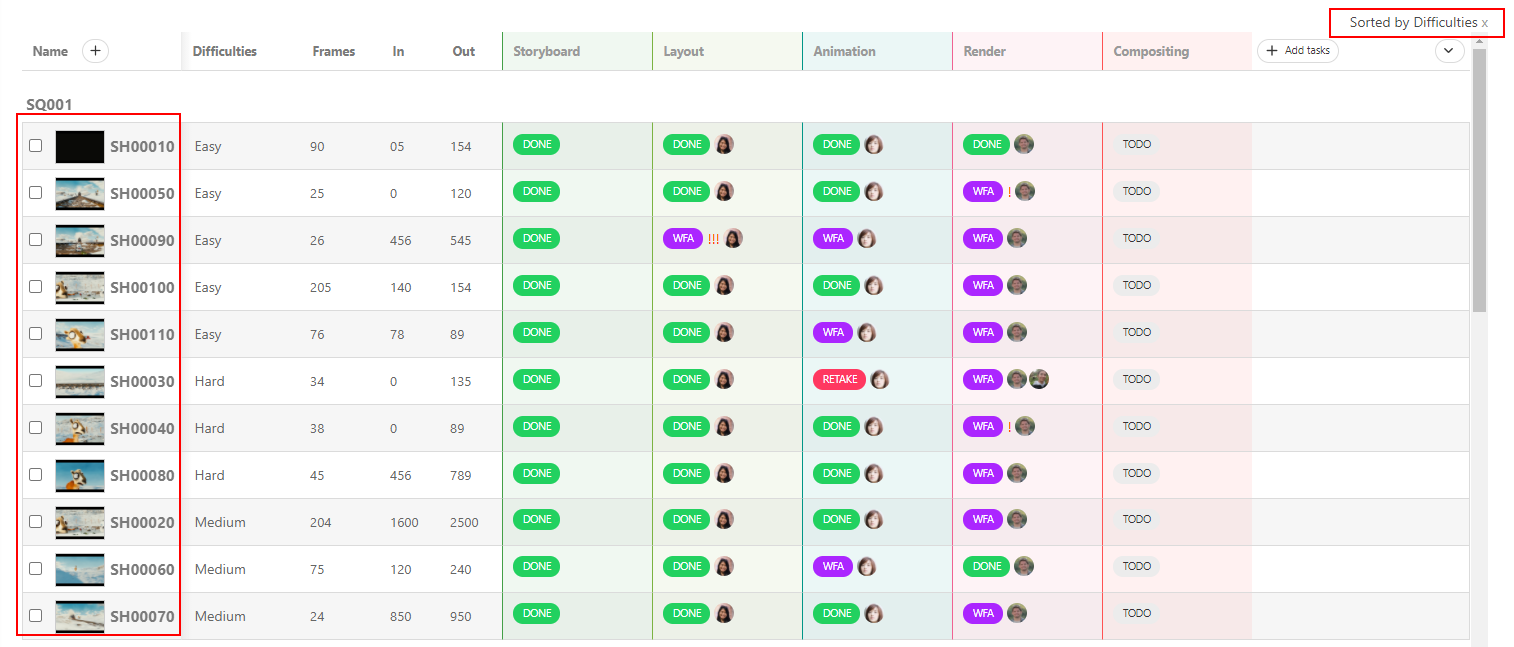
Then, click the arrow on the right of the column name to open his menu. Then click on Sort By
The shots are not sorted by name but by the metadata column information.
You can also select in the menu if you want to edit the name of the metadata column and its information or if you want to delete it.
You can also use the CSV Import to fill your custom metadata column quickly. First, you must create your Metadata column into Kitsu, add it to your spreadsheet, and copy-paste your data into the CSV Import.
Update Shots information with CSV Import
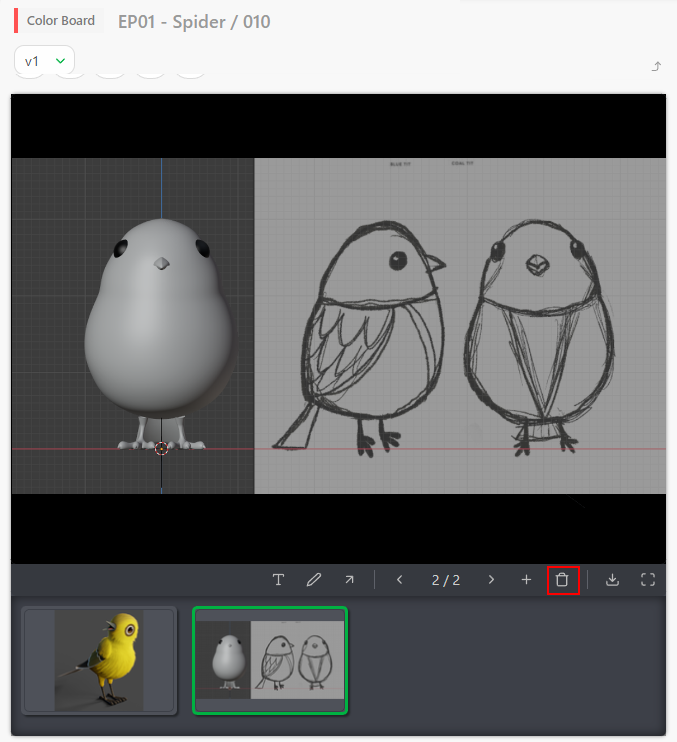
# Add Multiple Previews as one Version
You can add multiple images simultaneously, or once you have uploaded an image, you can add another one.
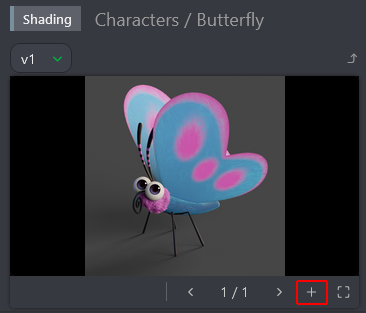
The Add preview pop-up asks you to choose a file.
You can navigate through the pictures uploaded.
You can change the preview order by clicking the number and then dragging and dropping them.
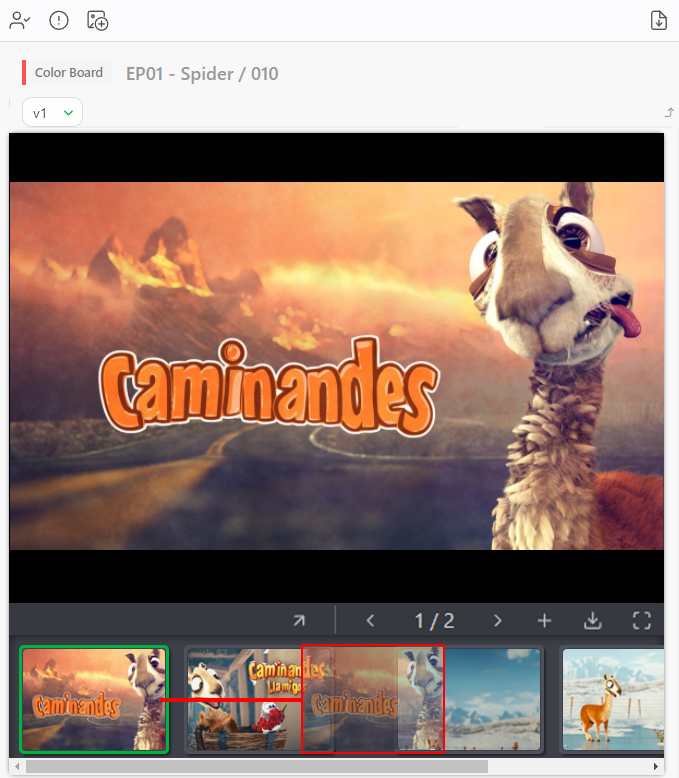
To delete an additional preview, you need to enlarge the comment panel by dragging it and clicking on the number of versions.
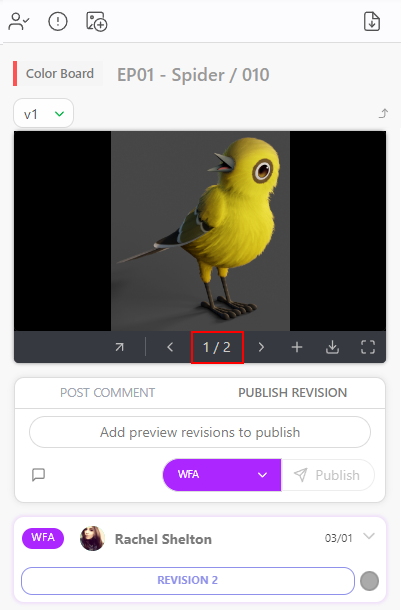
And then click on the 
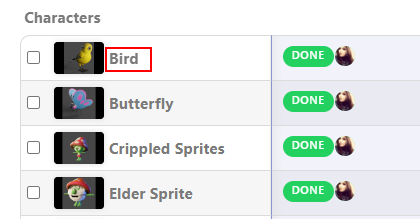
# See the Details of an Asset
To see an asset's detail, click on its name.
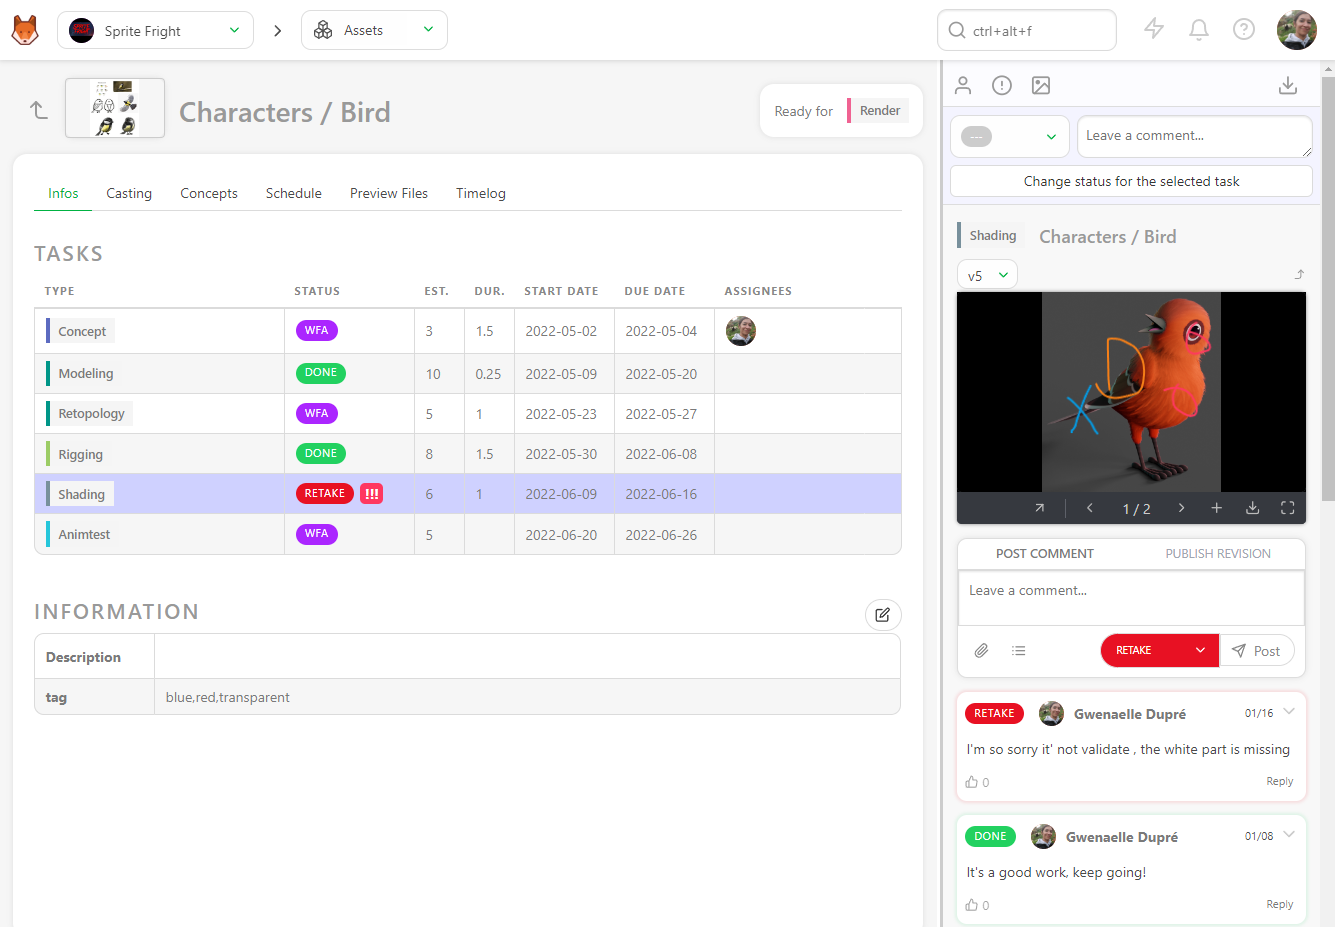
A new page opens with the list of the tasks, the assignation, and the status newsfeed on the right.
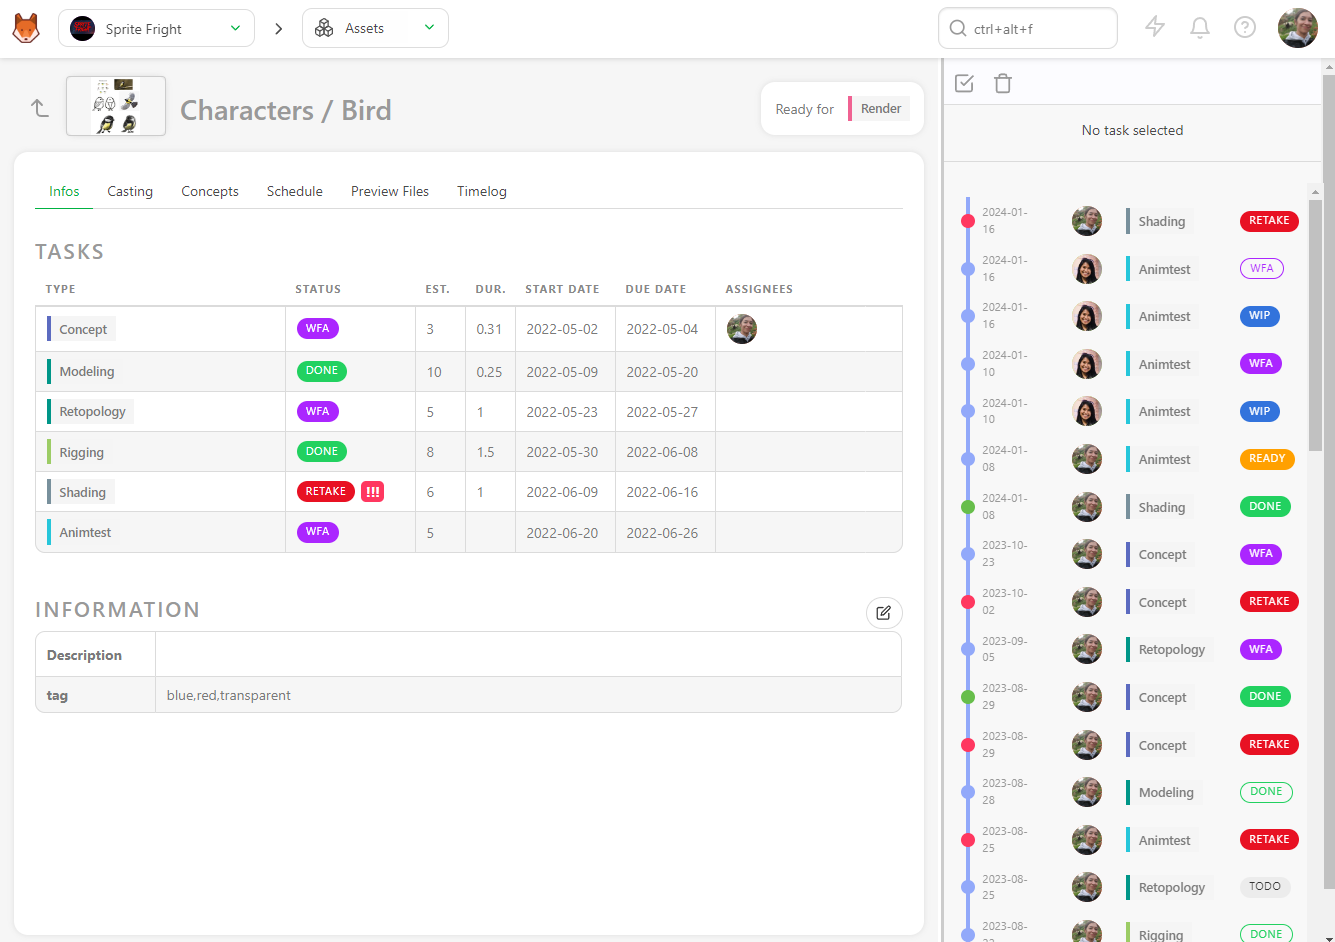
You can click on the status of each task to open the comment panel and see the history of the comments and the different versions.
You can also access the Casting,
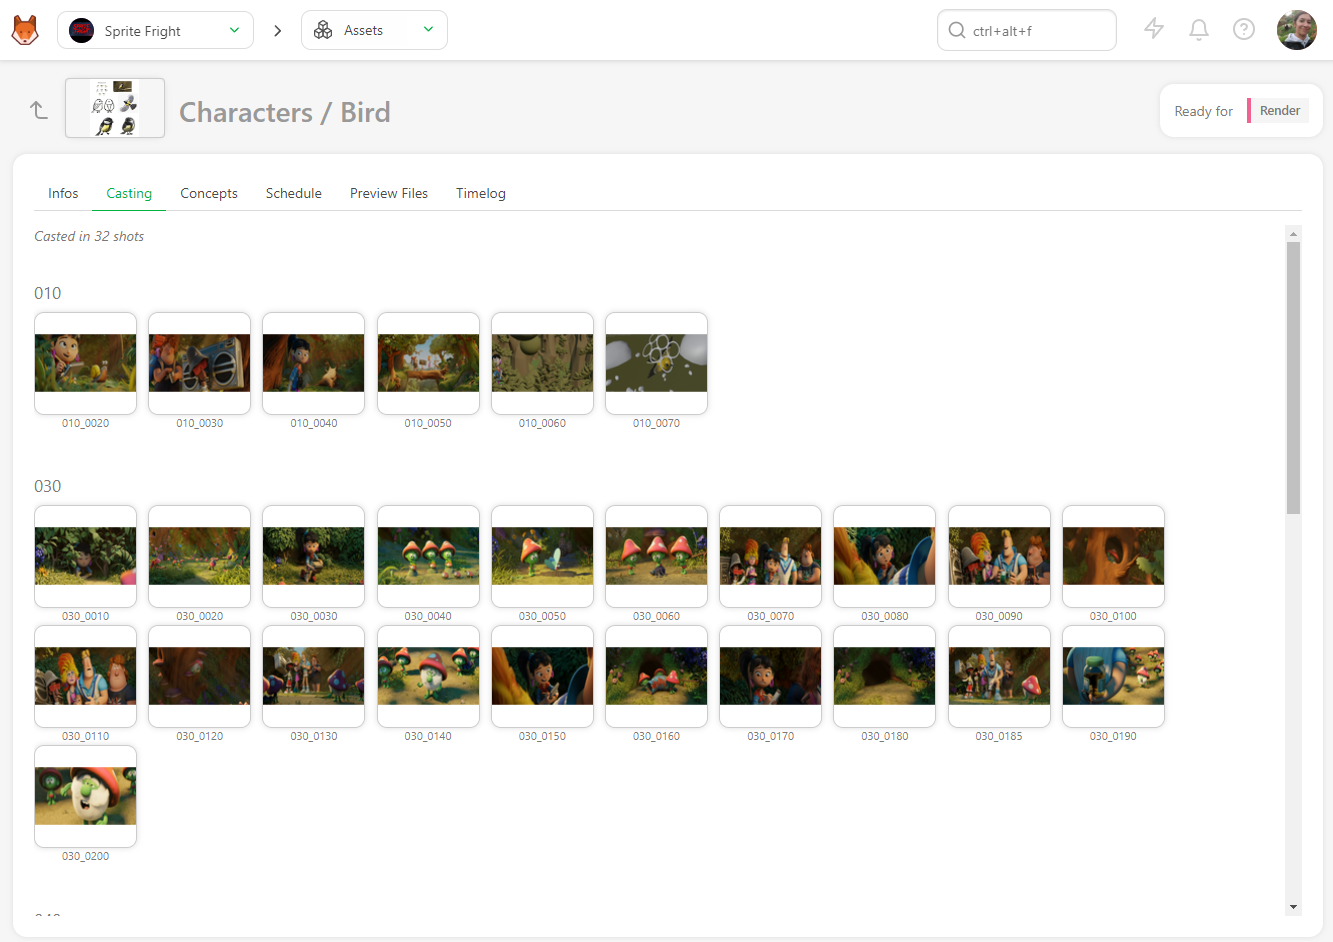
concept linked to this asset,

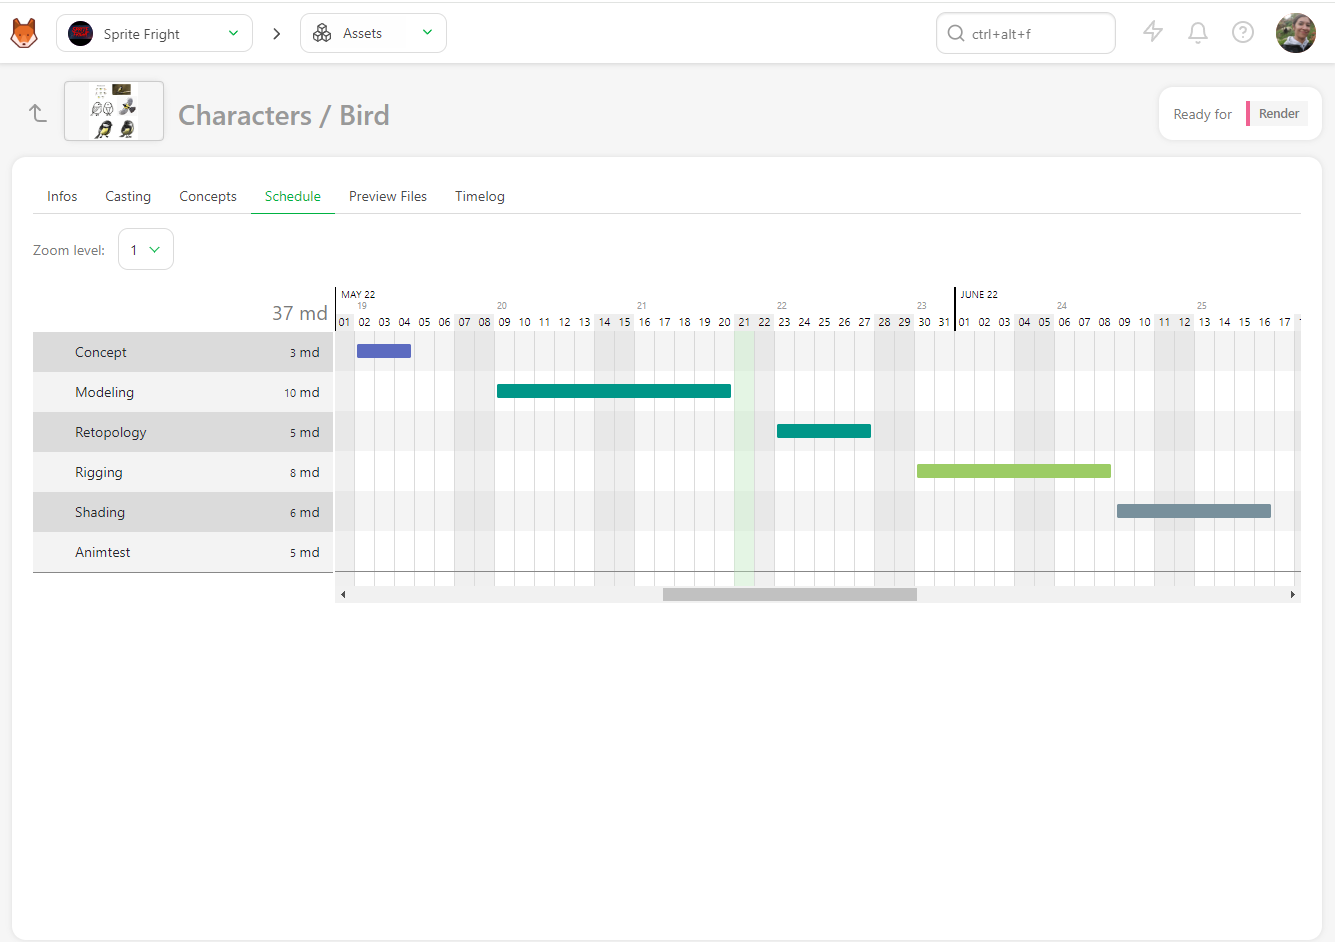
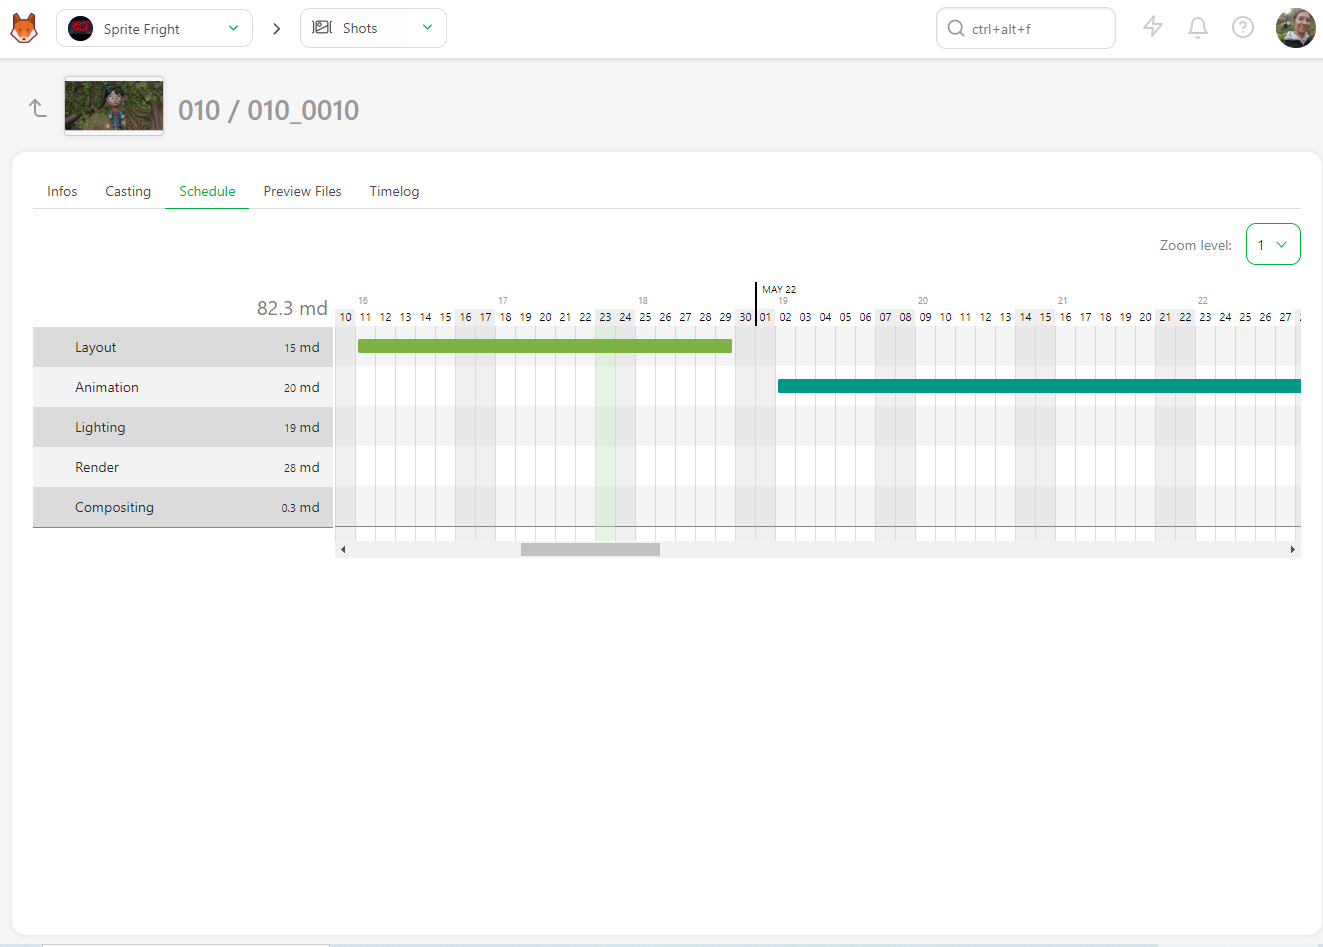
The Schedule if you have previously filled the task type page data. If the data are already first filled, then you will be able to modify them directly here.
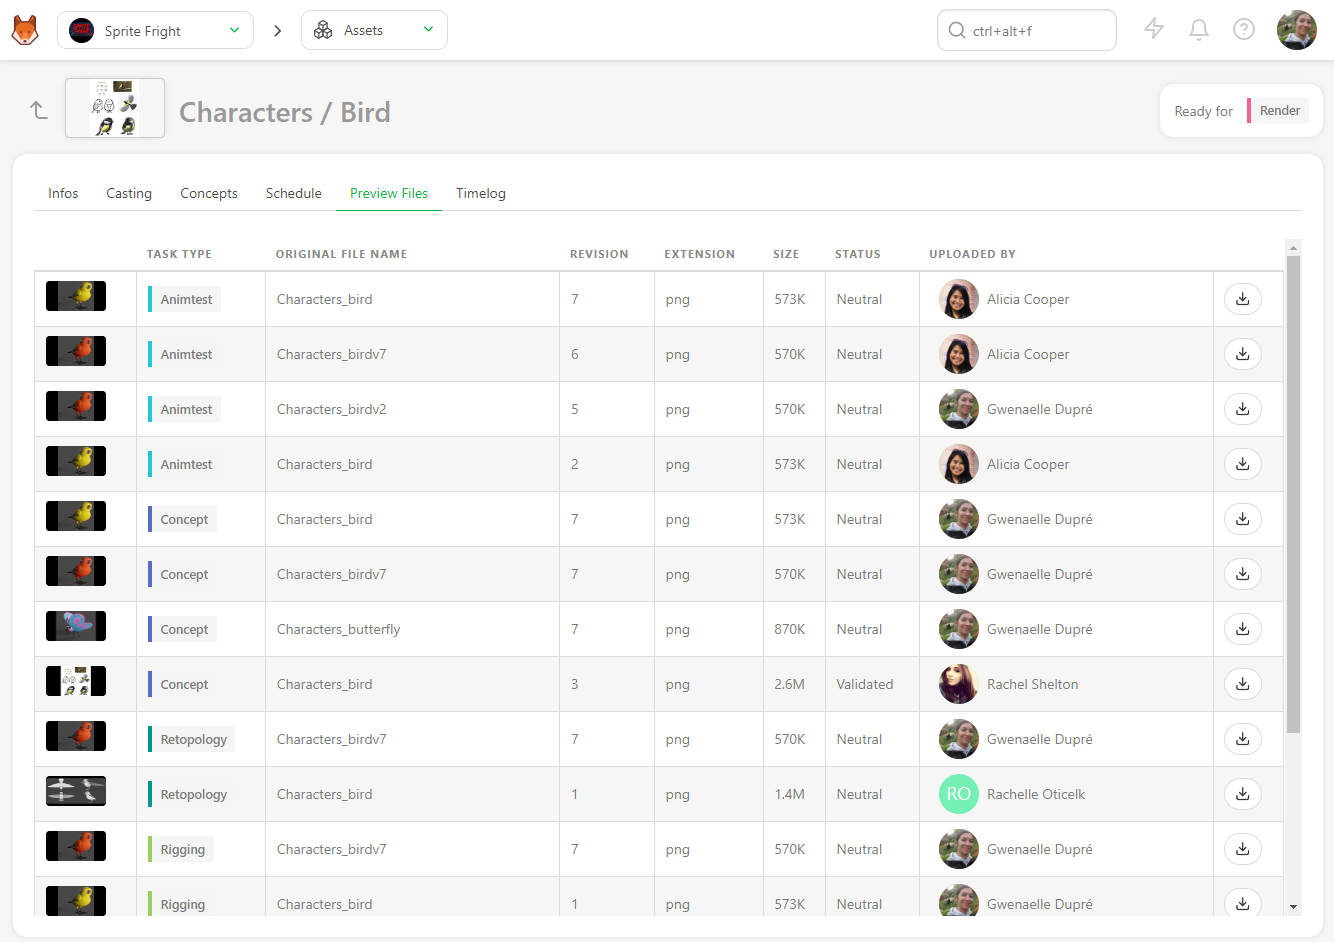
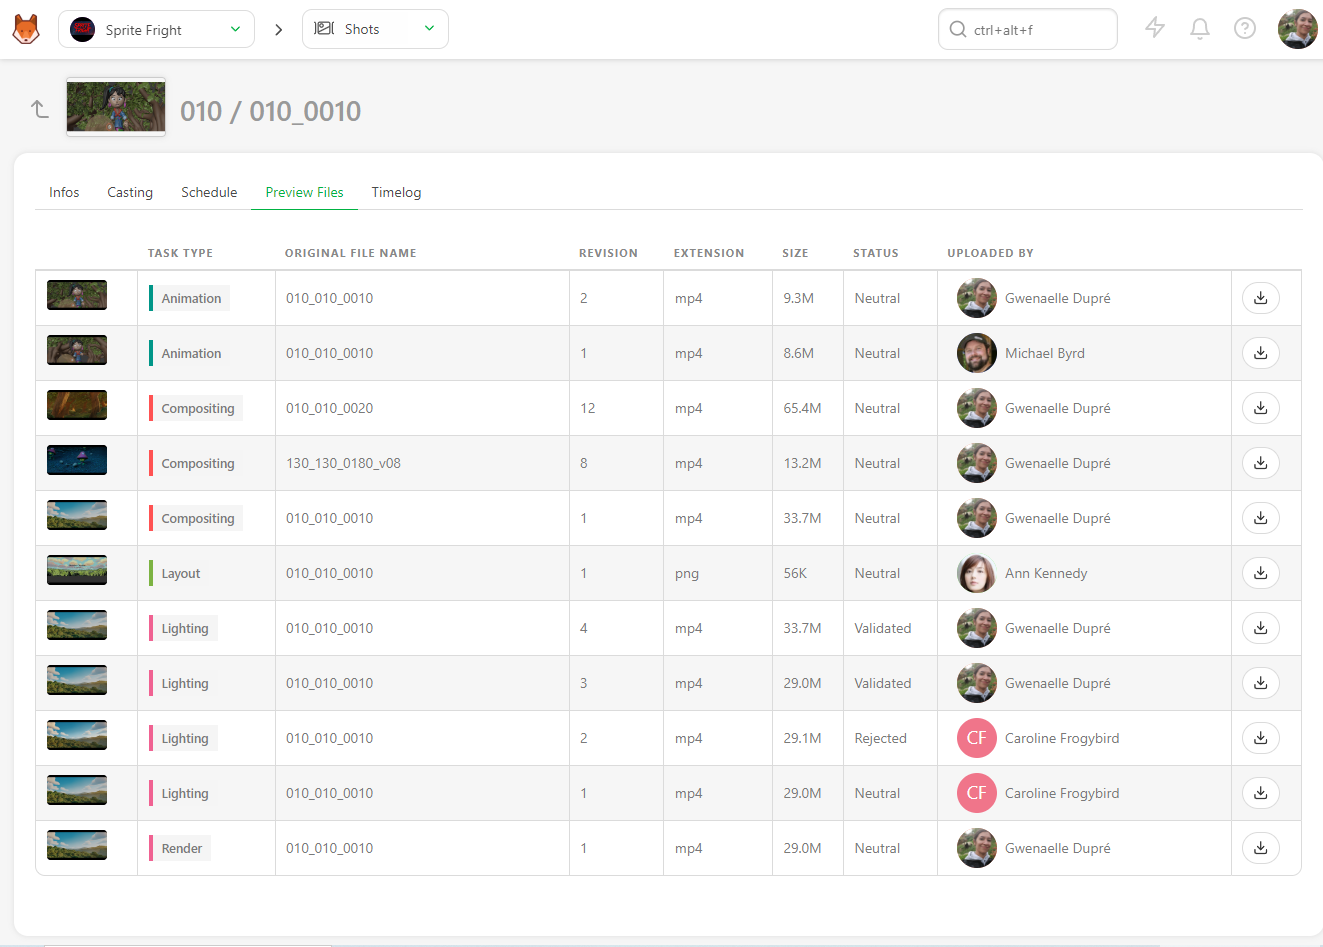
the Preview Files uploaded at various task types,
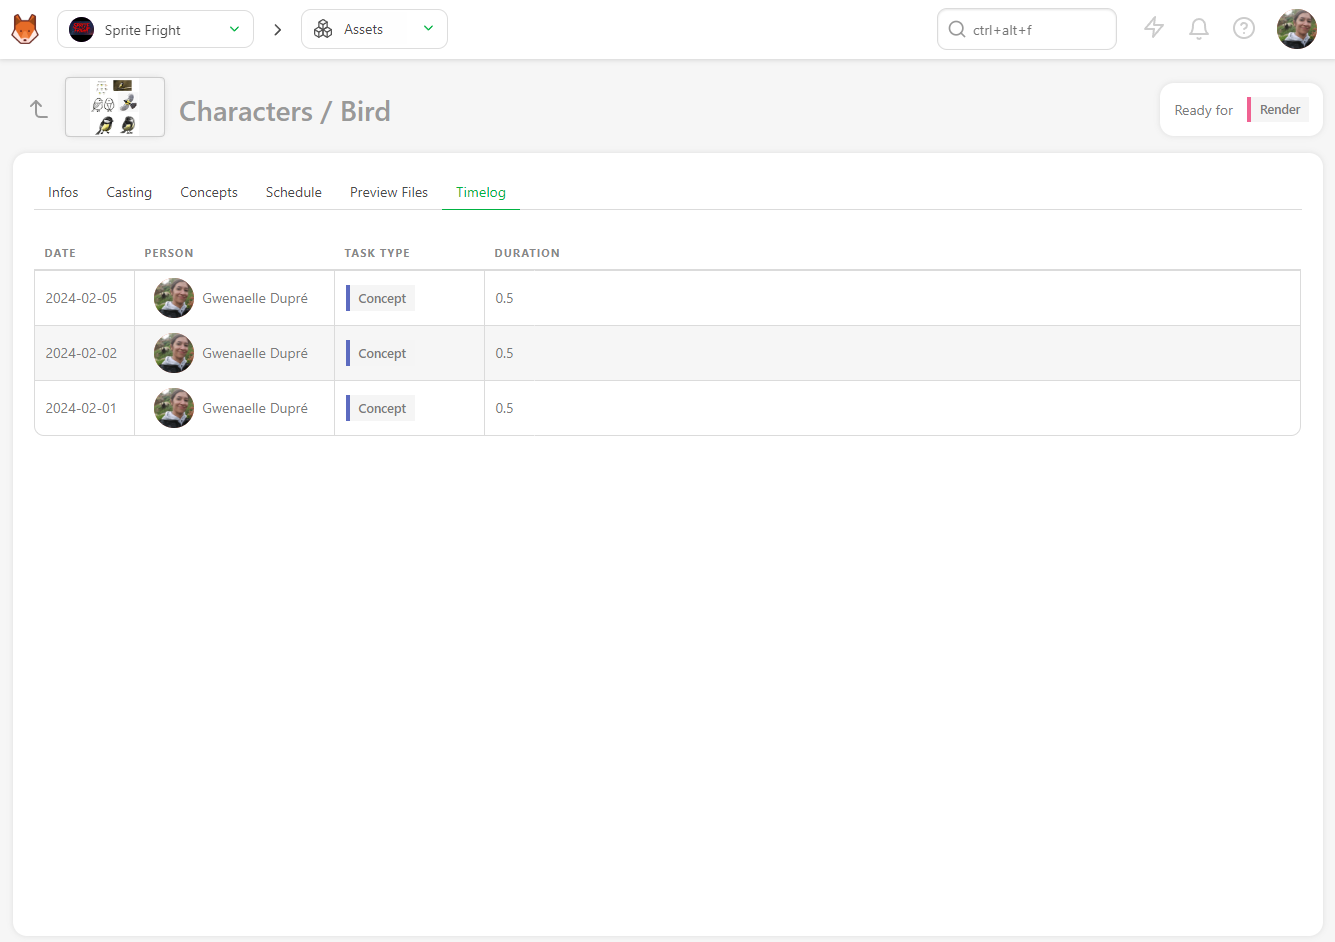
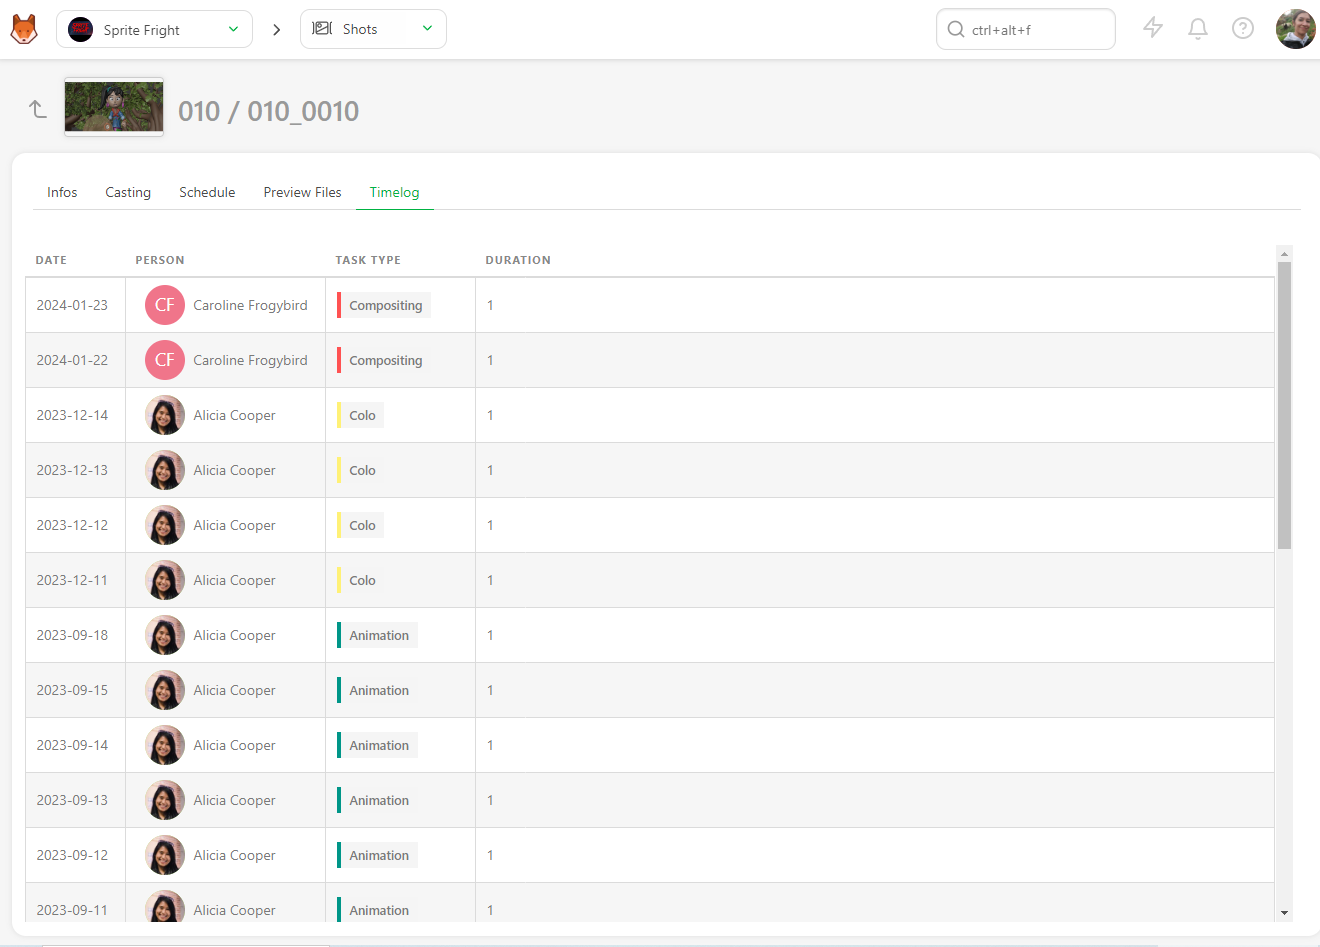
And the Timelog if people have filled out their timesheet on the tasks of this asset.
# See the Details of a Shot
If you want to see the details of a shot, click on its name.
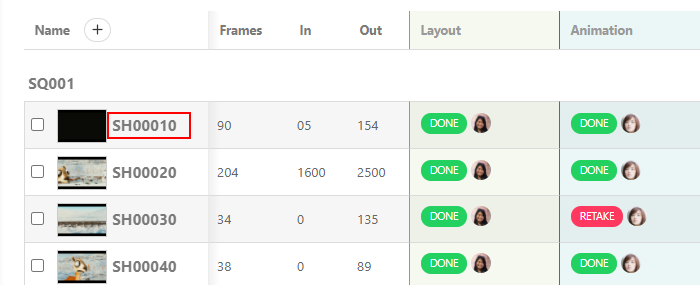
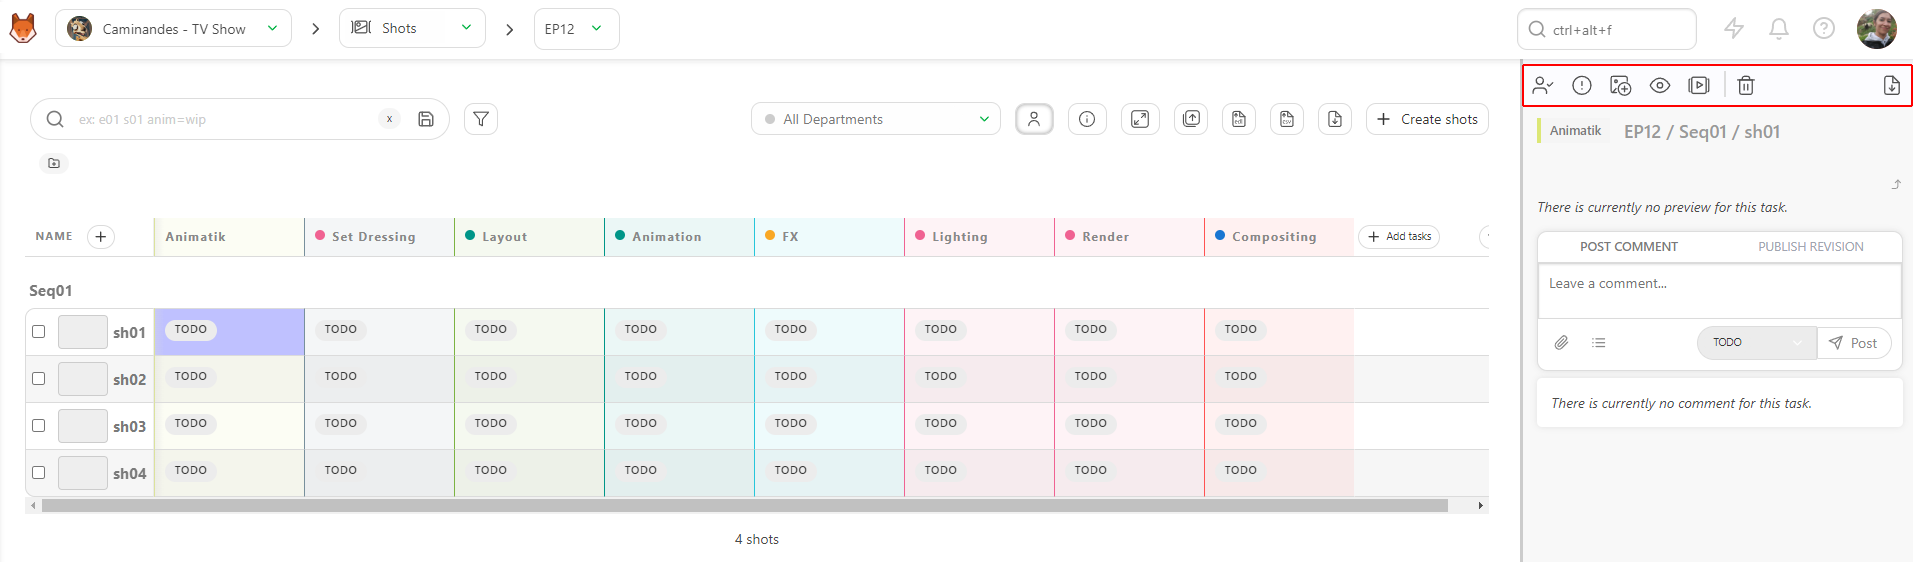
A new page opens with the list of the tasks, the assignation, and the status newsfeed on the right. You can navigate through each by clicking on the name of the tabs.
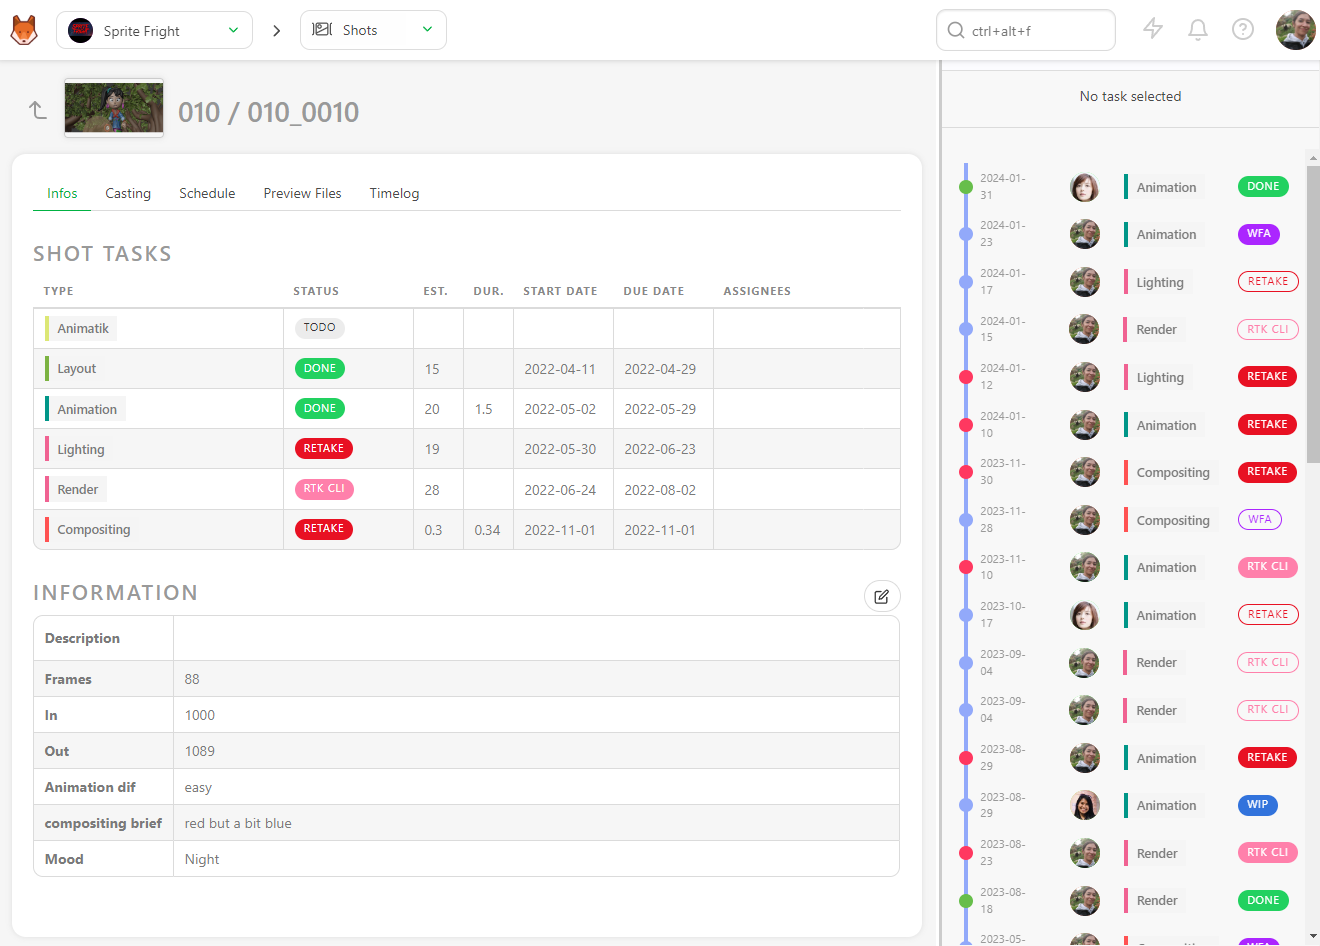
You can click on the status of each task to open the comment panel and see the history of the comments and the different versions.

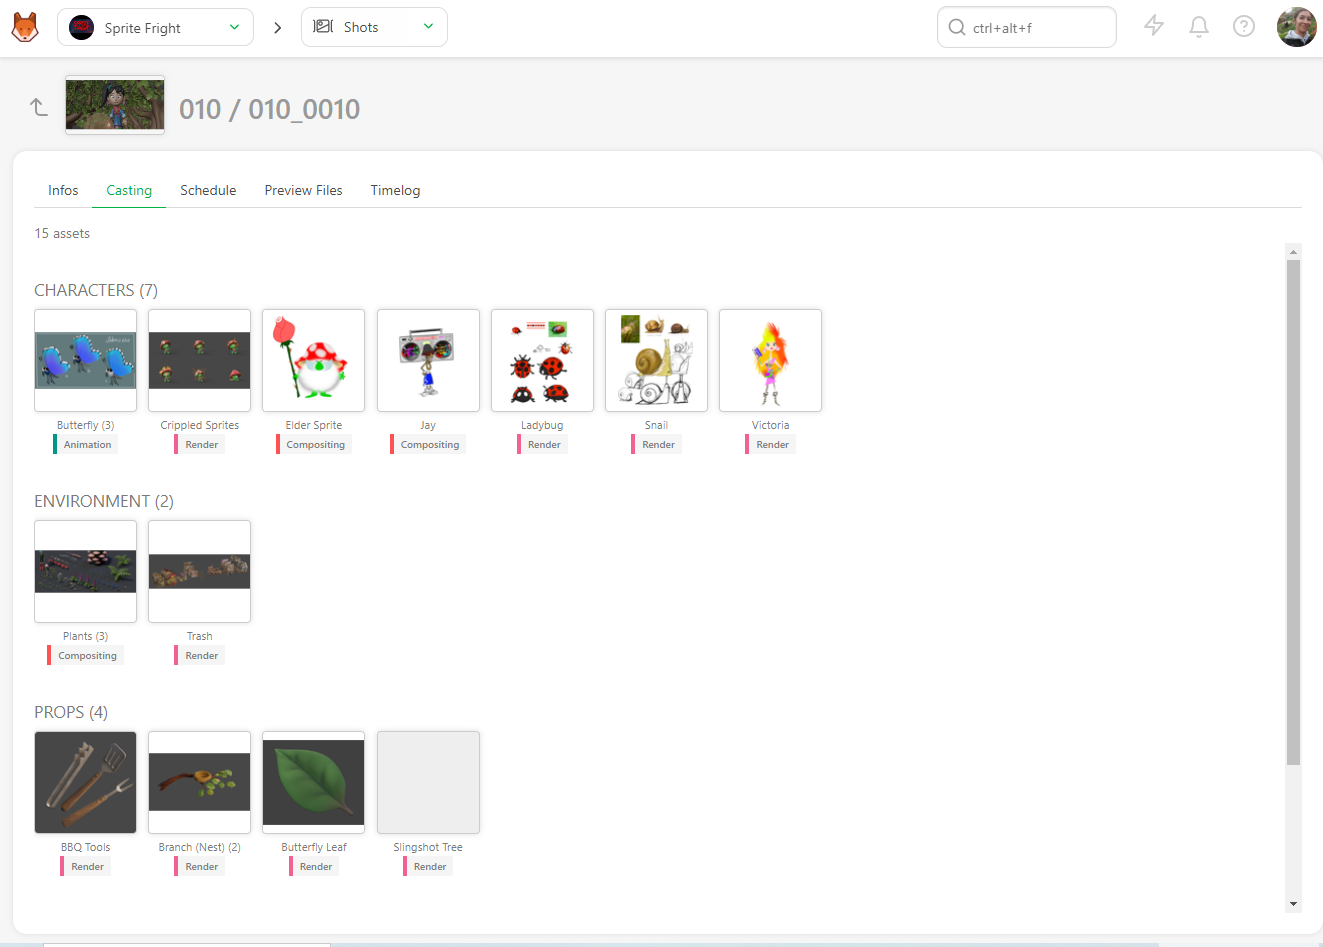
You can also access the Casting,
The Schedule if you have previously filled the task type page data. If the data are already first filled, then you will be able to modify them directly here.
the Preview Files uploaded at various task types,
And the Timelog if people have filled out their timesheet on the tasks of this asset.
# Change Priorities
At some point in the production, you may want to prioritize some tasks and pinpoint these urgent tasks to your team.
For this, we use the same technique as before. Click on the space near a status task (1).

The action box appears.
Click on the icon of the action menu to choose Change priority.

There are four levels of priority: Normal, which is the fundamental level of all the tasks High, Very High, or Emergency. Save the changes with the Confirm button.
As we have done for the assignation or the status, select the shots (1), select the level of priority (2), and apply with Confirm (3).
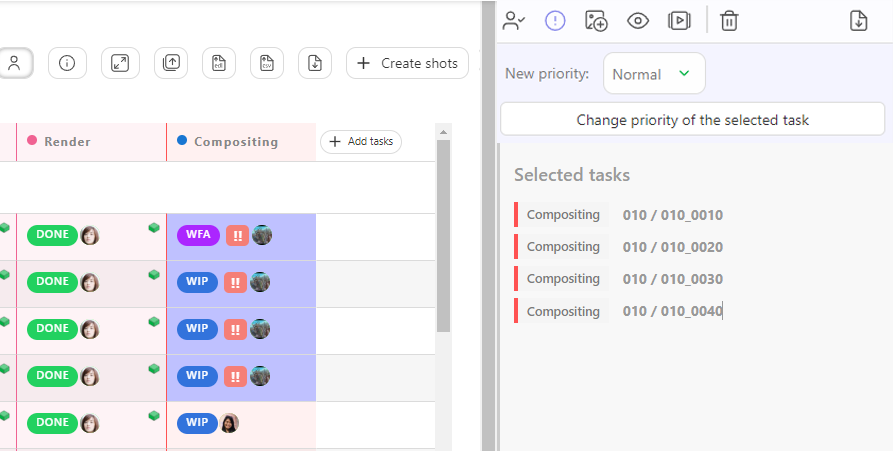
You can now see next to the status of the task some exclamation marks. The more there are, the more urgent the task is.
- (1) is Normal,
- (2) is High,
- (3) is Very High
- (4) is for Emergency.

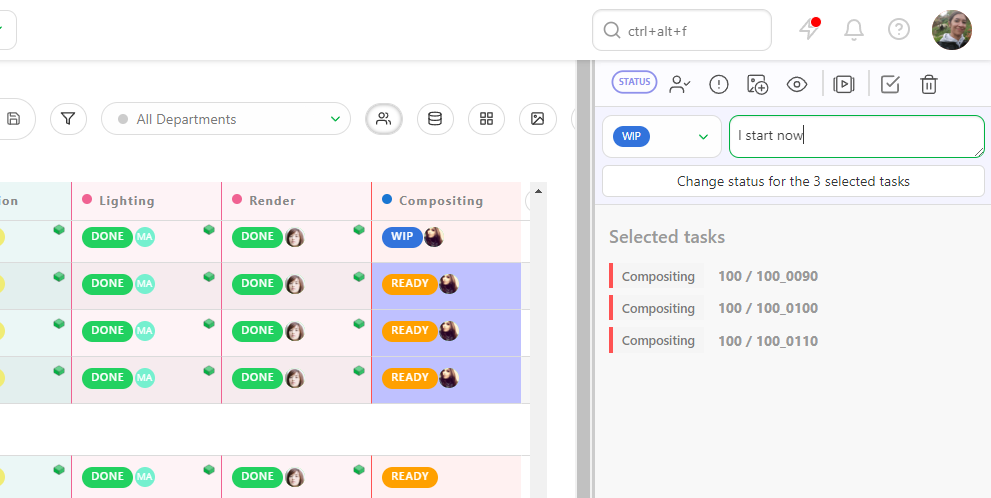
# Change Status per Batch
Alternatively, you can do it per batch.
You can select multiple shots or assets by pressing the ctrl or shift key.
Then, go to the Change status section on the action menu.

Choose the new status for your selected tasks (1). You can also add a comment for all the selected tasks (2) You validate the new status with the Confirm button.
# Simplify the Global Page
You may need to reduce a task type column on a global page. For example, you may be only interested in layout and animation but not so much in the shipment for the client.
Close to each task type name, you can click on the arrow
to unfold a submenu.
You can choose to Minimize Sort by, Select column, Stick, or Delete All the task type.

Once the column is minimized, only colored dots show the status.

You can also choose which Metadata column you want to display.
To hide your metadata column, click on the arrow on the right border of the global page.
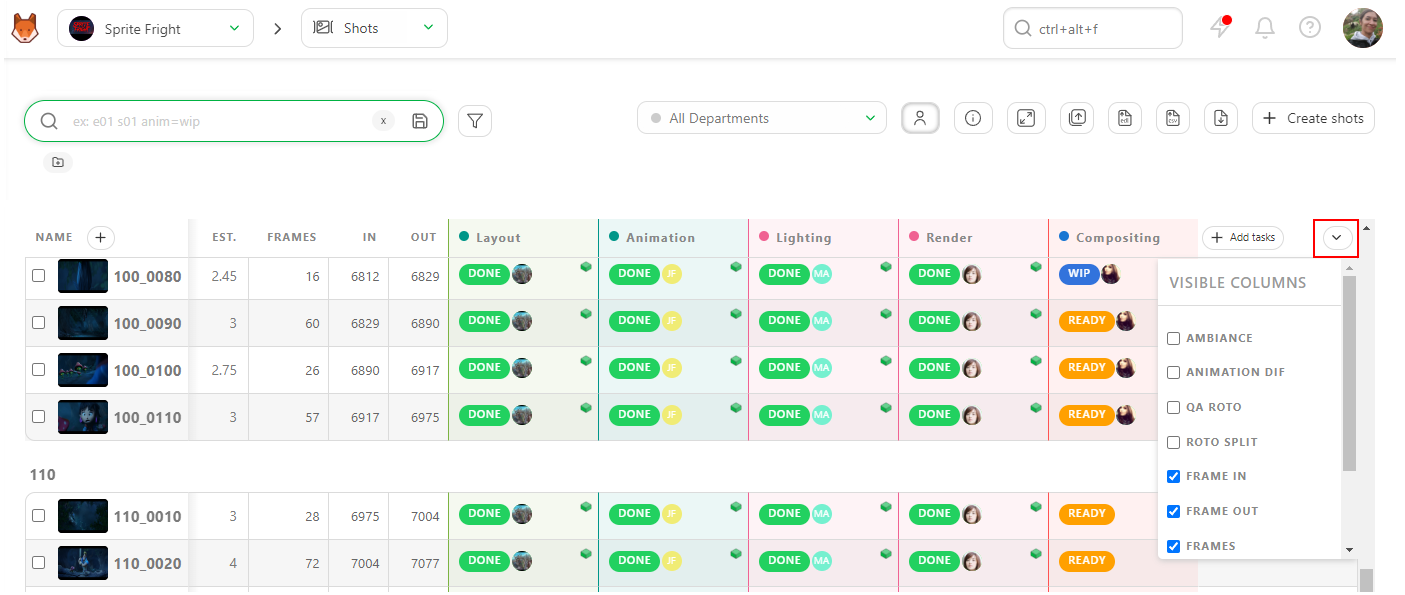
You can choose which column you want to hide or display.
You can also hide all the non-essential columns, like Description, Metadata column, even the minimized columns.
Just click on the Hide additional information  button on the top right of the page.
To make the information reappear, click on the same button,
 it won't have the grey highlight.
# Sticky Columns
If a piece of information is very important to you, you can Stick this column next to the shot name.
It can be a Task Type column or a Meta Data column.
Click on the arrow on the left of the column to open the column menu, then choose Stick.
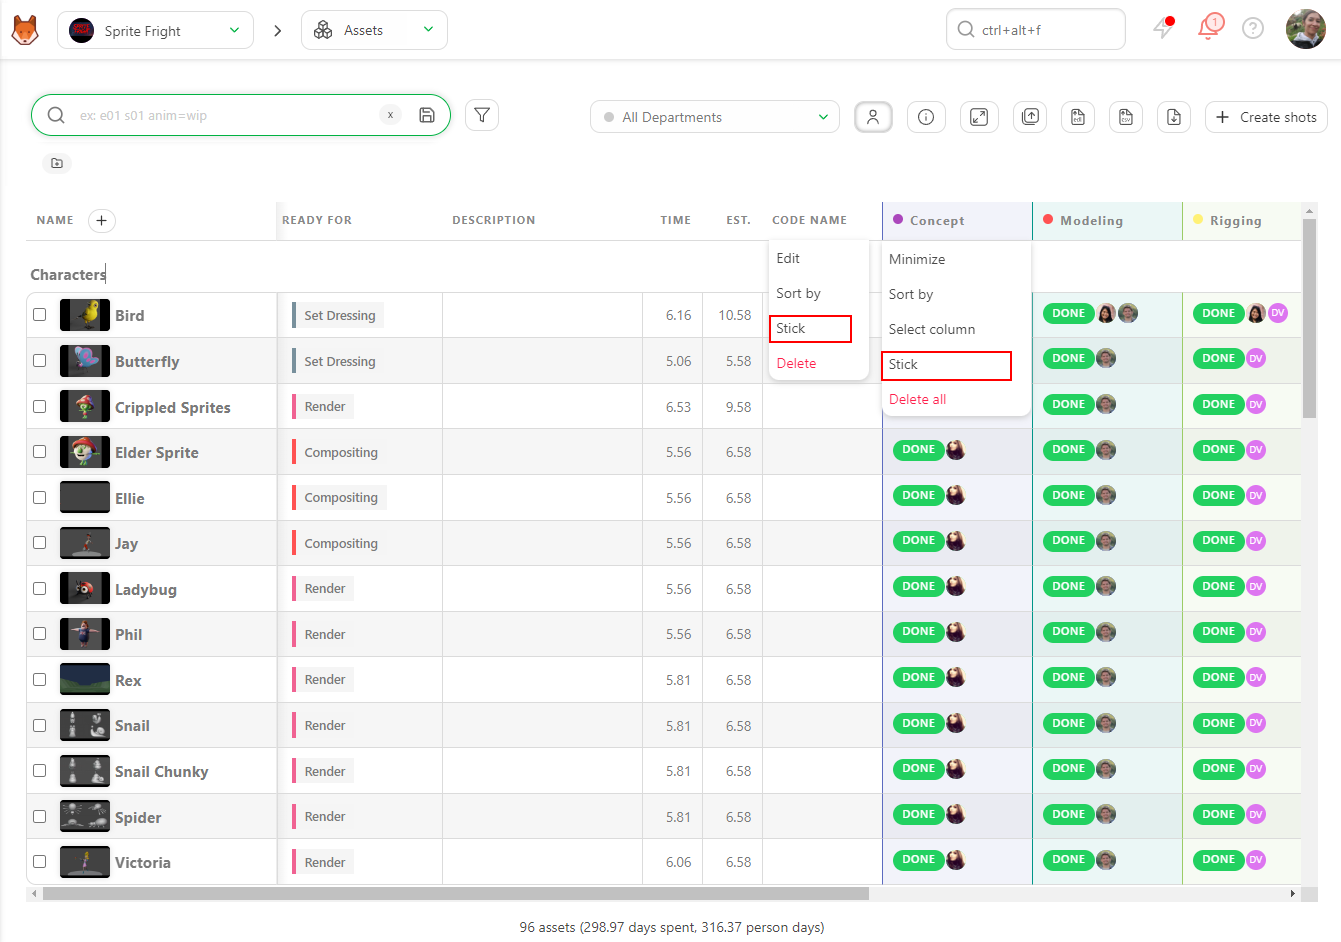
Once a column is stuck, it will stay displayed even if the page is simplified.