# Schedules
# Production Schedule
As the Studio Manager, you can use the global schedule as a reference for your production. The main purpose of this schedule is to track the milestones linked to your contract. This is referred to as your Reference Schedule.
In order to start filling out your global schedule, you need to populate the production with assets and shots and define your task types.
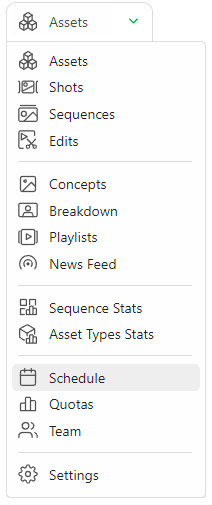
In the drop-down menu, choose SCHEDULE.
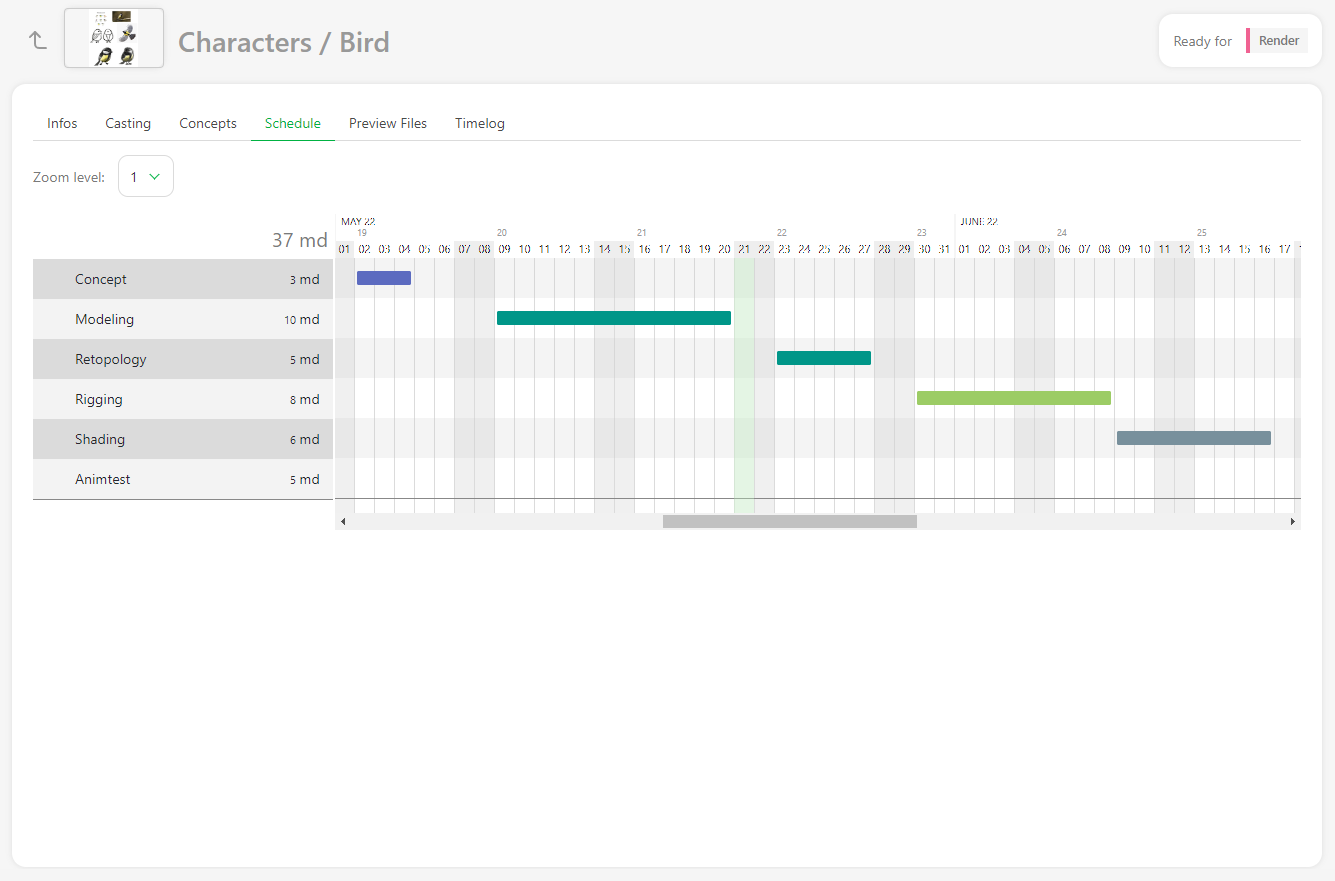
# The Production Schedule Gantt Chart
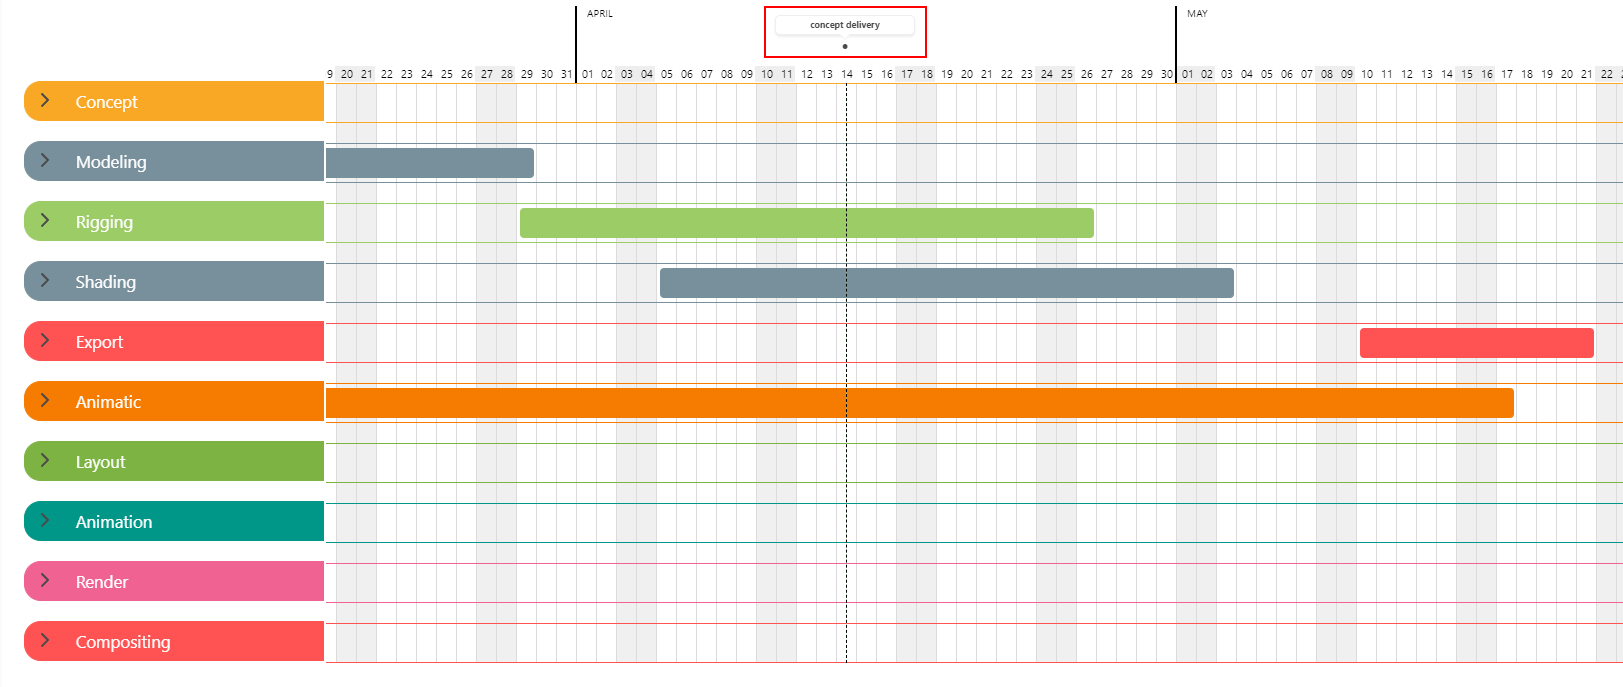
At the top of the schedule, you can see the project's start date (1) and the end date (2), which was defined when creating the production. You can modify these dates by clicking on the box to open the calendar and pick a date.
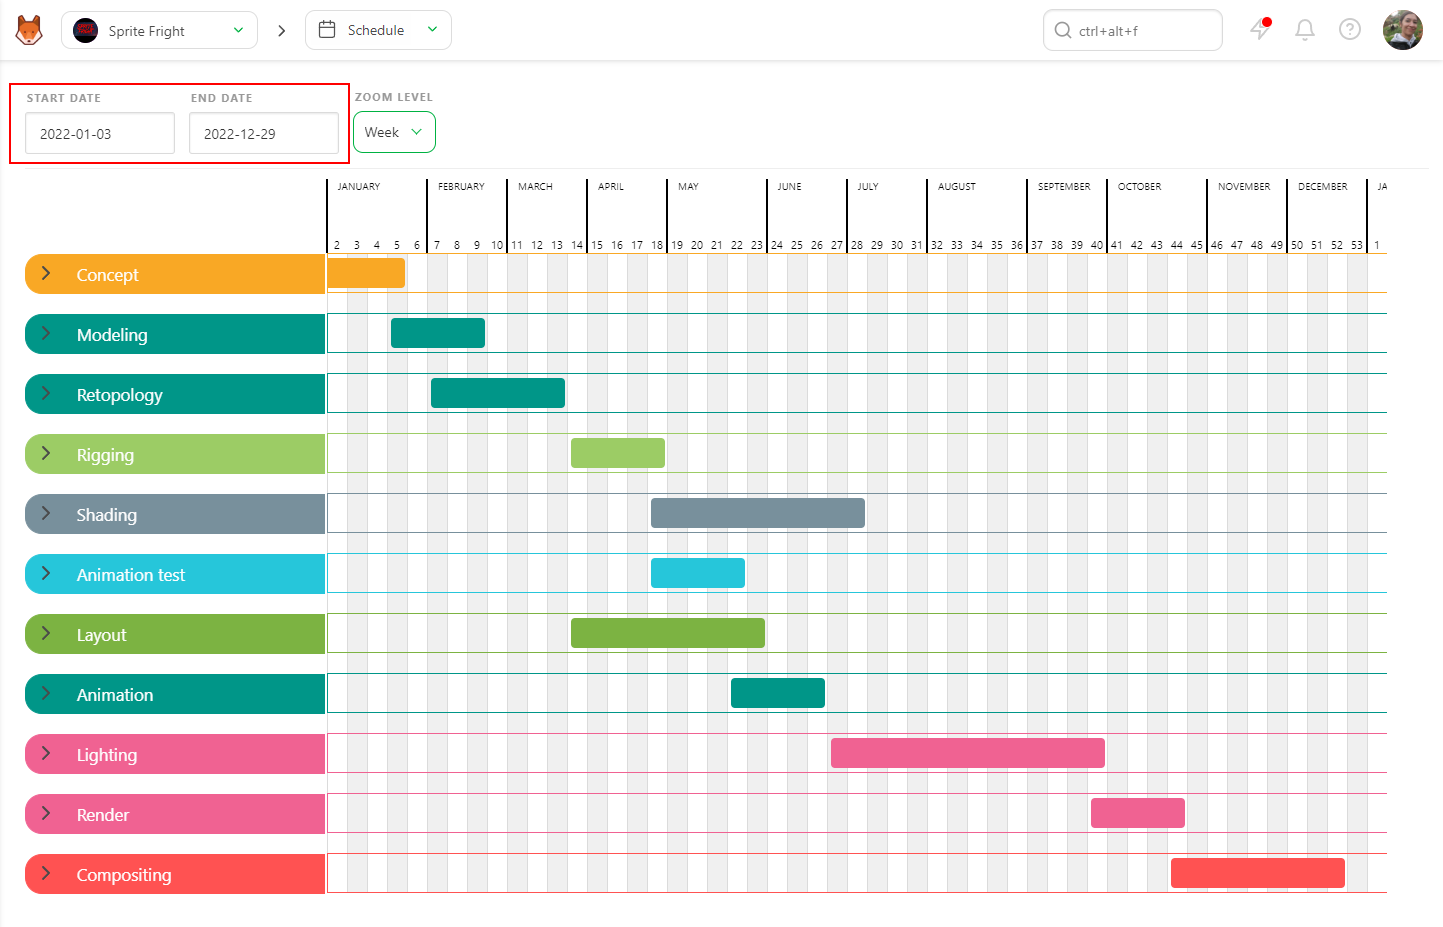
You can modify the start and end dates for each of your task types on the Gantt schedule in one of two ways: the first is by moving the bar directly, and the second is by entering the date on the settings page under the task type section.
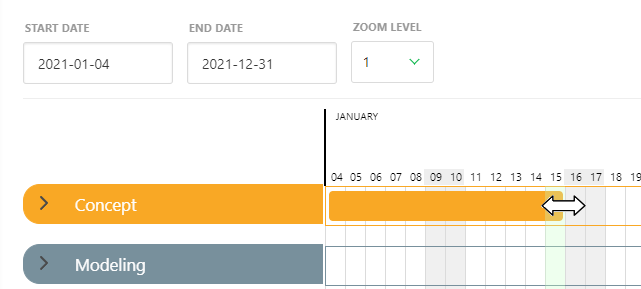
For the former, place your cursor on the start or end date; the cursor changes to a double arrow. Then, drag and slide to the desired date.
After setting the start and end dates for your task types, you should be able to see at a glance the flow of your production.
TIP
You can select all the Gantt chart bars and move them simultaneously with CTRL / CMD + Left Click.
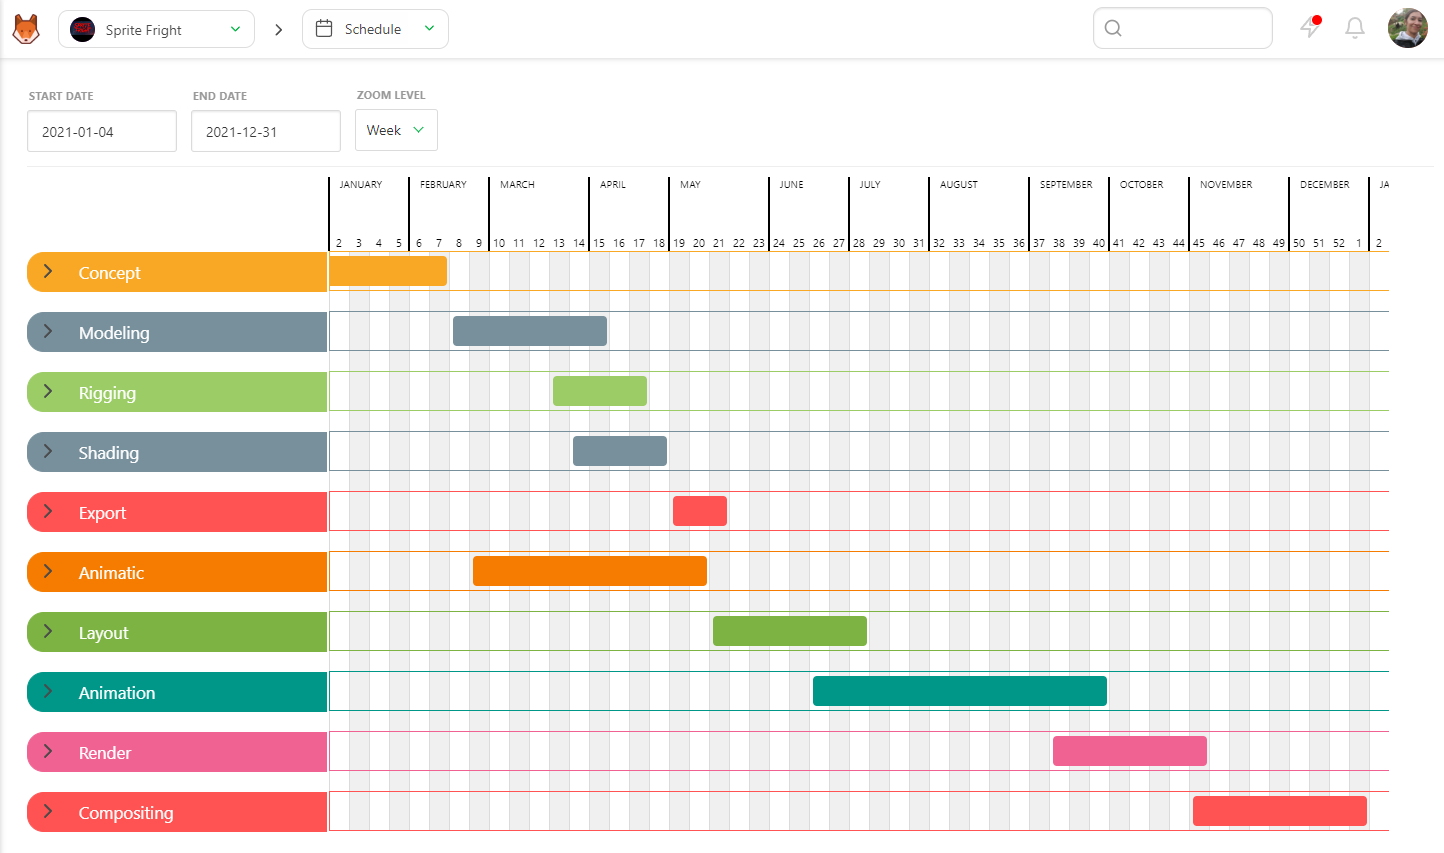
With that complete, the next step is to unfold each task type to reveal the associated shots sequences / assets types.

You can set the start and end dates the same way you would for the task type. You can also define the work period for all asset types.

You can do the same for the shot task types and determine the start and end dates for the sequences.

# Milestones
A milestone is a significant point in a project that marks the completion of a major phase or task and serves as a checkpoint to assess progress. When hovering over a date in the schedule, you'll see  appears.

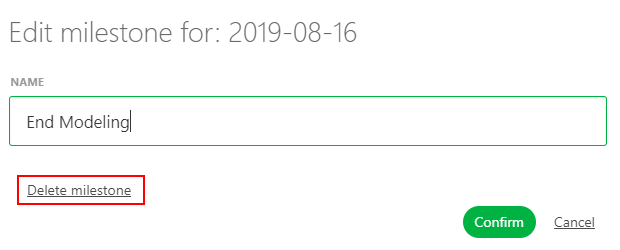
When you click, you'll be prompted to give a name to your newly created milestone.

Milestones are represented by a small black dot on the date and a vertical line on your schedule. If you hover over the little black dot, the milestone's name appears.
This is a great way to quickly reference important upcoming dates or deliverables in your production against your productions schedule.
To edit a milestone, click on the  or anywhere on the milestone name. From there, you can rename or delete the milestone.
Everyone assigned to the production can access the global schedule page, but only the Studio Manager can modify it.
To view specific tasks in more detail, click on the task type's name. This will lead you to the Schedule tab of the task type page.
# Task Type Schedule
Whereas the Global Schedule is used to references task types across the entire production, the Task Type page is used to drill down into the details for tasks in a specific task type.
There are 3 tabs on this page: Tasks, Schedule, and Estimation.

There are two ways to set the artist's Schedule.
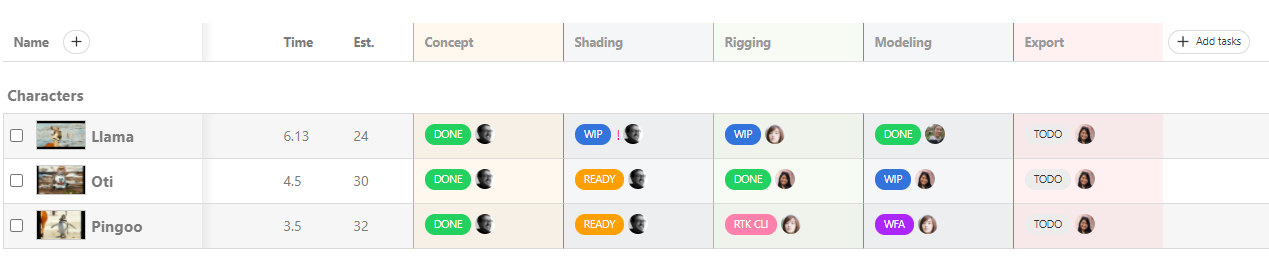
The first method is via the Tasks tab, where you will set Estimated Time and the Start Date. As we saw previously, setting both of these will automatically fill out the Due Date. Once those details are filled out, the Gantt chart on the Schedule tab will be automatically generated.
TIP
Remember that on the Gantt you can click and drag to modify the start / end date, but the duration of the task will always be auto-calculated using the end date and duration
The second method is to set the length directly (Estimate), Start Date, and Due Date from the Gantt chart.
Put your cursor on the start date, and the cursor will change to a double arrow. Then, drag and slide to adjust the start date. Define your Due date by filling in the MD.
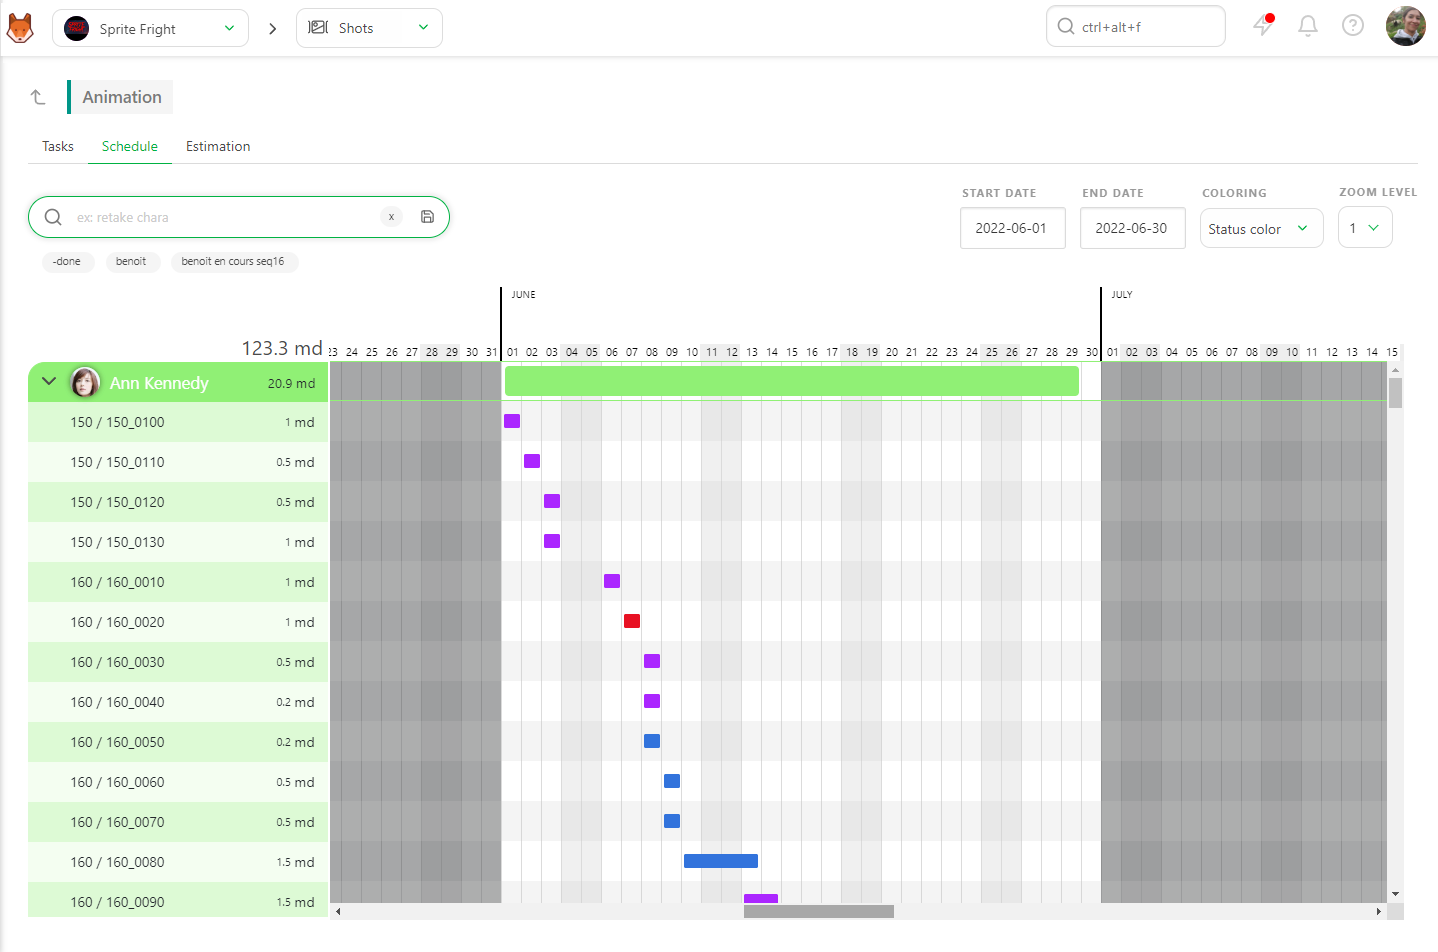
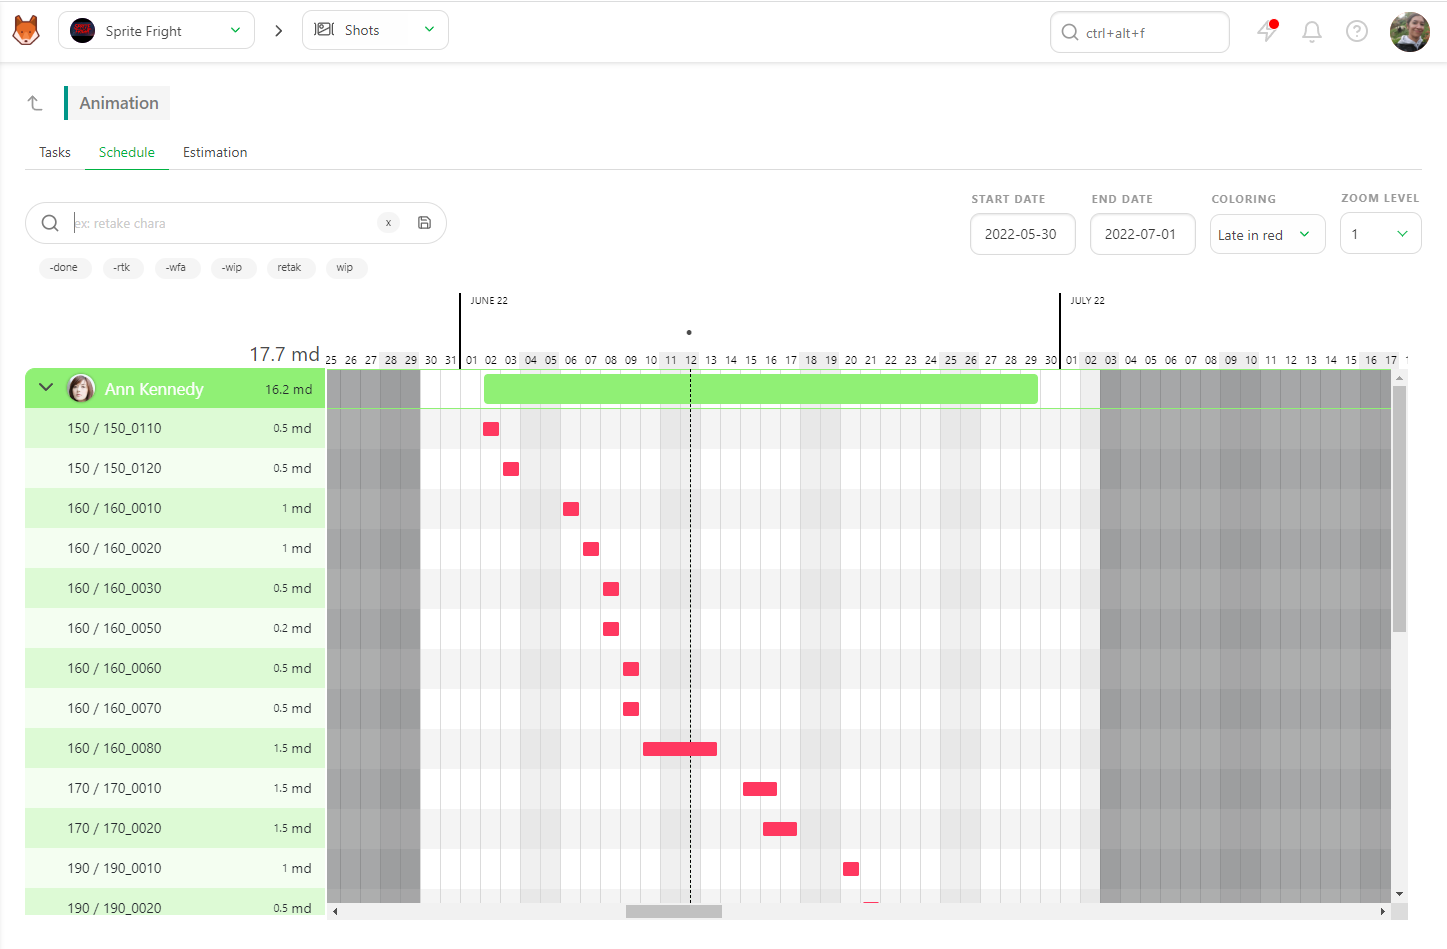
You can use the search bar (1) to narrow down a specific set of tasks. For example, you can search by status, asset type, sequence, asset name, shot name and artist name. (Note that you do not need to add the name of the task type as you are already on a specific task type page)
You can also expand or collapse each Artist (2) section to make the schedule easier to read.
You can change the bar's color in the Gantt chart (3). By default, the coloring is set to Status Color.

Status color changes the bar's color based on its status. For example, blue is for WIP, red is for RETAKE, purple for WAITING FOR APPROVAL, and green for DONE.
You can quickly assess the status of your elements and team. From this view, you may want to visually identify tasks that are behind schedule.
From the Coloring dropdown, select late in red. This view will highlight tasks where the due date has passed but that have not been approved yet. This indicates that they are behind schedule and will show on the Gantt chart as red.
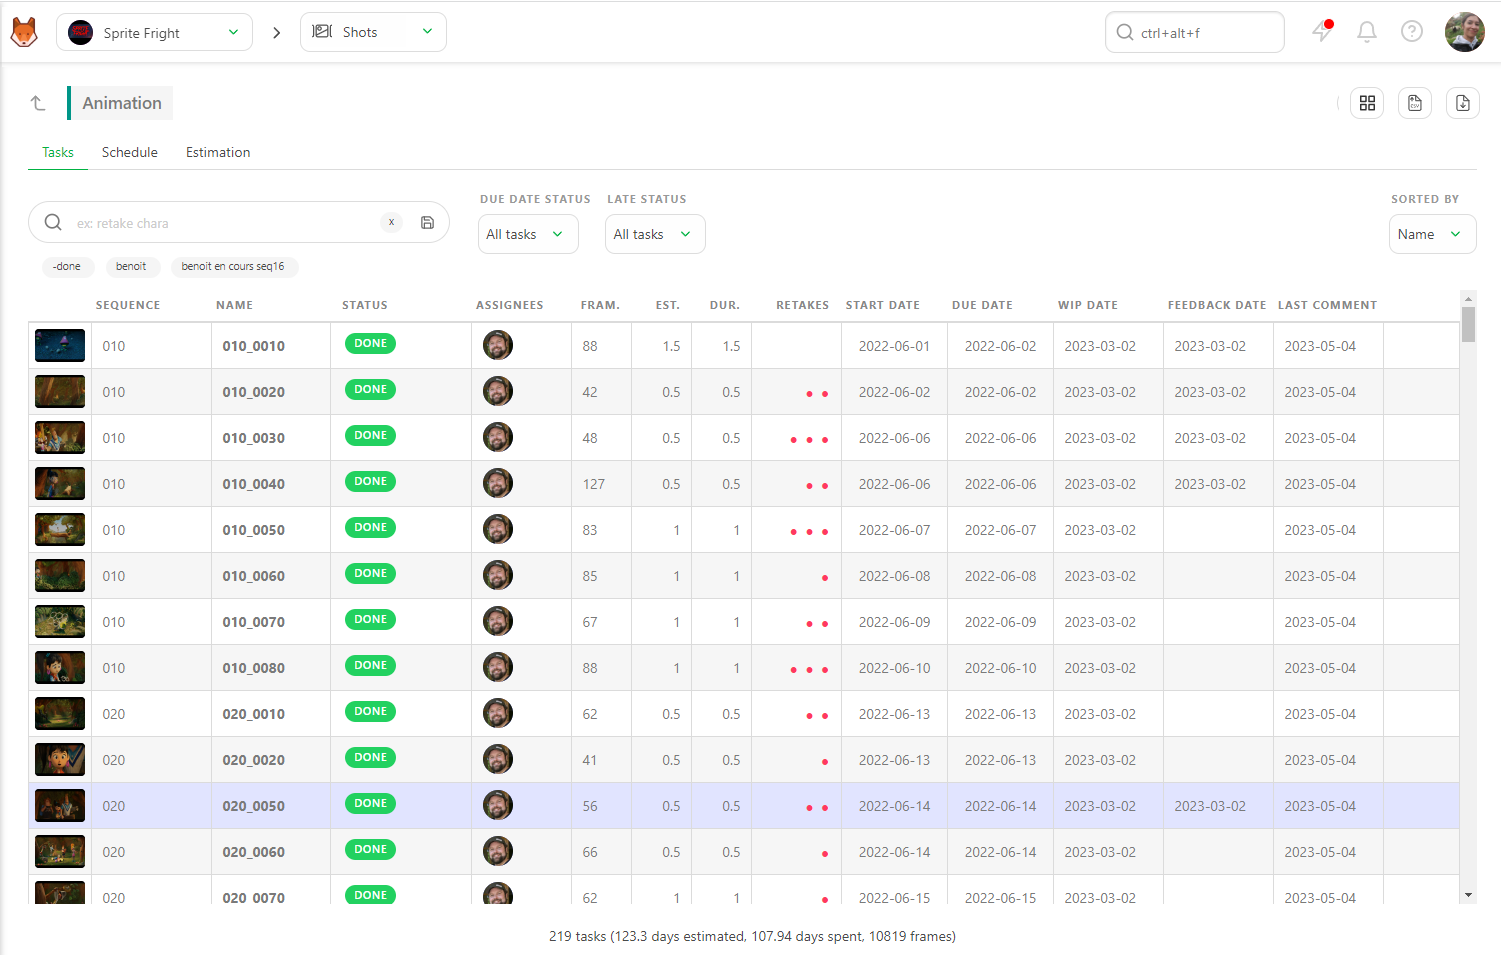
Changes made on the Gantt chart are reflected in other pages in Kitsu.
The Start date and the Due date are displayed on the Tasks tab of the task type page.
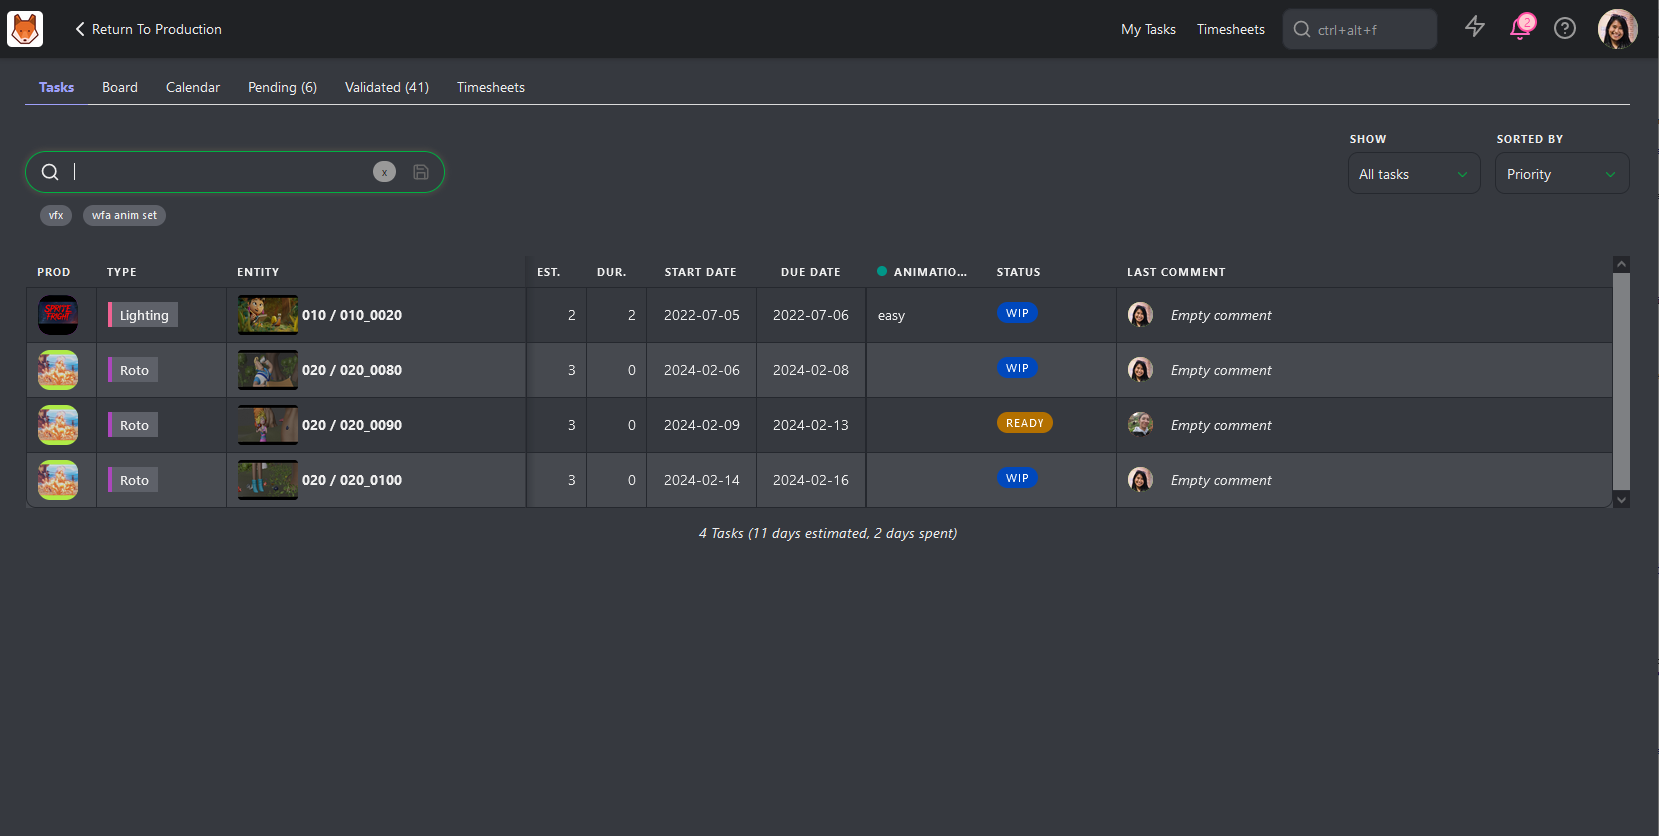
Additionally, you can view the Due date and Estimation days on the Todo Page of an Artist.
Access to this page is visible to everyone, but only the Studio Manager can modify it.
# Asset and Shot Schedule
On the detail page of an asset or a shot, you can access the Schedule tab.
If you have entered a start and due date on the Task Type schedule, the Gantt bar will be displayed.
From this page, you can modify the length, start, and end dates of each task in the asset or shot.
# Studio Schedule
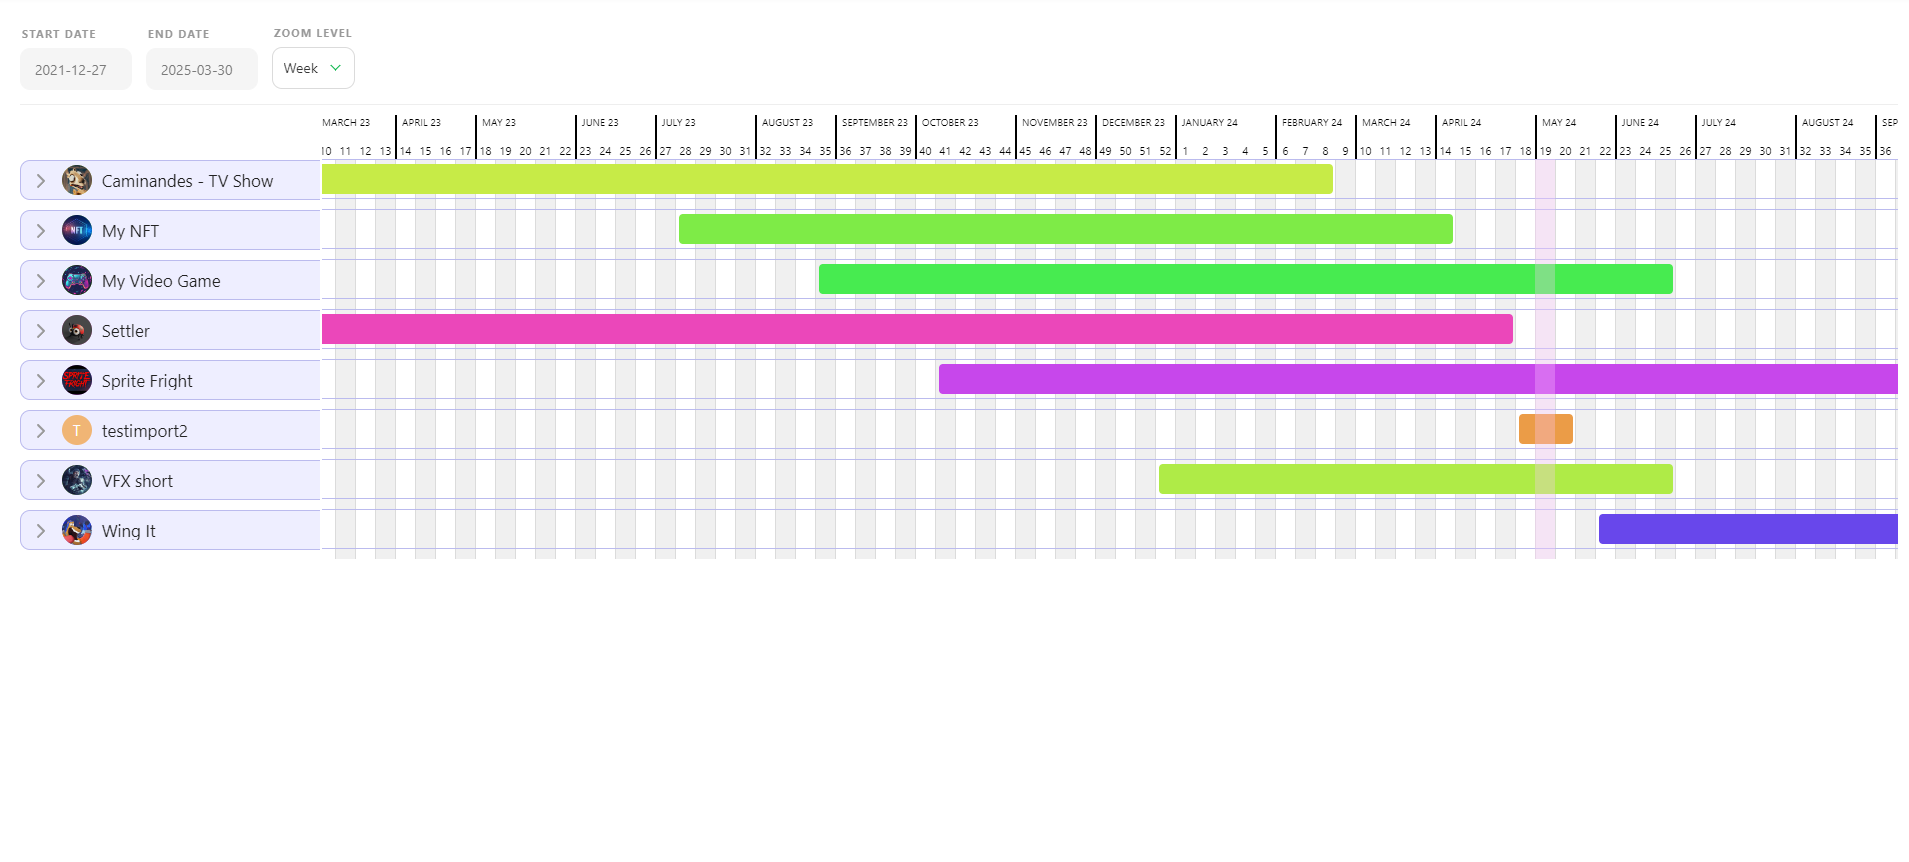
As a production manager, you have access to the Studio Schedule, which consolidates all production schedules in one place, aiding in better preparation for your productions.
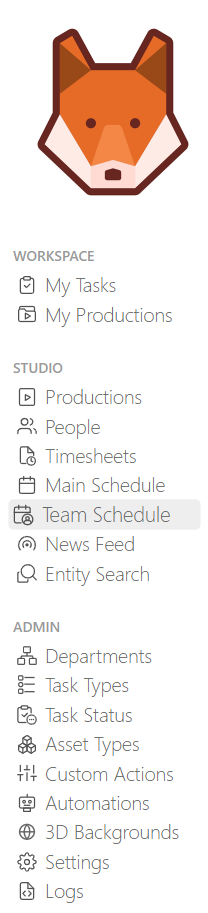
To access the Studio Schedule, navigate to the main menu ( ) and click on Main Schedule under the Studio section.

Here, you'll find all your productions listed on each row, including their start and end dates. Additionally, you can view the number of days planned for each production within the specified timeframe. Furthermore, you can see the milestones you've defined for each production.
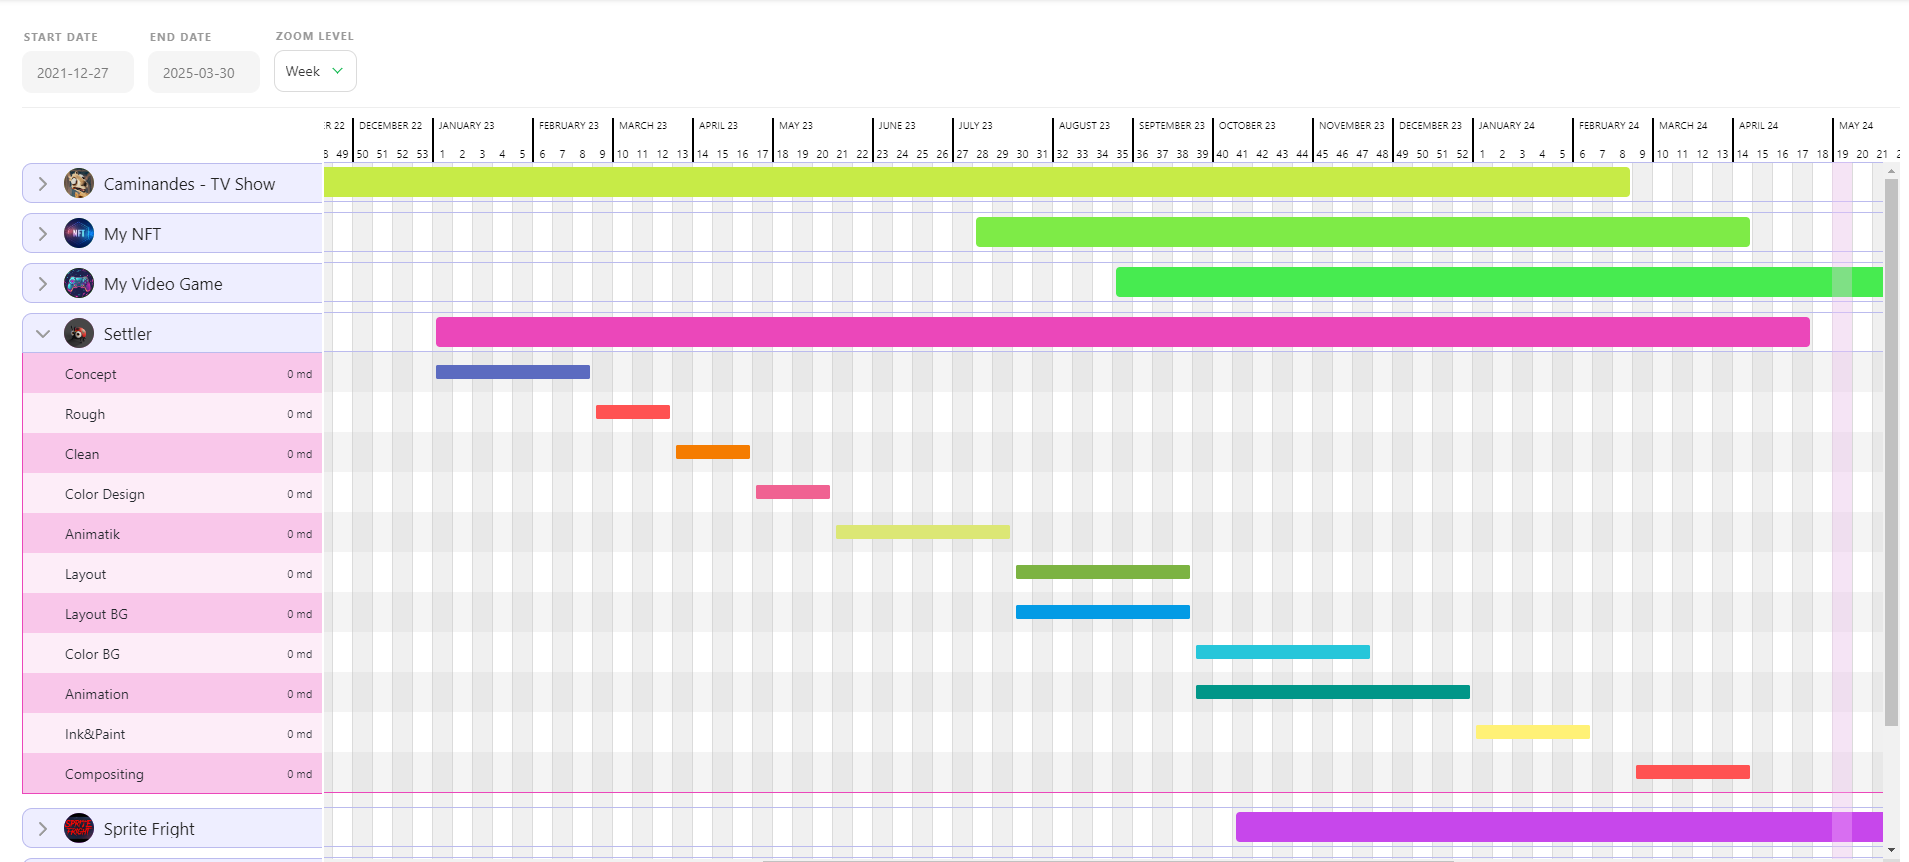
When you click on a production name, you can expand the view to see full details of each task type. The color scheme corresponds to the columns on the global pages.
It's important to note that you cannot modify your production schedules directly from this page. To make adjustments, you'll need to navigate back to the specific production schedule page you wish to modify.
Access to this page is restricted to the Studio Manager.
# Team Schedule
As a studio manager, staying informed about team activities is crucial. For a comprehensive overview of each department's activities, the Team Schedule provides valuable insights.
To access the Team Schedule, navigate to the main menu () and click on Team Schedule under the Studio section.
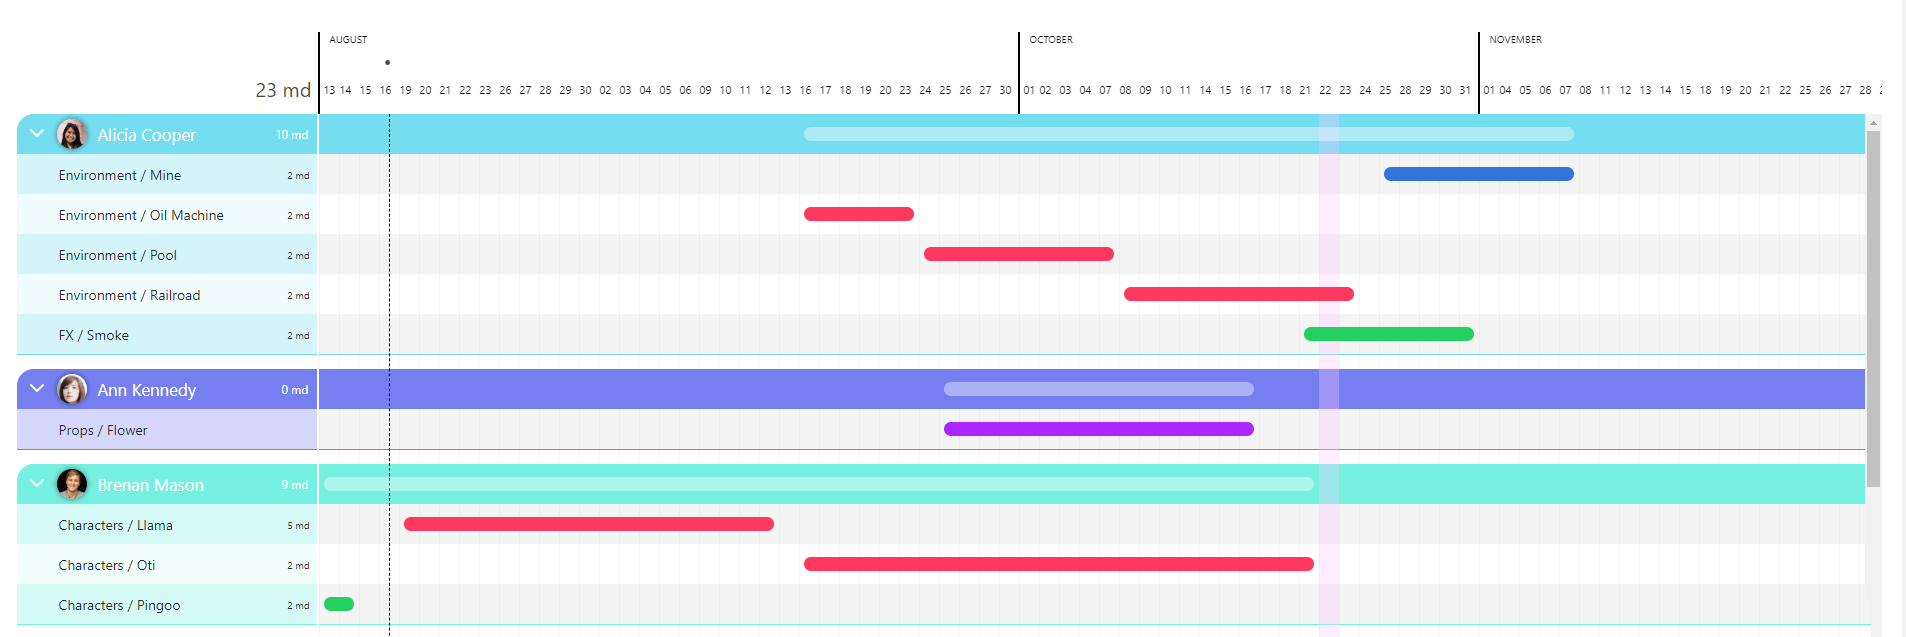
In the Team Schedule, on each row you'll find a list of all personnel in the studio.
At the top of the page, you can adjust the displayed timeframe by selecting the Start Date and End Date, as well as adjust the Zoom Level for a more detailed or broader view.
Additionally, you have the option to hone in on a specific Department or individual Person.
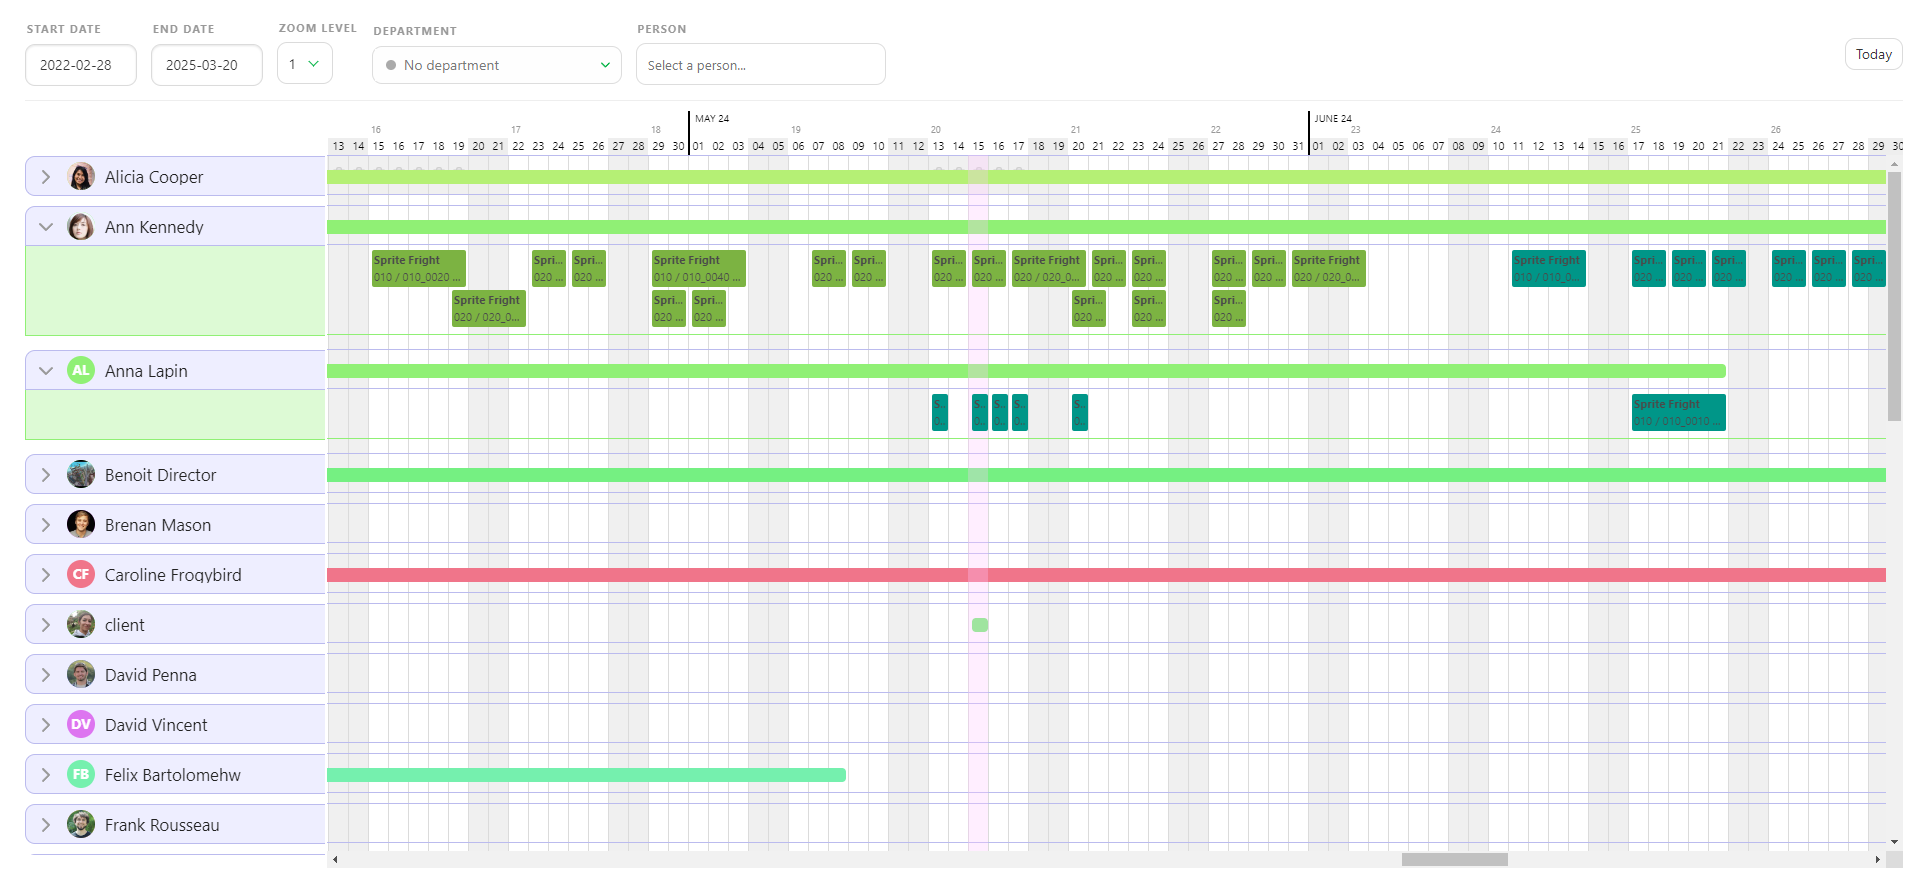
In cases where an artist has multiple simultaneous tasks, these tasks will be stacked atop one another for clarity.
You can manipulate each task by selecting and moving it around as needed. These tasks are directly linked and reflected in the task type schedule, and can be edited in both areas.