# Preparing Your Team
Now that you have defined your workflow, it's time to organize your team so you have people to assign tasks to.
We will learn how to add users to Kitsu, link them to departments, grant them permissions, and finally, add them to a production team so that they can begin working.
# Creating Users
# Creating Users and Linking Them to Departments
To assign tasks to people, you first need to create an account for them in Kitsu.
Definition
As with other aspects in Kitsu, there are two libraries for users:
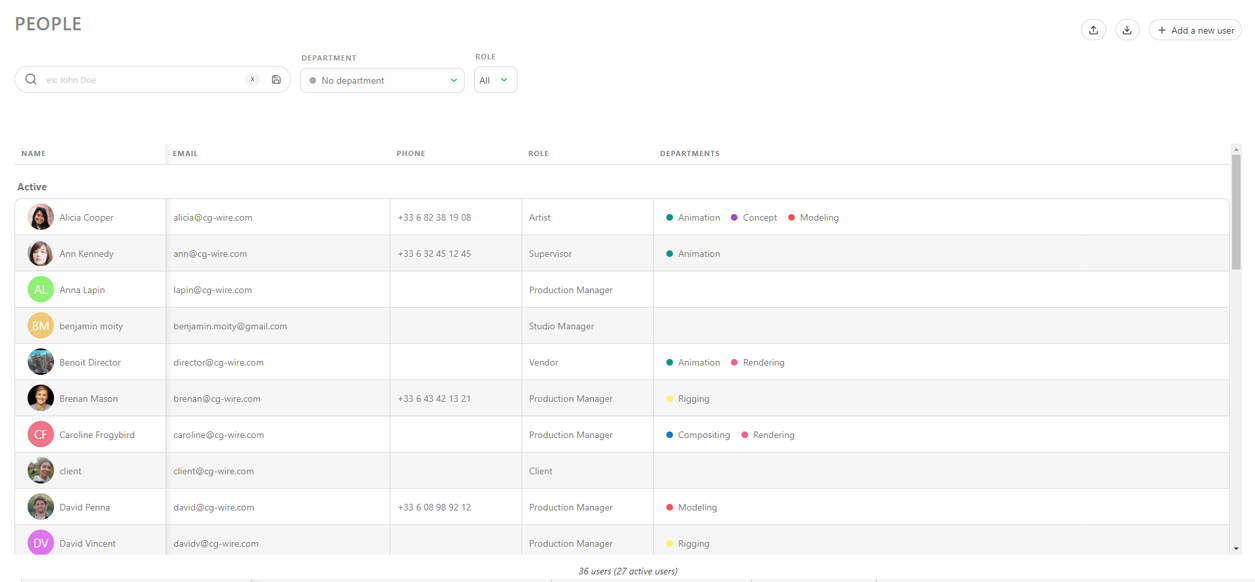
- The People Page (Global Library) is used to determine users' permissions, contracts, and departments they belong to.
- The Team Page (Production Library) is used to define who is working on a project and provide access to the production.
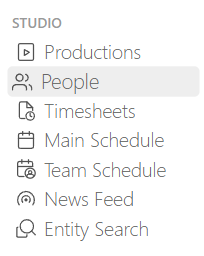
Go to the Main Menu  , and under the STUDIO
section, choose People page.
, and under the STUDIO
section, choose People page.
Then, click on the  button.
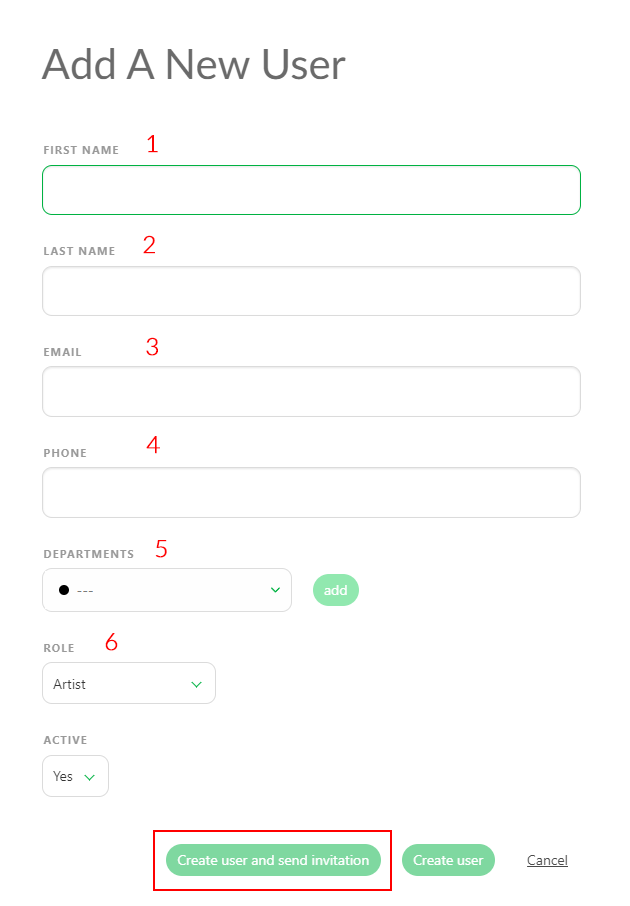
You will then be prompted to enter the following information: (please note from of the fields are required in order to create the user)
- First Name (MANDATORY)
- Last Name
- Email (MANDATORY)
- Phone Number
Important!
An email address is mandatory and must be unique in order to create an account.
- You can specify one or multiple Departments to link a user to.
Being assigned to a Departments will also affect what shows up on the My Checks page, displaying only tasks related to your department.
Finally, the timesheet page will be filtered to only tasks within your department as well.
Some more details about Departements
Once a user is linked to a department, various options will become available to them. For example, they will have direct access to their department's view on the global homepage.
The department supervisor will be able to comment on all tasks within their department and assign tasks only to people from the same department(s).
- Role: This is where you will define the permission role of the user (this will be explained below).
- Active
This section lets you choose whether to activate users immediately. If the user needs immediate access to Kitsu, set this to yes. However, there might be instances where you want to create a user but are not ready to give them access to Kitsu (for example, if you want to schedule tasks for an artist who is due to start work in two weeks). In this case, you can create and schedule the user, then simply enable them once they start.
Important!
Each user requires an individual account to log in to Kitsu.
# Permission Roles
# Understanding Permission Roles
Definition
A permission role defines a set of access rights and privileges granted to a user within a system or application, dictating what actions they can perform and what resources they can access.
Roles are very important, so it's useful to understand what each of them does and which ones might be relevant to specific team members. Click into each of the sections below to learn more about each permission role.
- Artist
Artist Permissions
Artists can only access the productions they are part of. They can comment on tasks, upload media, and change statuses only on tasks that have been assigned to them. Their access is limited to a predefined set of statuses as determined by the Studio Manager.
They can:
- Create personal filters on the global page and Task Type page.
- Edit their own comments.
- Check the checklist on their assigned tasks.
- Create playlists-on-the-fly for shots or assets, but won't be able to save these playlists.
They cannot:
- See client comments.
- Access anything inside of projects that they haven't been assigned to.
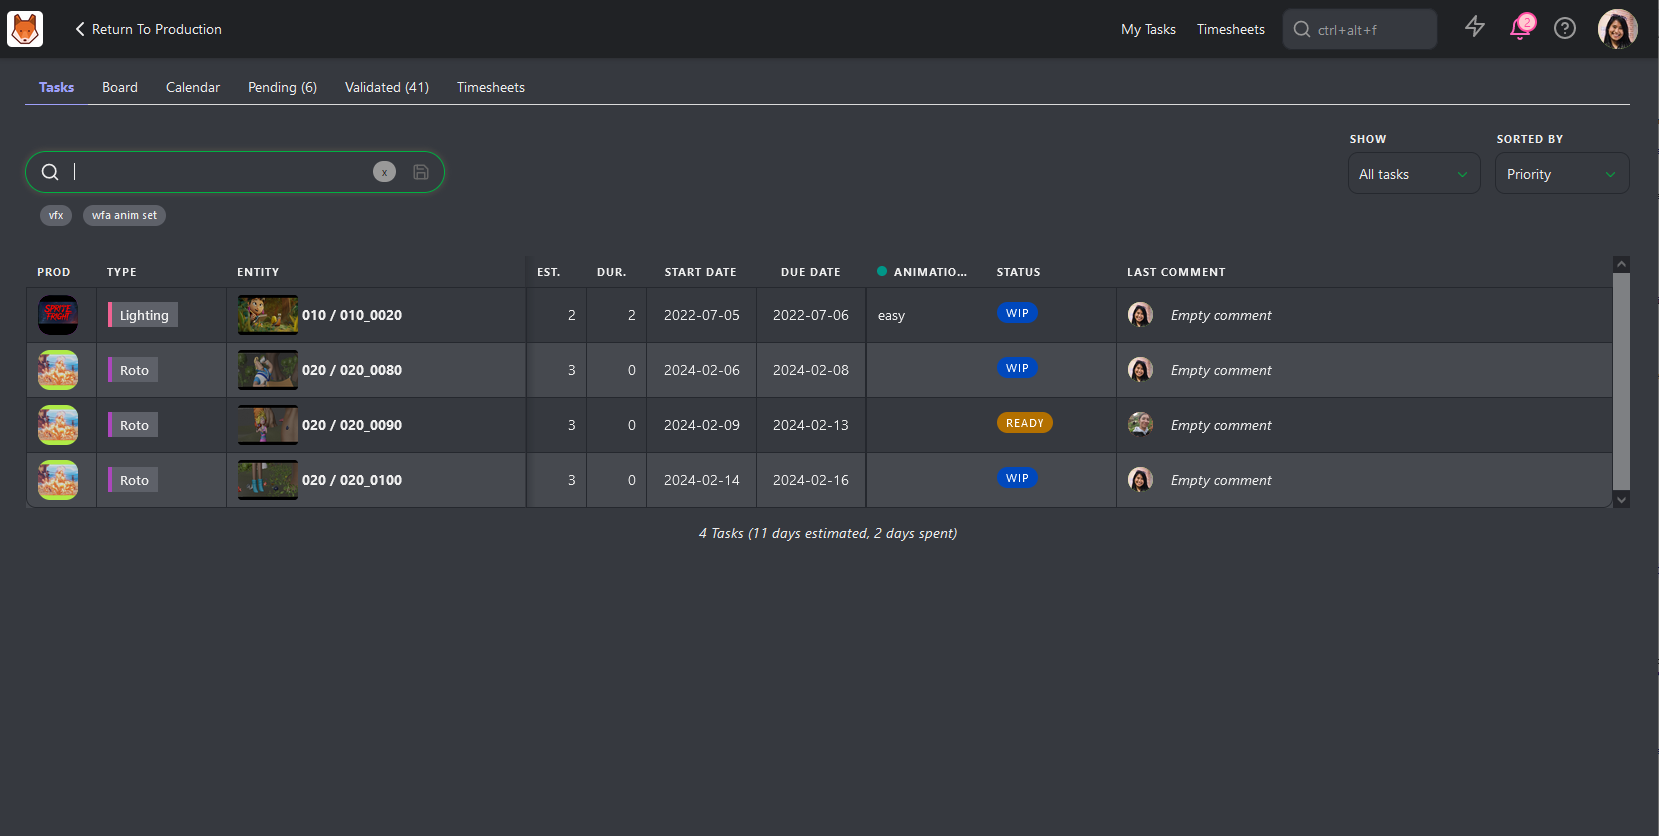
When an artist logs in to Kitsu, the first page they will see is their My Tasks page.
- Supervisor
Supervisor Permissions
Department supervisors inherit Artist permissions.
Department supervisors have read and write access to their department(s) they work on: assets, shots, tasks, assignments, statistics, breakdown, and playlists.
They can:
- Assign tasks to their team artists (same department).
- Post comments on all tasks or their department(s).
- Check a checklist in their own department.
- Pin a comment.
- Edit their own comments.
- Add/edit a playlist for the studio or the client.
- See client comments and validations.
- See comments from other departments.
- View the timesheets of their team department(s).
They cannot:
- Access the studio team, the main timesheets, and the production list
- Define task types, task statuses, and asset types.
- Comment on other departments than theirs; they can't assign artists from other departments.
- Production Manager
Production Manager Permissions
Production managers inherit Department supervisor permissions.
Production managers have read and write access to the productions they are assigned to, including assets, shots, tasks, assignments, statistics, breakdowns, and playlists.
They can:
- Create assets and shots, either manually or through a CSV batch import.
- Post comments on any tasks within the production.
- Edit any comment within the production.
- Check any checklist within the production.
- Pin any comment within the production.
- Add a task column.
- Delete or add a task.
- Add/edit a playlist for the studio or the client.
- See client comments and validations.
They cannot:
- Access the studio page, the main timesheets, and the production list.
- Define task types, task statuses, and asset types.
- Studio Manager
Studio Manager / Administrator Permissions
A Studio Manager acts in the same way as an Administrator, having read and write access to all productions and settings within Kitsu. Some of their privileges include:
# Create and edit a production
The Studio Manager can create a new production, define its type, FPS, ratio, and resolution, and add a cover picture. They can also edit and delete any production.
# Manage the studio
The Studio Manager has access to everything in the studio, including:
- Read / write access across all the productions
- Access to the global timesheets page
- The ability to view all people in the studio
- Access to the main schedule
In the People page, The Studio Manager defines the permission role of each user.
They can also:
- Customize global aspects of Kitsu: for example adding and modifying task types, task statuses, and asset types.
- Set permission roles
- Customize high-level studio information, such as customizing the studio name adding the company logo, and defining the number of hours per day of work etc.
- Choose to use the original filename for downloading media.
# Manage productions
They have full access to all productions on your Kitsu site. Additionally:
- They have the same permissions as the supervisor.
- They can add / delete a task column.
- They are allowed to create custom metadata columns.
- Vendor
Vendor Permissions
Vendors have similar permissions to artists. The main difference is that while an artist can still see tasks in their production (though they can only edit tasks assigned to them), a vendor can only see and edit tasks that they are specifically assigned to. Everything else that is not assigned is hidden.
- Client
Clients Permissions
The client can only see the production of which they are part of.
They can:
- Access the global page of the assets/shots.
- Access the stats pages.
- Access Client playlists with limited access to task status when they post a comment
Note
- Only Supervisors and the Studio Manager can see the Client retake or validation status.
They cannot:
- See task assignments
- See comments that they didn't write
Add Employees from a CSV Spreadsheet File
You may already have your employee list ready in a spreadsheet file. With Kitsu, you have two ways to import them: importing a .csv file directly or copy-pasting your data directly into Kitsu.
First, save your spreadsheet as a .csv file.
Then, go back to the People page on Kitsu and click on the Import icon.

A pop-up window Import data from a CSV will open. Click on Browse to pick your .csv file.

To see the result, click on the Preview button.
You can check and adjust the column names using the preview of your data.
Note: The Role column is not mandatory.
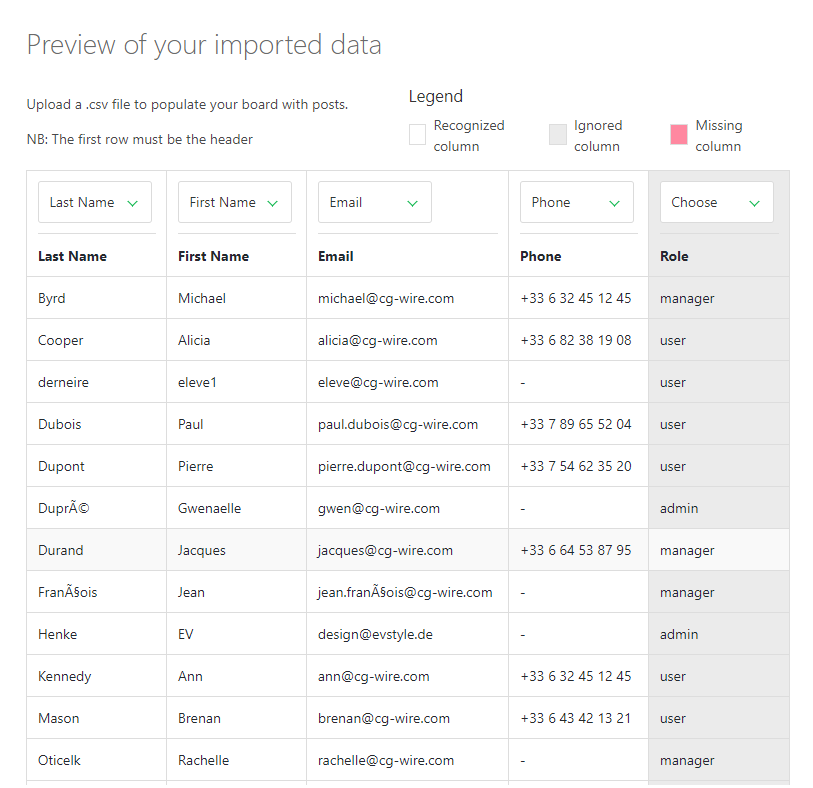
Once everything looks good, click on the Confirm button to import your data into Kitsu.
Now, you have all your people imported into Kitsu.

# Two-Factor Authentication
# Add Additional Security to Your Studio
Two-Factor Authentication provides an additional layer for security for users logging in to Kitsu. It can be enabled on a per-user basis, so you can decide for which users it is enforced.
To enable this, click on their avatar at the top right of the screen, then select Profile. At the bottom of the page, they will find various Two-Factor Authentication options.
# Available Two-Factor Authentication Methods
- TOTP: This lets you use a Two-Factors Authentication app as a secondary password for your account. Selecting this option will present you with a QR, that once scanned into your 2FA app of choice, will prompt you for a one-time code each time you login.
- OTP Via Email Similar to TOTP, but instead of using an app the 2FA code is sent to your email address
- FIDO Device A FIDO device refers to a hardware security key that supports the FIDO (Fast IDentity Online) standard for two-factor authentication (2FA). If you own one of these devices, you can input it's name here to be used for Two-Factor-Authentication

# Adding Users to the Team
Once you have created your production, you need to add users to the production's team to allow them access. Being part of a team also allows tasks to be assigned to you.
TIP
You don't need to add the Studio Manager role to a team to give them read permission (since this role will have access to it anyways). However, if you want to assign them tasks, they will need to be added to the team.
To add users to a team:
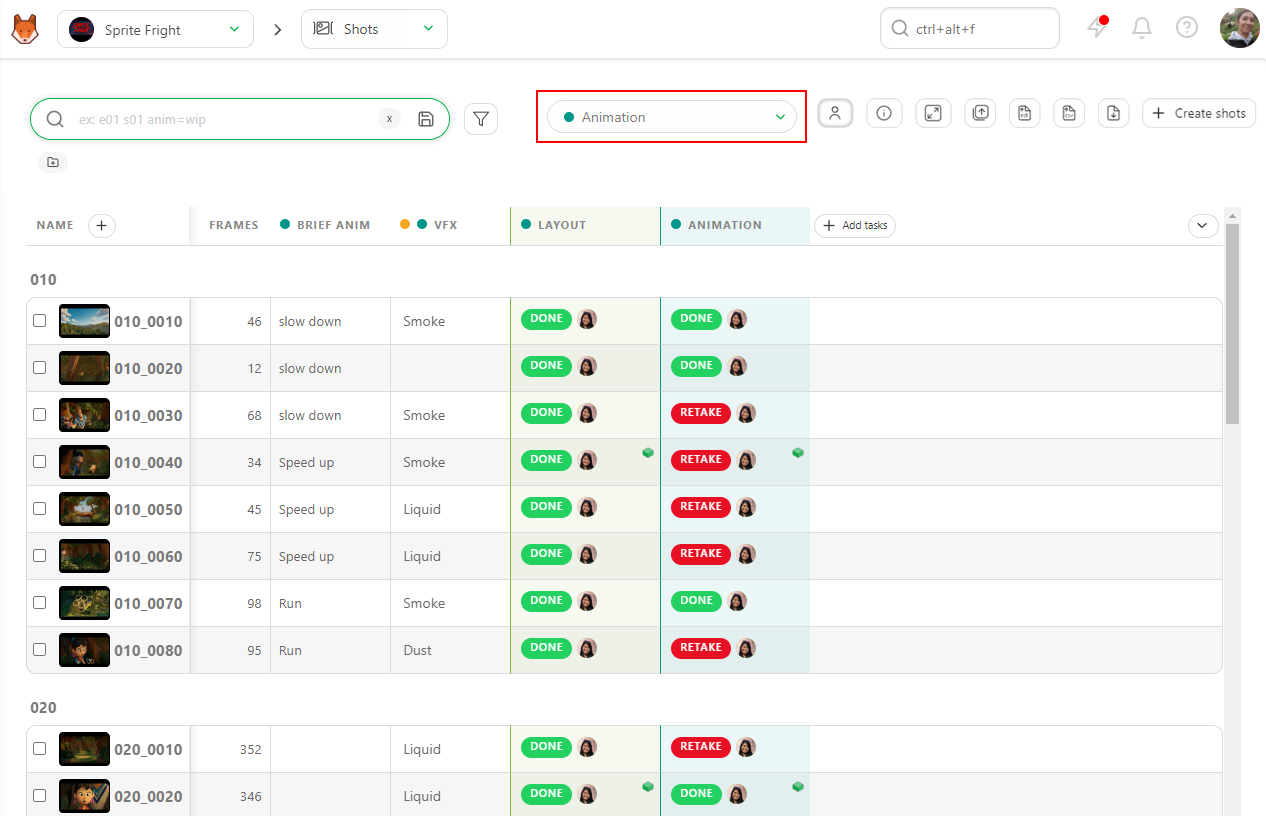
On a production, use the navigation dropdown menu at the top of the page and select the TEAM page.
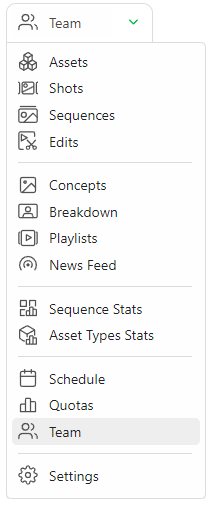
On the Team page, you can see all the assignees for a specific project. Switch to the top of the page if you want to check another project team.