# Getting Started With Kitsu
With Kitsu, users can track various production projects, encompassing 2D and 3D production, VFX, video games, and other related endeavors.
The content tracked by Kitsu can be as simple as still-frame advertisements, to extensive 3-hour feature films, accommodating projects with varying numbers of elements
But before jumping into our production, we must first configure our Studio Workflow.
# Studio Workflows
# Understanding Studio Workflows
Definition
A workflow is defined as the structured coordination of tasks constituting the operational processes within a production.
For example, within a CGI production, tasks such as modeling, rigging, and shading are undertaken to finalize an asset.
Definition
- Processes such as modeling, shading, etc., are referred to as a Task Type.
- An individual objects such as asset, shot, etc., are called Entities.
- A task can be defined as a specific action or activity that needs to be done. Tasks can be attributed to entities and will usually be categorized with a task type.
Entities with corresponding tasks form foundation of your asset workflow. Each task will then be assigned to an artist. Once you have determined your assets workflow, you will do the same for the shots, sequences, etc.
Once the workflow for tasks is defined, the next step involves establishing an Approval Workflow, which entails defining all the statuses utilized for communication within the team. Statuses will also be useful for tracking the progress of your production.
The Workflow of your production is the sum of your Tasks and Status.
# Global Library VS Production Library
In Kitsu, you have two kinds of libraries:
The first is the Global Library at the studio level. Only the Studio manager has access to it.
The second is the Production Library, where you will pick elements created in the global library to fill out.
The idea is to keep each production separated with a specific workflow.
Your Global Library is where you can create and modify departments, task types, task statuses, asset types, and status automation. You can create as many elements as needed, name them as you wish, and select the best colors and options to suit your needs.
Once your Global Library is populated, you can fill out the Production Library with the newly created elements from the Global Library.
# Departments
# Creating Departments
Departments are designed to help supervisors and artists focus on their tasks. Once a user is linked to one or more departments, supervisors and artists gain direct access to a filtered view of all tasks associated with that task type. Departments are also used to define what metadata columns appear for users within that department.
If a metadata column is linked to a department, then they will only show up for users in that department. If a metadata column is not associated with a department, they will show up for everyone.
TIP
By default, Kitsu provides some example departments to help you get started.
Defining your studio's Departments is typically the first step in setup, as multiple objects such as people and task types are linked to a department.
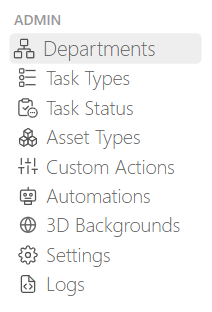
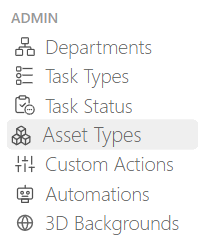
On the main menu  select the
Department page under the Admin section.
select the
Department page under the Admin section.
If you need to create more departments, you can click on the  button.
When adding a department, you need to define:
- The name of the department
- A color (it will be displayed as a small round circle next to a column task type or a custom column)
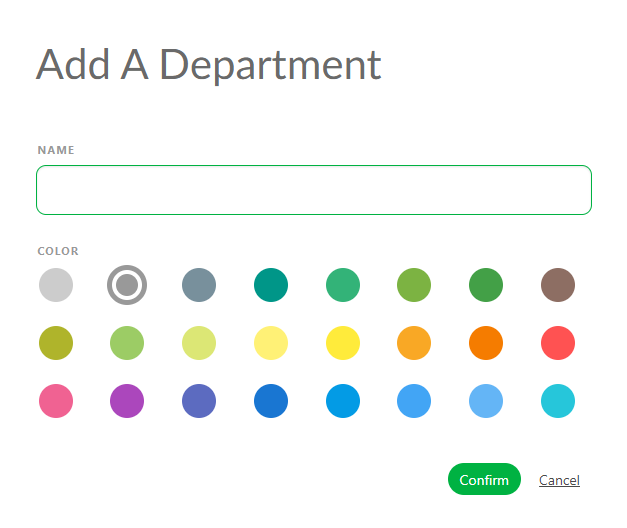
Click on Confirm to save your changes.
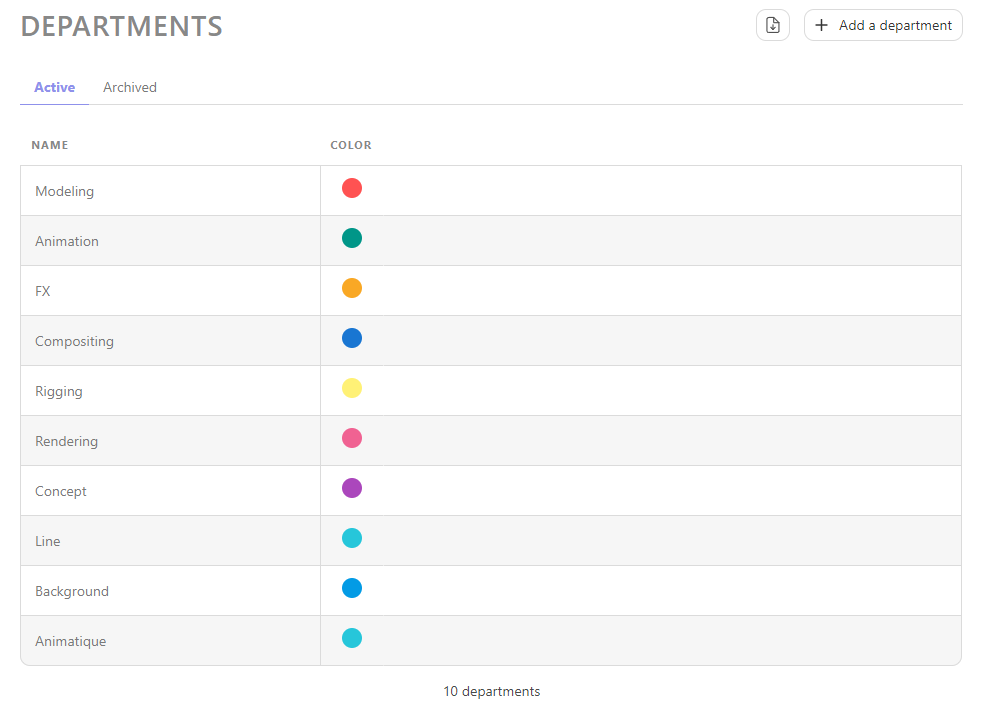
Once you finish creating the department, your page should look like this. Whereby each department has a unique name and corresponding color.
# Task Types
# Creating a New Task Type
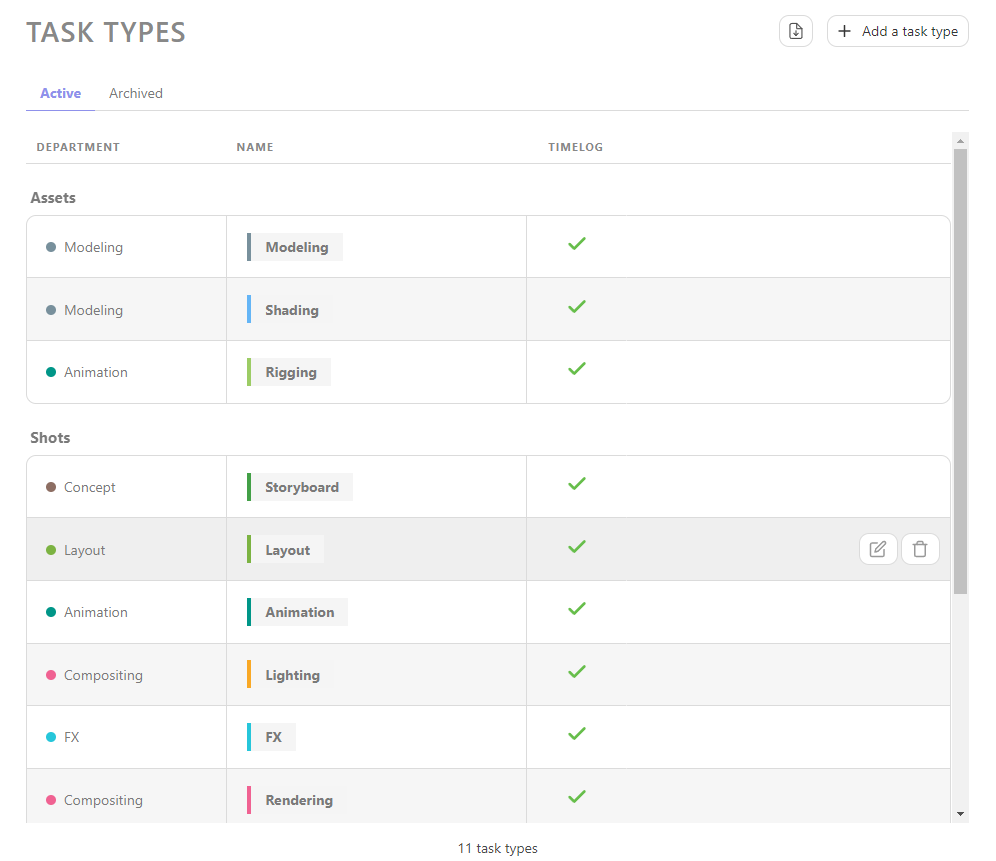
Next, let's create all the Task Types needed to manage and track our production. Task types could be associated with multiple entities such as assets, shots, sequences, episodes, or edits.
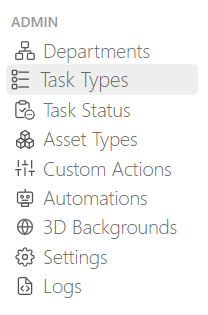
From the main menu select
the Task Types page under the Admin section.
TIP
By default, Kitsu provides some example task types that can be used for a CGI production. You can rename or remove any that are not relevant to your production.
You will notice that these Task Types are already linked to a department.
You can click on the  button to create new Task Type.
Next, you will need to supply some information about your task type, including:
- The name of the task type
- If team members need to time log their work for tasks with this task type
- For which entity it will be used
- To which department it should be linked
- The color (this will be reflect in the background color on the main spreadsheet page)
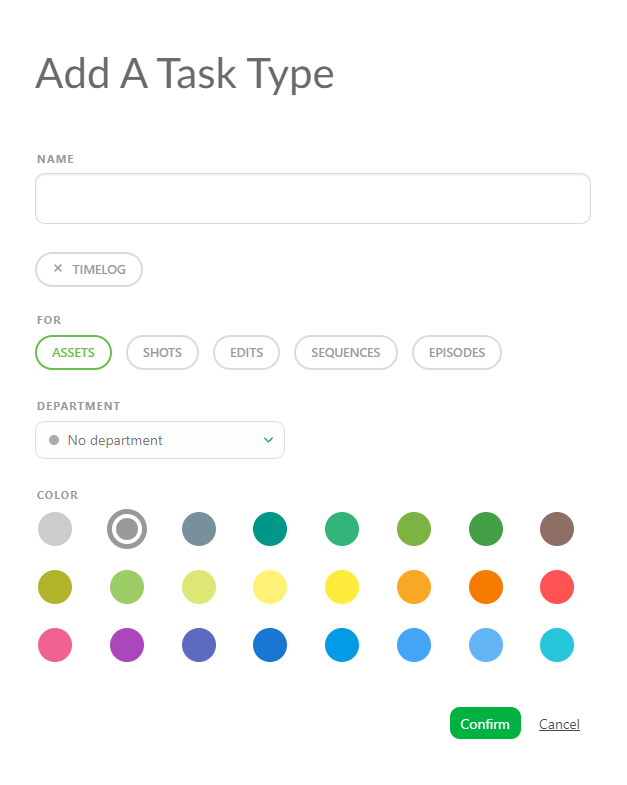
You'll notice that the Departments we created previously are available as an option to link task types to. Connecting a department to a specific task type can help your team stay organized.

Click on Confirm to save your changes.
WARNING
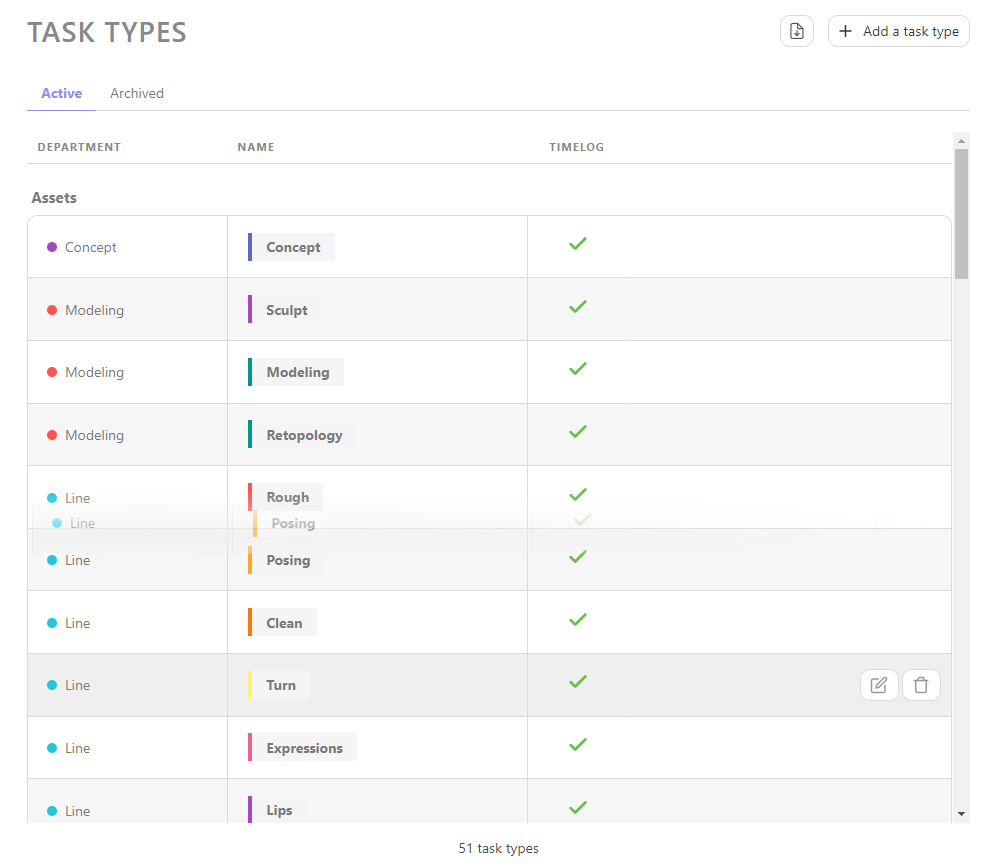
Newly created task types will appear at the bottom of the list
To adjust the order, simply click on the Task Type and drag it to its appropriate position in the list.
Congratulations, your task type has now be created in your Global Library.
WARNING
Once you have created your production, you need to add the Sequence, Episode, and Edit task types to your Production Library.
TIP
At any point during production, you can revisit this section to create additional Task Types as necessary and add them into your workflow.
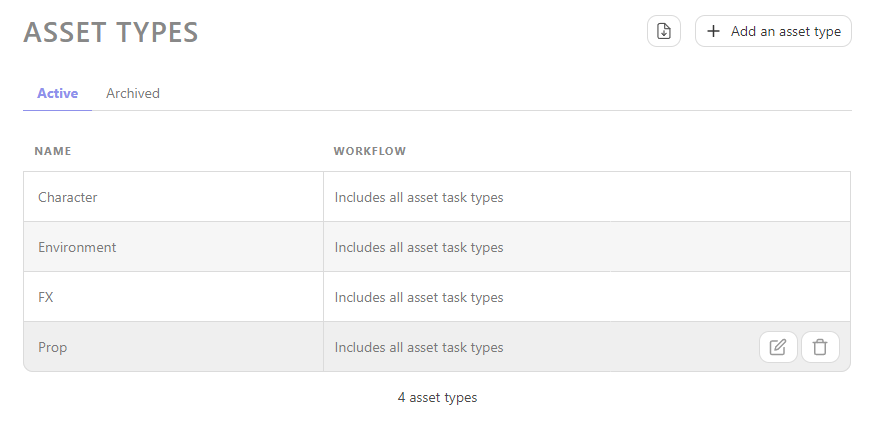
# Asset Types
# Define Your Asset Workflow
Once you have created your global Workflow, you can then define your Asset Types
Much like how shots can be organized by a sequence, an asset can be organised by it's Asset Type. Think of it as using folders to organize all your assets by category.
On the main menu select the
Asset Type page under the Admin section.
TIP
By default, Kitsu provides some example asset types that can be used for a CGI production.
To create new Asset Type, click on the  button.
Next, you will need to supply some information about your Asset Type, including:
- The name of the asset type
- A workflow for the specific asset type
Different Asset Types will have distinct workflows. For instance, you might have fewer tasks for an Environment compared to a Character, as Environment assets typically don't require Rigging tasks.
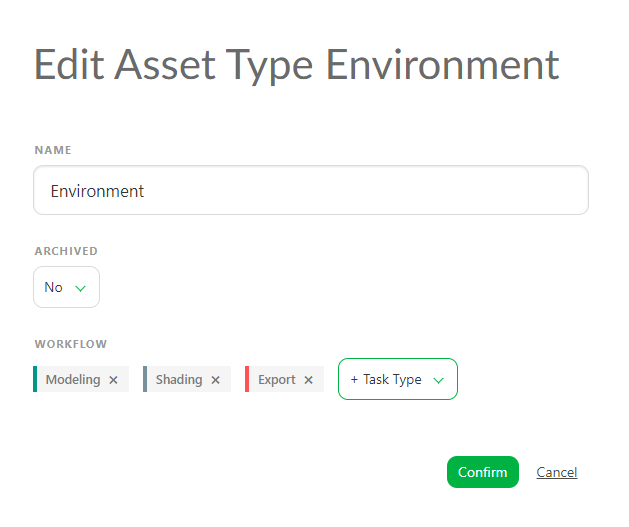
When you create or edit an Asset Type, you can add a specific task type; if you don't select a specific workflow for this asset type, your production asset workflow will be applied.
However, if you choose specific Task types for this Asset type, only these will be applied to production.
Click on Confirm to save your changes.
Your new Asset Type is now created in your Global Library. It will be available to use when you create your production.
TIP
At any point during production, you can revisit this section to create additional Asset Types as necessary and add them into your workflow.
# Task Statuses
# Define Your Approval Workflow
Next, let's create the statuses we intend to use during our Approval Workflow.
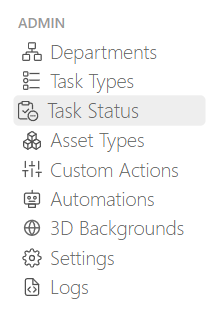
On the main menu select the
Task Status page under the Admin section.
TIP
By default, Kitsu already provides some examples Statuses.
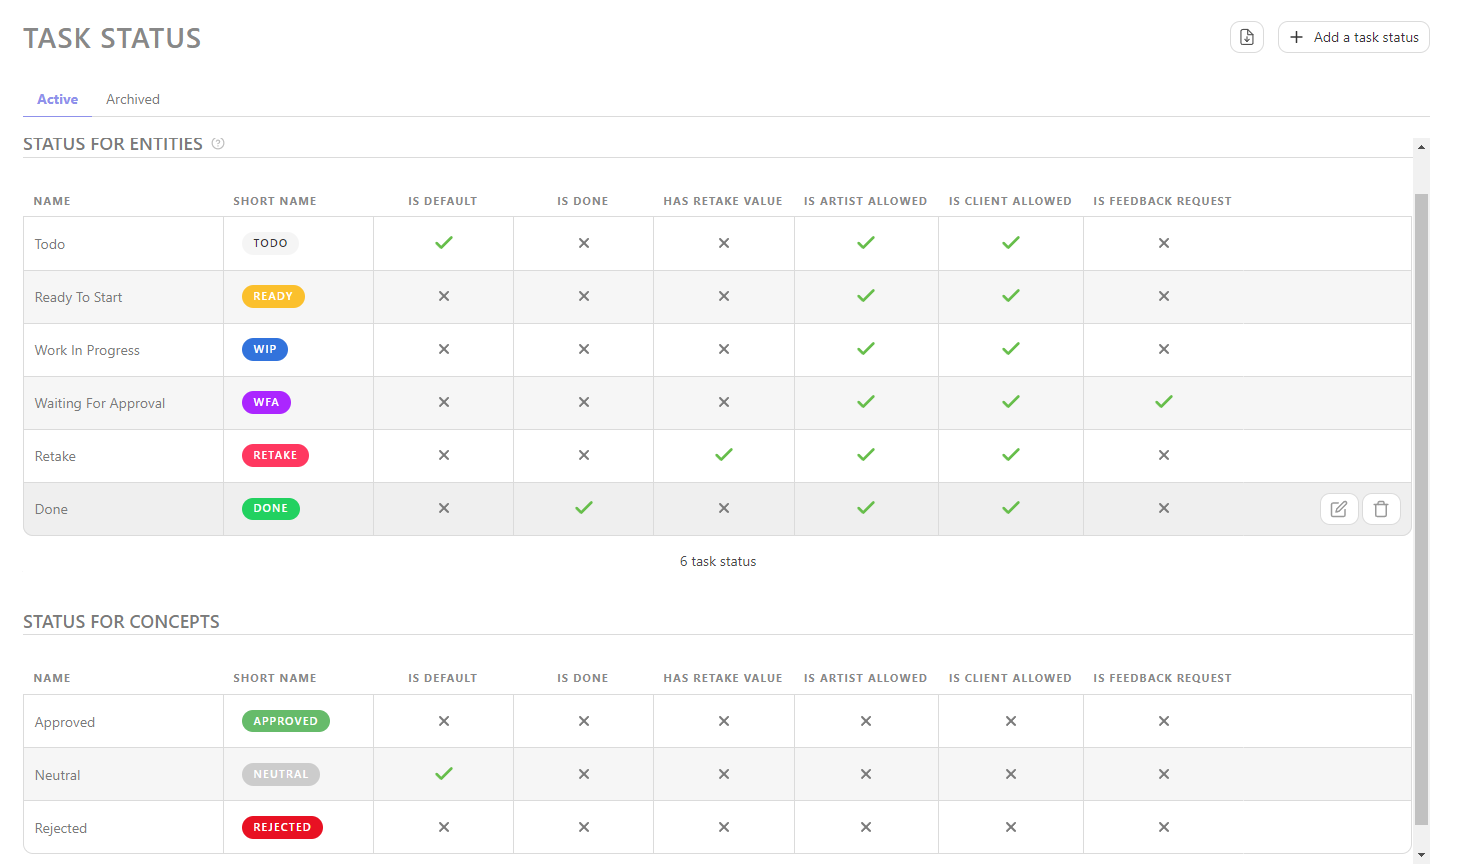
A status represents a specific stage or condition that a task or must pass through as part of the review and approval process.
For example, the Ready  status indicates that the artists have everything they need to start working and should not begin their tasks without reaching this status.
WIP  : The Work in Progress status is used by artists to inform their team that they are actively working on the task, indicating that there is no need to assign it to someone else.
WFA : The Waiting-For-Approval status is used by artists to notify their supervisors that they have completed their work and are awaiting review. Supervisors can also use a similar status to inform directors that work is ready for review.
Done  : The Done status indicates that all work has been completed & approved. This indicates that the current task is complete and the next step in the process can commence.
Retake  : The Retake status indicates that a comment has been made, prompting the artists to continue working on their task and publish a new version until validation is achieved.
These statuses are just examples of what is achievable in Kitsu. You are free to create your own as needed.
To do this, from the main page, click on the  button.
You'll then need to define some details about you Task Status, including:
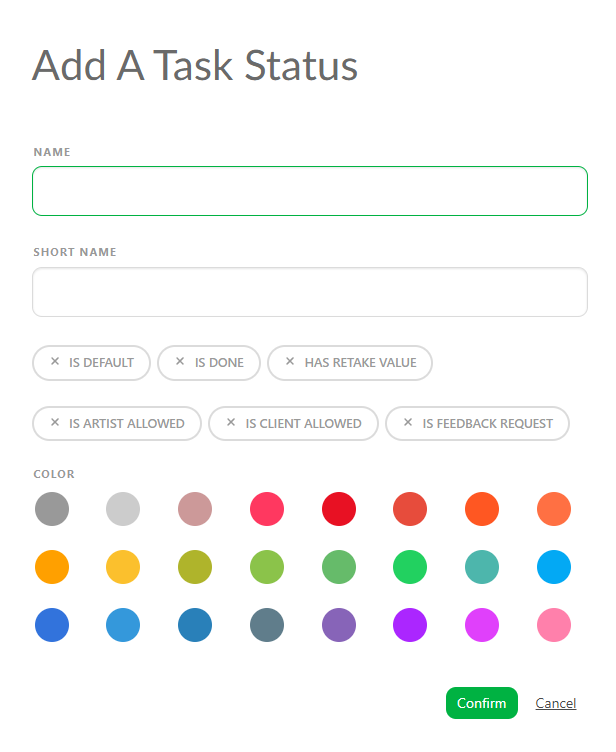
- NAME, the explicit name of the status that will be displayed when you hover your mouse over it in the.
- SHORT NAME, what will be displayed in Kitsu.
- IS DEFAULT, the first status that Kitsu will display by default on all tasks. You can only have ONE default status in Kitsu.
- IS DONE, if this status is utilized to validate a task (which is beneficial for quota management, organizing the to-do list, and updating episode statistics).
- HAS RETAKE VALUE, if this status is used for commenting on a task (helpful for tracking the back-and-forth discussions on the task type page and for the episode stats page).
- IS ARTIST ALLOWED, are artists allowed to set tasks to this status? If No, the artist won't see this status in their list of available statuses. However, they can still post comments on it.
- IS CLIENT ALLOWED, Can the client use this Status? If No, the client won't see this status in their list of available statuses.
- IS FEEDBACK REQUEST, if this status is used to request a review (helpful for quota tracking if you don't use a timesheet, it will appear in the Pending tab of the to-do list, and all these statuses will be grouped on the My Check page. Kitsu will prompt you to publish a preview each time you use this status).
- Finally, choose a background color you prefer for this status.
Click on Confirm to save your changes.
Your Status is now created in your Global Library and will be available to use in your production.
TIP
At any point during the production, you can return here and create more Task Status if needed, and then add them to your production.
WARNING
You'll notice a few tasks statuses listed under the category of Concept Status. These are used by the system and while you can modify them here, you cannot create new ones.
# Automation
# Create a New Status Automation
A Status Automation defines rules or conditions that automatically trigger changes in the status of tasks based on predefined criteria. You can set up Status Automation for both asset and shot tasks.
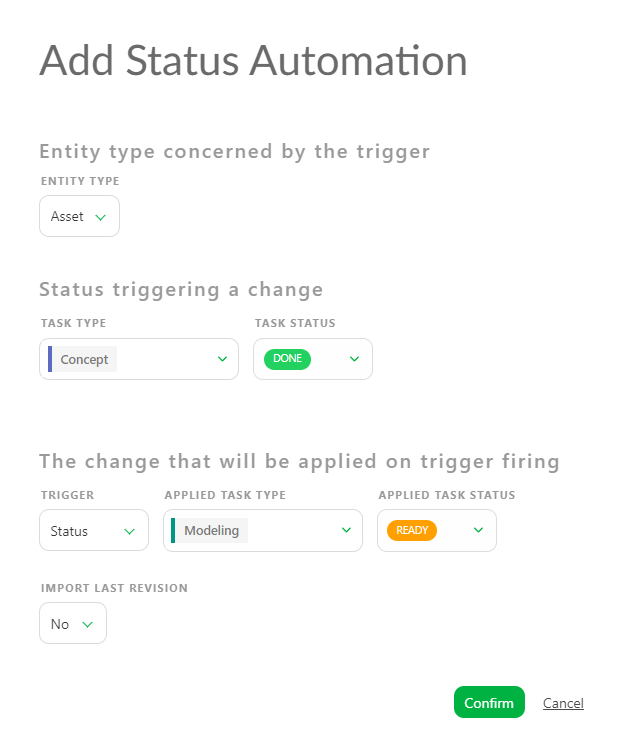
For assets, you can establish Status Automations between tasks. For example, when the concept task status is set to done, the downstream modelling task status is automatically changed to ready.
Additionally, you can create Status Automations that update the Asset Status based on task statuses. For example, when the concept task is set to done , then the linked asset status is set to layout.
TIP
You can also ask Kitsu to copy the latest preview with the Automation.
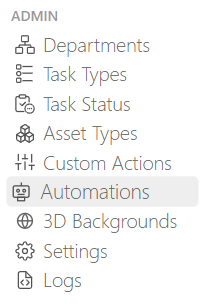
Go to the main menu and select Automation.
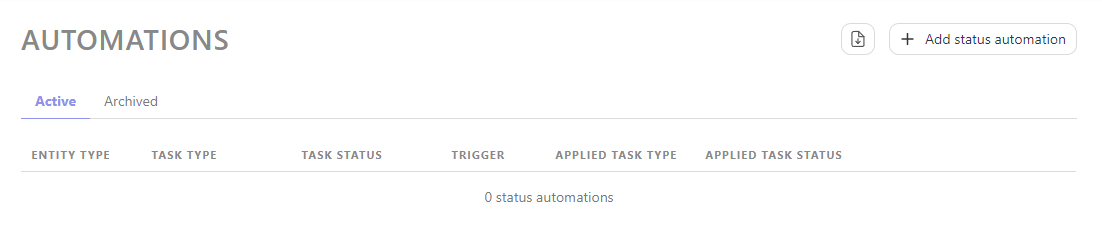
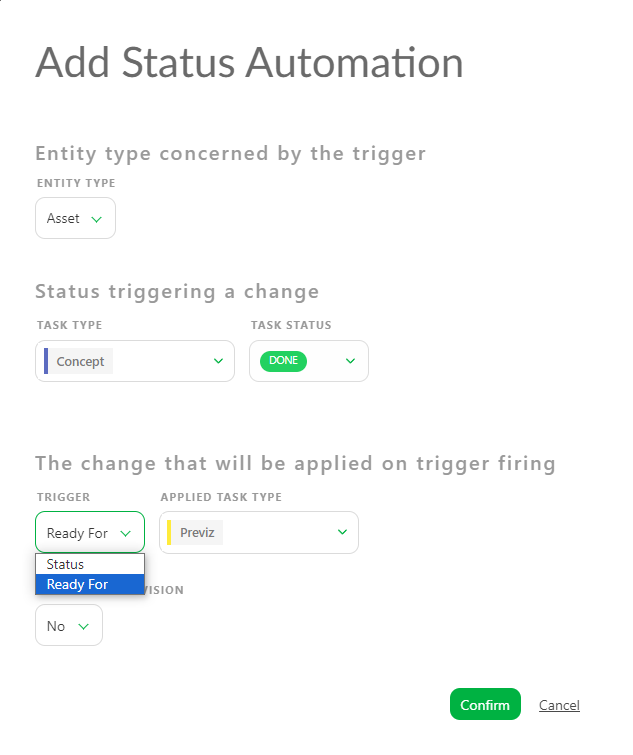
From this page, you can create Status Automations by clicking the +Add status automation button.
You have the option to create Status Automation for either the asset or the shot.
Next, you can select the task type and the status that will trigger the Automation.
You can specify which Task Type will respond to the Automation and select the Status that will be changed.
You need to change the trigger from "Status" to Ready For in order to initiate the change in Ready For status.
You will notice the Applied Task Type will now display Shot task type.
To create a Status Automation for shots, you must change the Entity Type to shots.
Your new Status Automation is now created in your Global Library.
WARNING
You must add status automations to your Production Library once you have created your production.
TIP
At any point during the production, you can return here and create more Status Automations if needed, and then add them to your production.
# 3D Backgrounds
# Create a Global Library of HDR Files
The 3D Backgrounds feature enhances your review of 3D files (.GLB) by incorporating an .HDR background to make things easier to review.
The .GLB file format is a binary container that encompasses various 3D assets and resources. These assets may comprise 3D models, textures, materials, and animations.
Definition
It means you can review your 3D files with lighting information.
In this section, you can create your own. .HDR files library that you can use in your production.
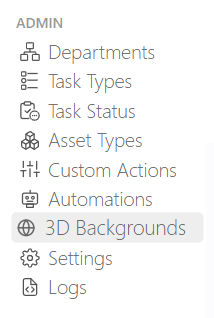
Go to the main menu , and select 3D Backgrounds.
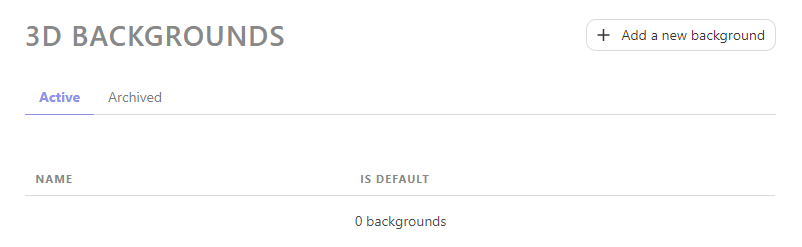
From here, you can add a .HDR Background by clicking the +Add a new background button.
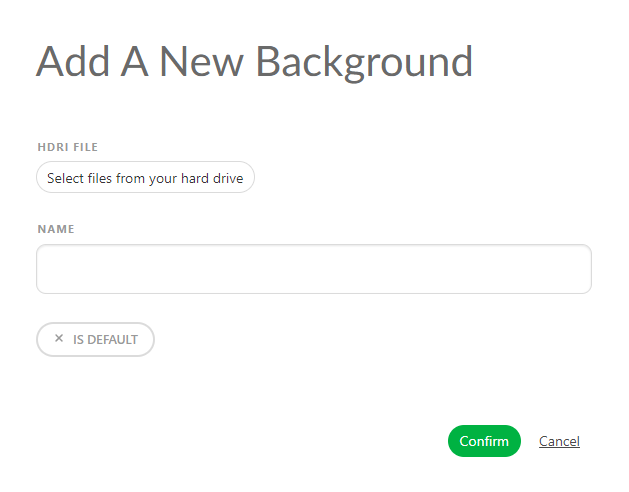
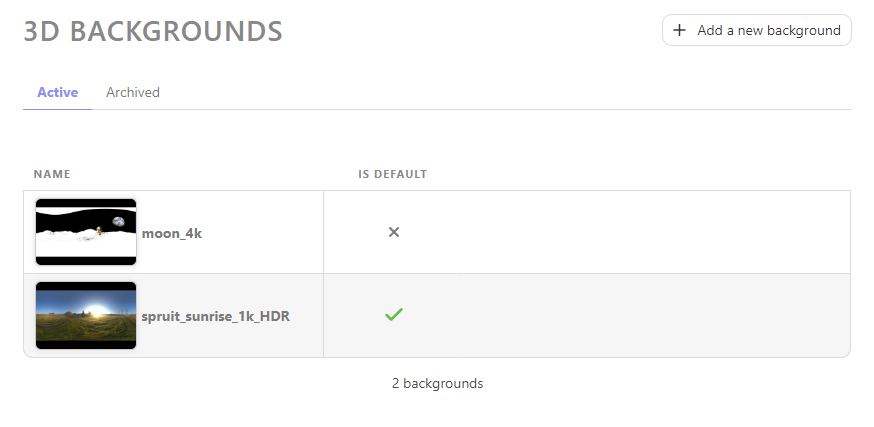
From this point, you'll need to select your .HDR background, provide a name for it, and decide whether you want this .HDR to serve as the default background.
TIP
Checking the Is Default option means this HDR will be applied across your entire production instead of the default grey background.
Once you have uploaded all your .HDR files, Kitsu will display them as a list.
Your new 3D Background is now created in your Global Library.
WARNING
You must add them to your Production Library once you have created your production.
# Asset Library
# What is the Asset Library?
The Asset Library serves as a centralized repository for all assets used within Kitsu. Teams can import assets from any project into a shared library, making them accessible for future productions. With this functionality, assets like character models, props, environments, and more can be managed in one place and repurposed seamlessly in new projects.
# How to Use the Asset Library
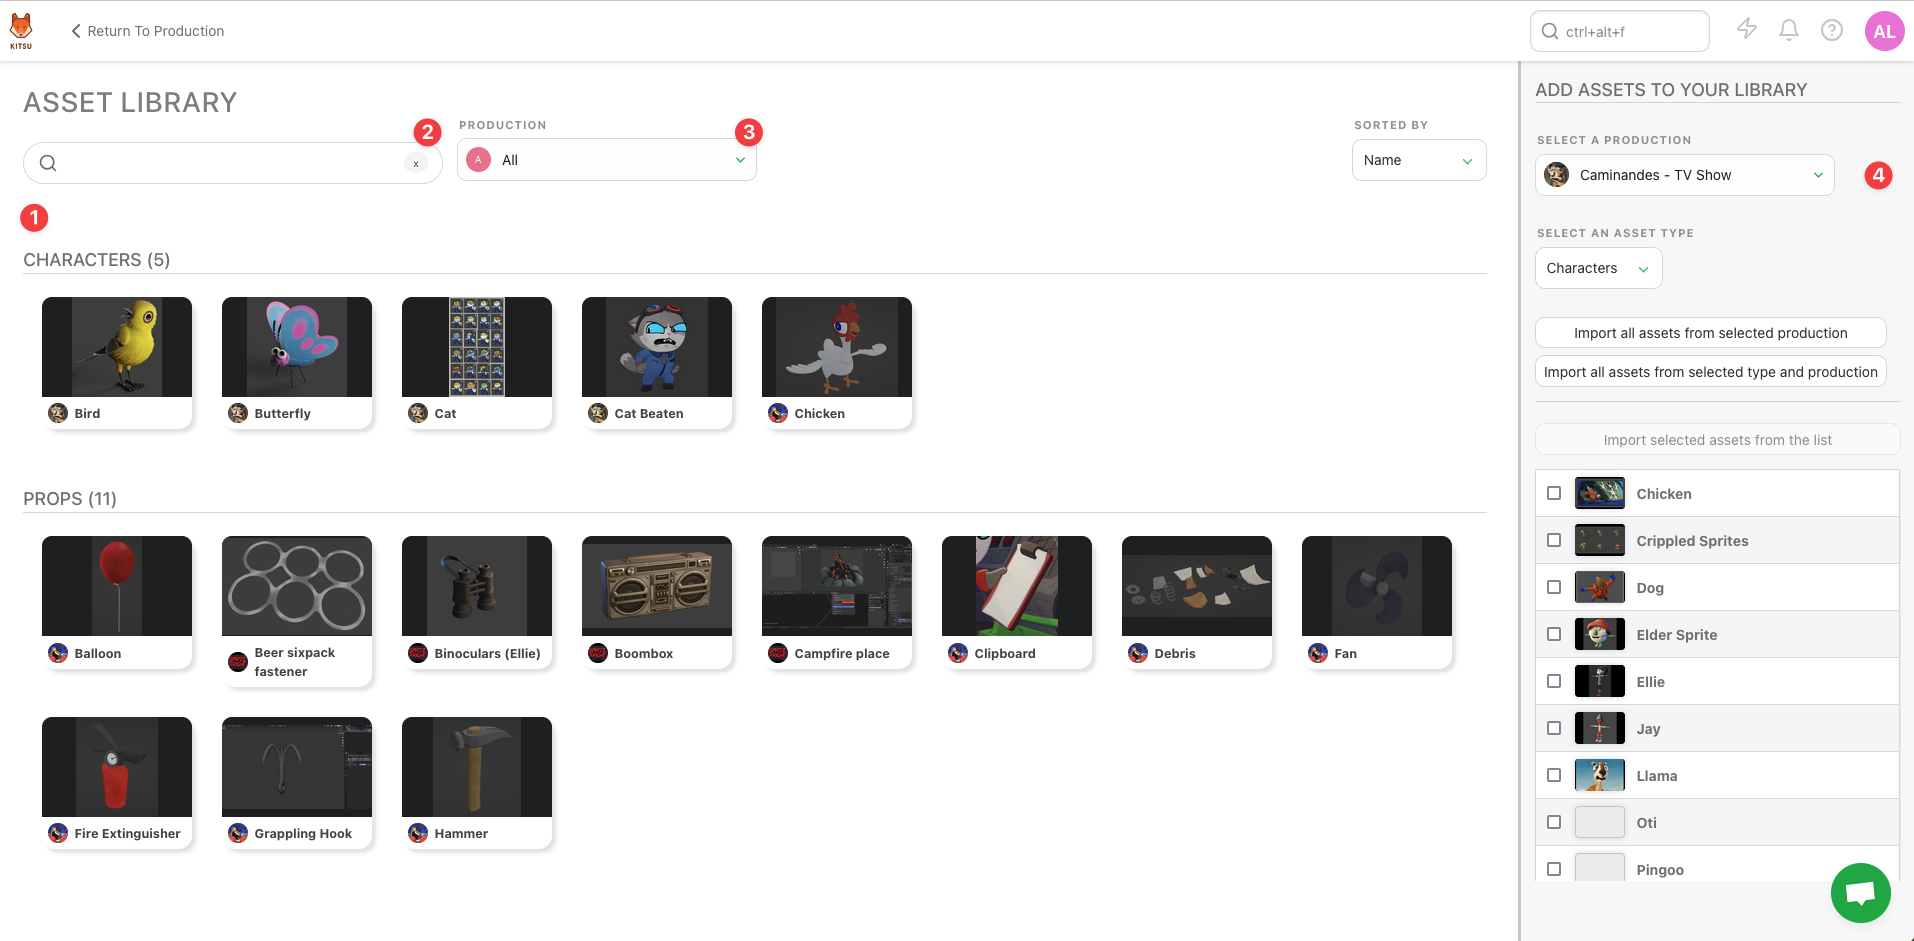
- You can access the Asset Library from the Studio section of the main Kitsu menu.
- The main Asset Library window displays all assets currently available in the library (1). Use the search (2) and filter (3) options to quickly find specific assets within the library.
- On the right-hand pane (4), you’ll find the import option for bringing in assets from other productions into the Asset Library.
# Adding Assets to the Library
The right-hand pane is where you can add existing assets from other productions into the library. This action does not create a copy but simply references the original asset, allowing it to be used in other productions.
To import an asset:
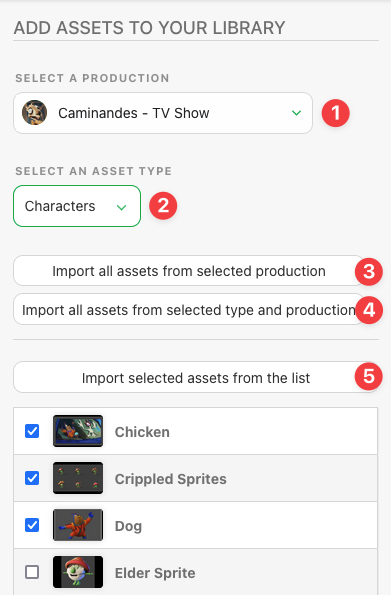
- Select the production you wish to import the asset from (1).
- Choose the asset type you’d like to import (2).
There are three main ways to import assets:
- Import all assets from a specific production (3).
- Import assets by type from the selected production (4).
- Select individual assets for import (5).
Once imported, the asset will be available for use in breakdowns for other productions, allowing for efficient asset reuse across projects.
TIP
There are specific rules around who can import assets into the asset library, depending on the user’s permission group:
- Studio Manager: Can import any assets from any production.
- Production Manager: Can import assets only if they are part of the team.
- Supervisor and Artist: Cannot import assets into the library.
# Settings
# Configuring Kitsu
Several global settings can be configured that apply to your studio, such as replacing the default Kitsu logo with your studio's logo.
To do this, click on the main menu button
, then under the Admin section, click on the Settings.

# Studio Settings
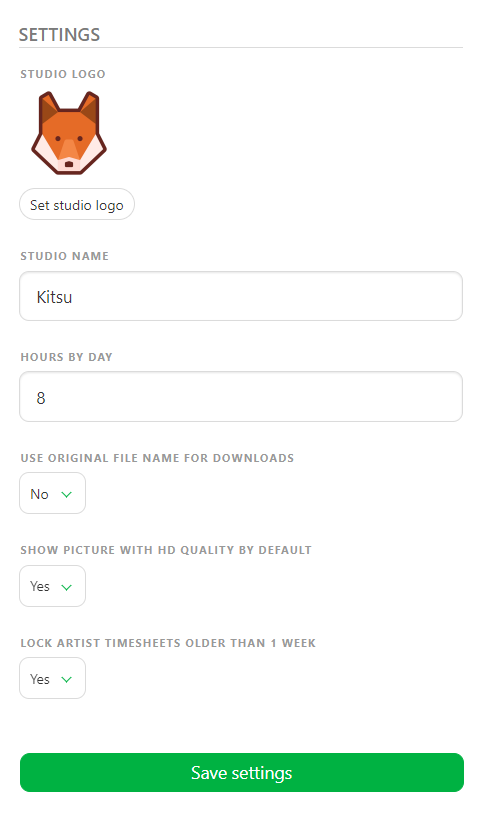
Click on the Set studio logo and select an image to use. This will replace the Kitsu logo on your site and in various places across the app. You can also change the Studio Name to be used in your Kitsu instance.
The remaining settings on this page are global settings that affect every production. Some of these include:
- How many hours per day should your team be working.
- You can opt to use original file names for downloads.
- Display images in HD quality by default. Use this option only if you have a very fast internet connection.
- Regarding the timesheet, you can also restrict artists from modifying timesheets older than one week.
Finally, you will also find settings relating to various chat integrations. Please refer to Chat Integration section for more information on how to configure this.
WARNING
Remember to Save Settings at the end once you are finished.