# Create your First Production
# New Project - Create a Production
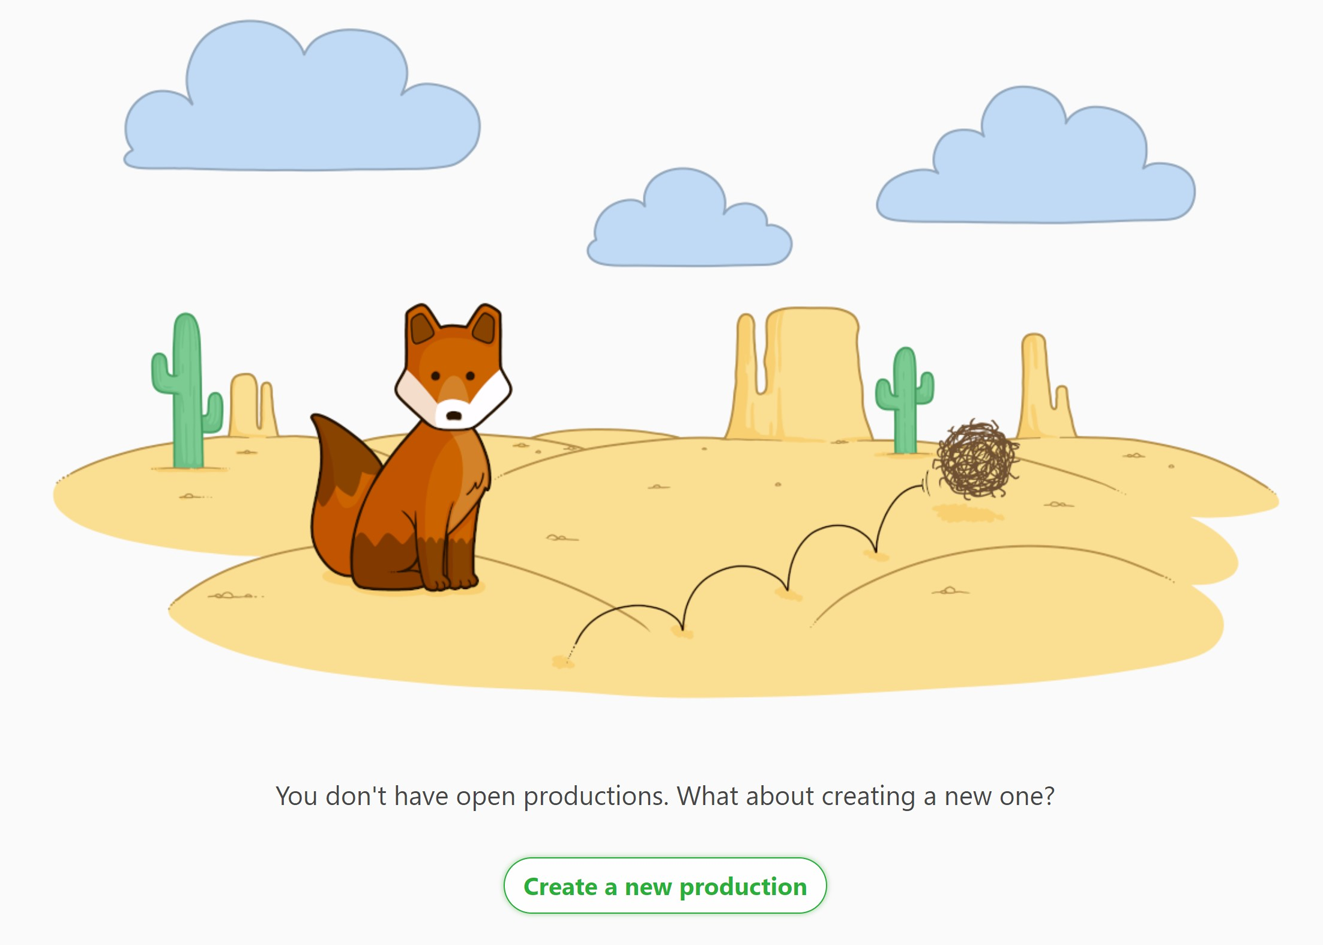
The first step in Kitsu is to create a production. Click on the Create a new production button.
Enter your production name, and choose TV Show if you need more than one episode.
Then, you have to fill in technical information, such as the number of FPS, the Ratio, and the Resolution.
TIP
All these data will be used when Kitsu re-encodes the video previews uploaded.
Then, you need to define your production's start and end dates.

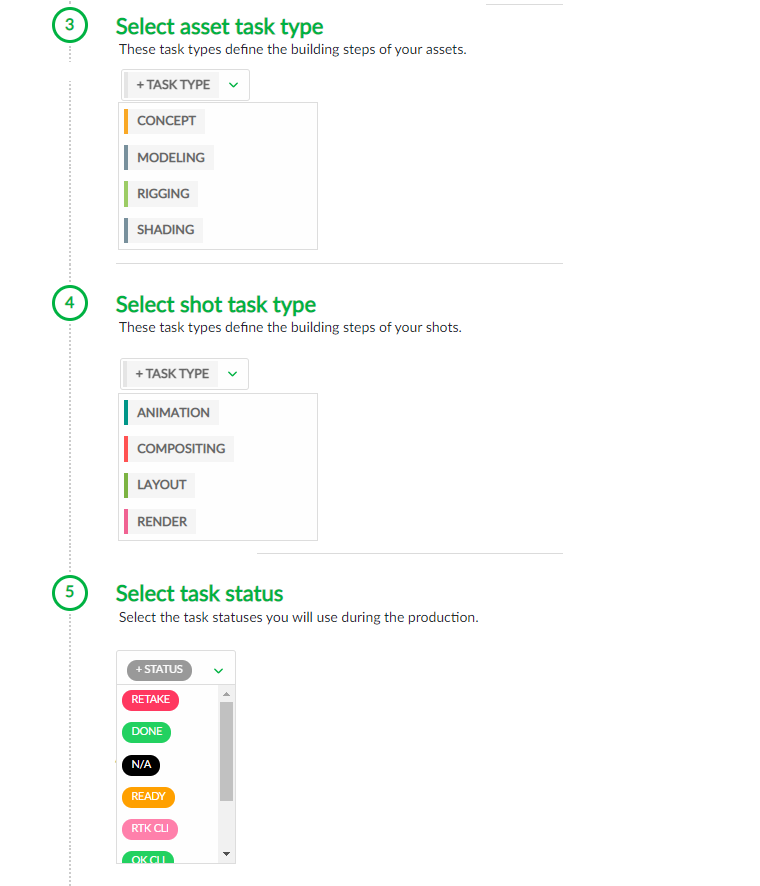
In the next part, 3 to 6, you can define your production pipeline. First, you need to select your asset task type, shot task type, task status, and asset types.
Then, 7 and 8 are the option parts. If you already have a spreadsheet with your asset/shot.
See the import CSV section for more details.
Validate everything with the  button.
If you don't find all the Task Types, Status, or Asset Types you need while creating the production. You will be able to add them to your production later.
See the Customization section for more details.
# Create Assets
So, now you have the first script for your production. Next, it's time to break down and create the assets. Finally, it allows you to list your assets, dispatch the work to the artists, and follow each related task's progress.
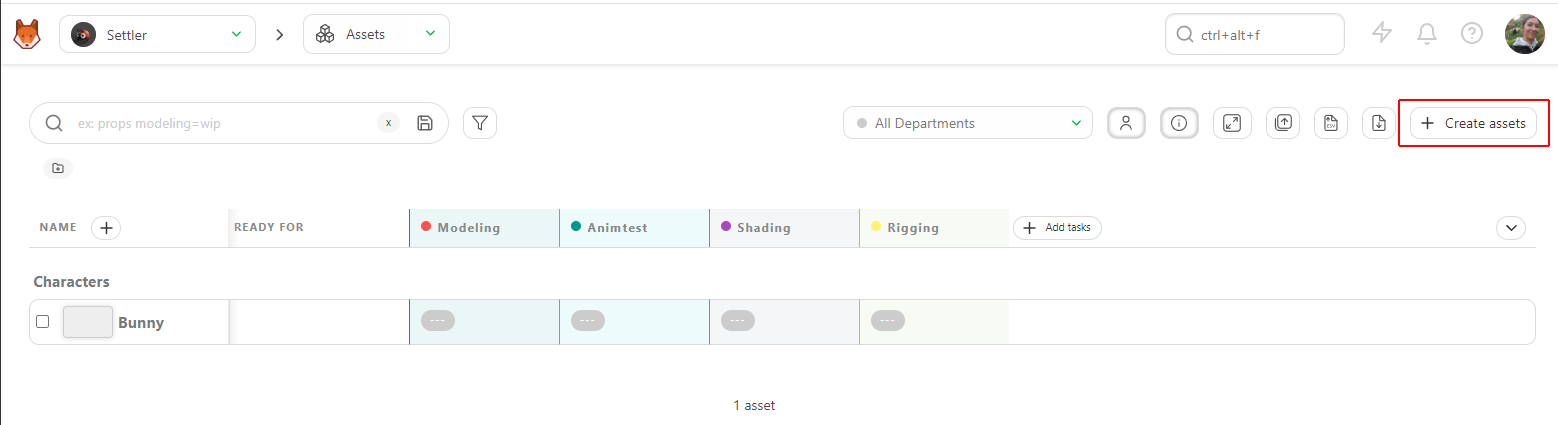
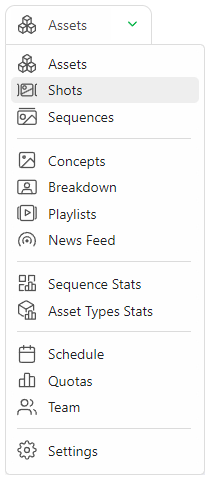
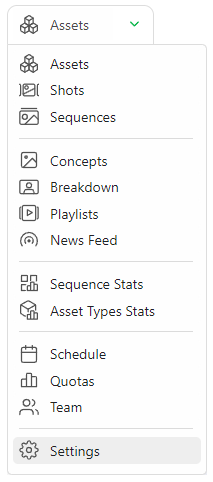
Let's begin with the asset page. You can access it via the dropdown menu at the top of the page.

On the asset page, click on Add assets.
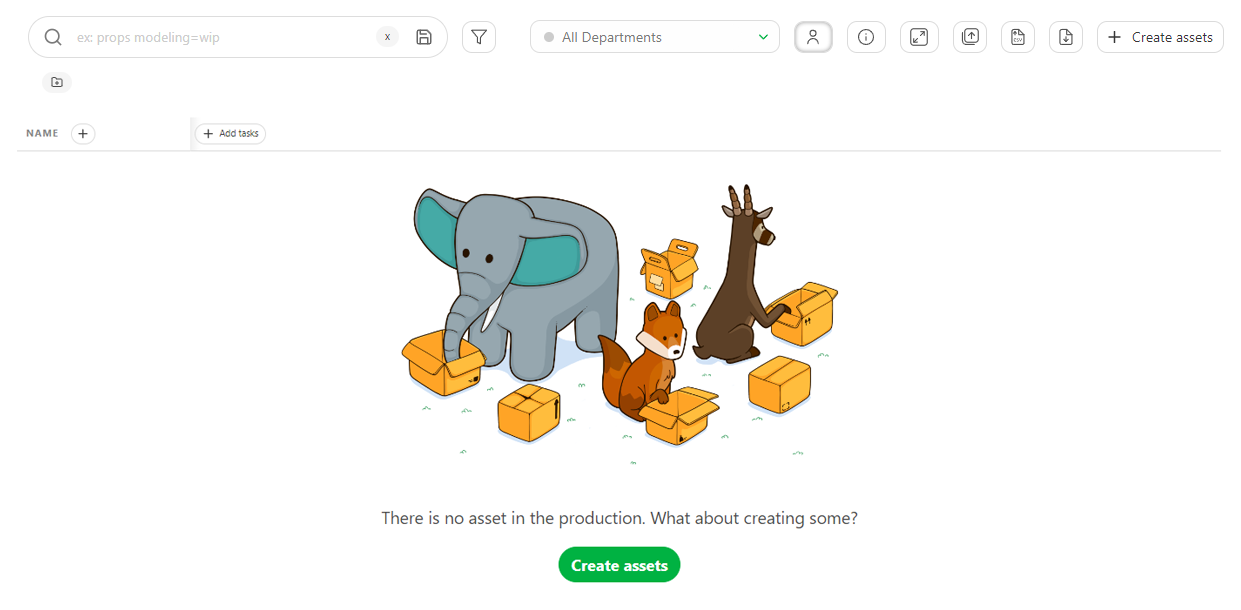
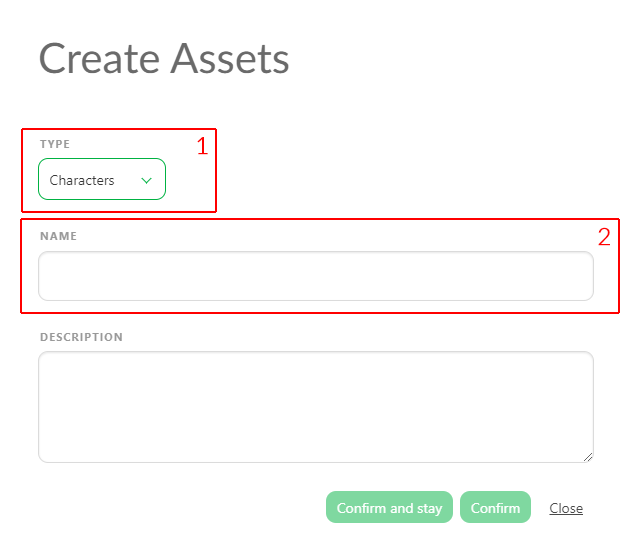
A pop-up window opens:
It asks you to choose the asset Type (1): Camera, Characters, Environment, FX, Props, ... Let's start with a character.
Then, you select the Main Pack, or the episode (2)
We give it a Name (3) and enter a description that helps the Artist know what to do and quickly identify the asset.
Click on Confirm and stay if you have multiple assets to create.
You can change the asset type and keep adding assets.
You can also customize the asset type list and their tasks pipeline. Customization of the workflow )
The newly created asset appears in the background whenever you click on Confirm and stay.
After adding your last asset, click on Confirm. It saves the asset and closes the window. If you don't have more assets to add, click on Close, it cancels the window.
The assets are linked with the first episode E01 (created per default by Kitsu) or with the Main Pack.
You will also see the tasks are created at the same time. By default, all the tasks of your library will be added, and if you have set your parameters, only the selected tasks will be added.
If you need to add more Assets, click the Add assets button.
You can edit assets by going to the asset page, hovering over the asset you want to modify, and then clicking on the edit button
 (1) on the right side of
the line.
(1) on the right side of
the line.
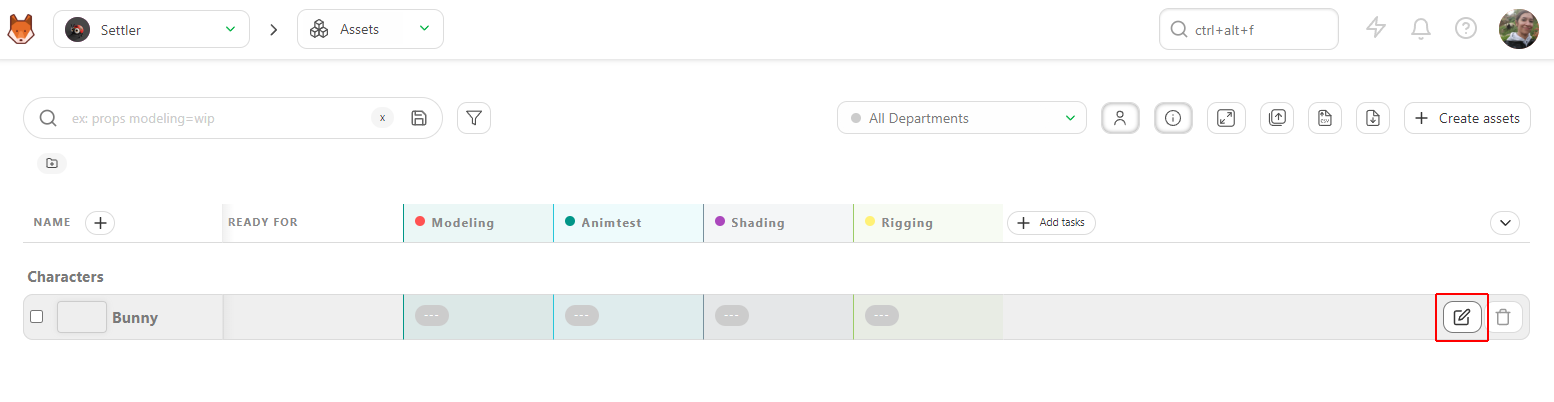
To extend the description on the main asset page, click on the first words (2), and a pop-up opens with the full description.
To delete an asset, see the FAQ : How to delete an asset
# Create Episodes, Sequences, and Shots
It's time to do the breakdown of the storyboard. Meaning you can create the sequences and the shots of the episode and associate assets to them.
Nb: Episodes are only mandatory for TV Show Production.
You can also create tasks for episodes and shots. See the ADVANCE section.
You need to go to the Shots page: you can use the dropdown menu and click on the SHOTS.
Click on the Add shots button to start with the shot creation.
A new pop-up opens for the creation of the assets. You can now create the episodes, the sequences, and the shots.
Enter the first episode using your code name, e01, then click the add button (1). Then, do the same for the sequence, for instance, sq01, then add (2), and now the shots: sh001, then again add (3). You can also define padding for your shots.
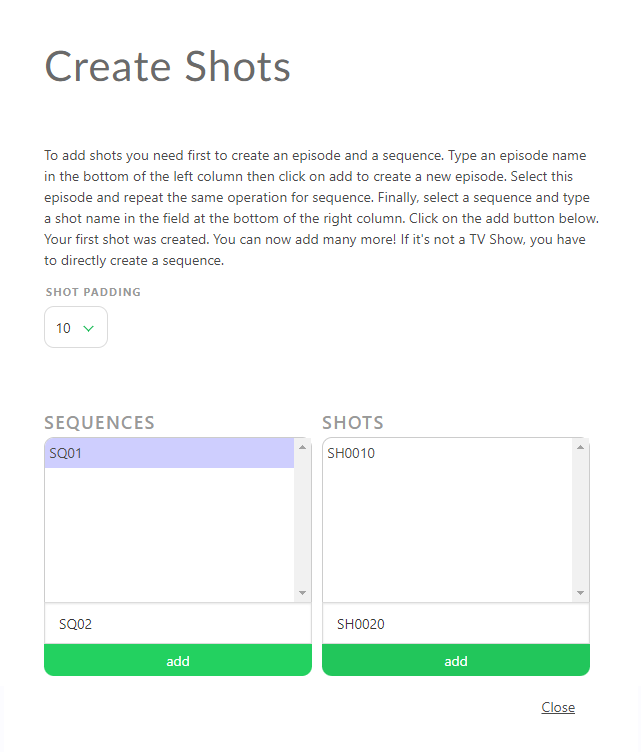
You can now see that new shots are listed, described by their episode, and sequence. You have created the first shot of the first sequence of the first episode.
Now, let's add more shots than just one! As you can see, the box already contains your name code but incremented, so you have to continue to click on add to create more shots.

You have to do the same with the sequences and episodes.
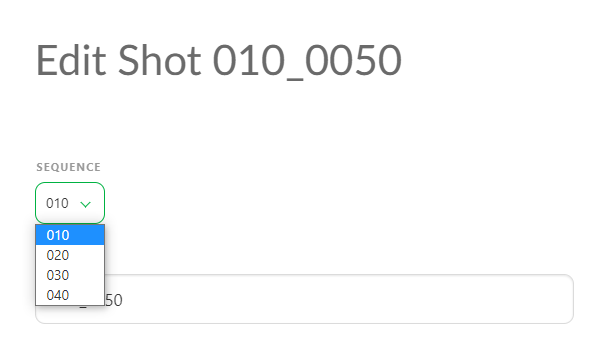
If a shot is misplaced on a sequence, you have to edit the shot you want
, and change the
sequence.
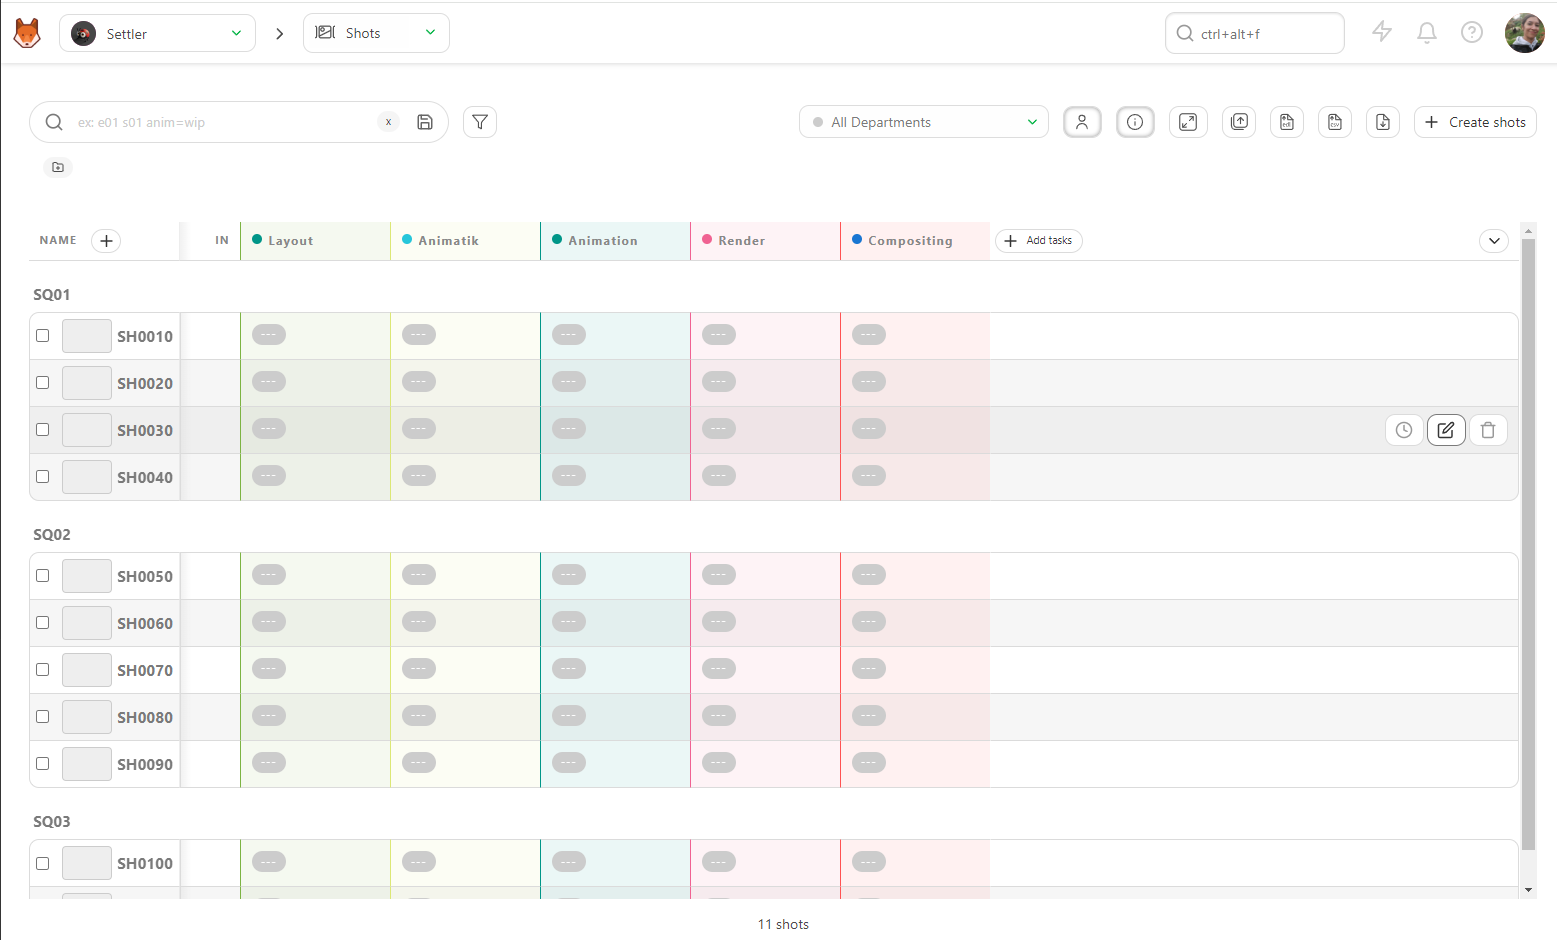
If at some point you need to delete a shot, click on the trash can
icon on the right of the line  .
If you need to import this shot back, click on the restore button
.
If you need to import this shot back, click on the restore button
 .
.
To delete a shot, see the FAQ : How to delete a shot
To delete a sequence, see the FAQ : How to delete a Sequence
# Introduction to Kitsu global Page
Welcome to the global asset page of Kitsu.
Let's take a look around.
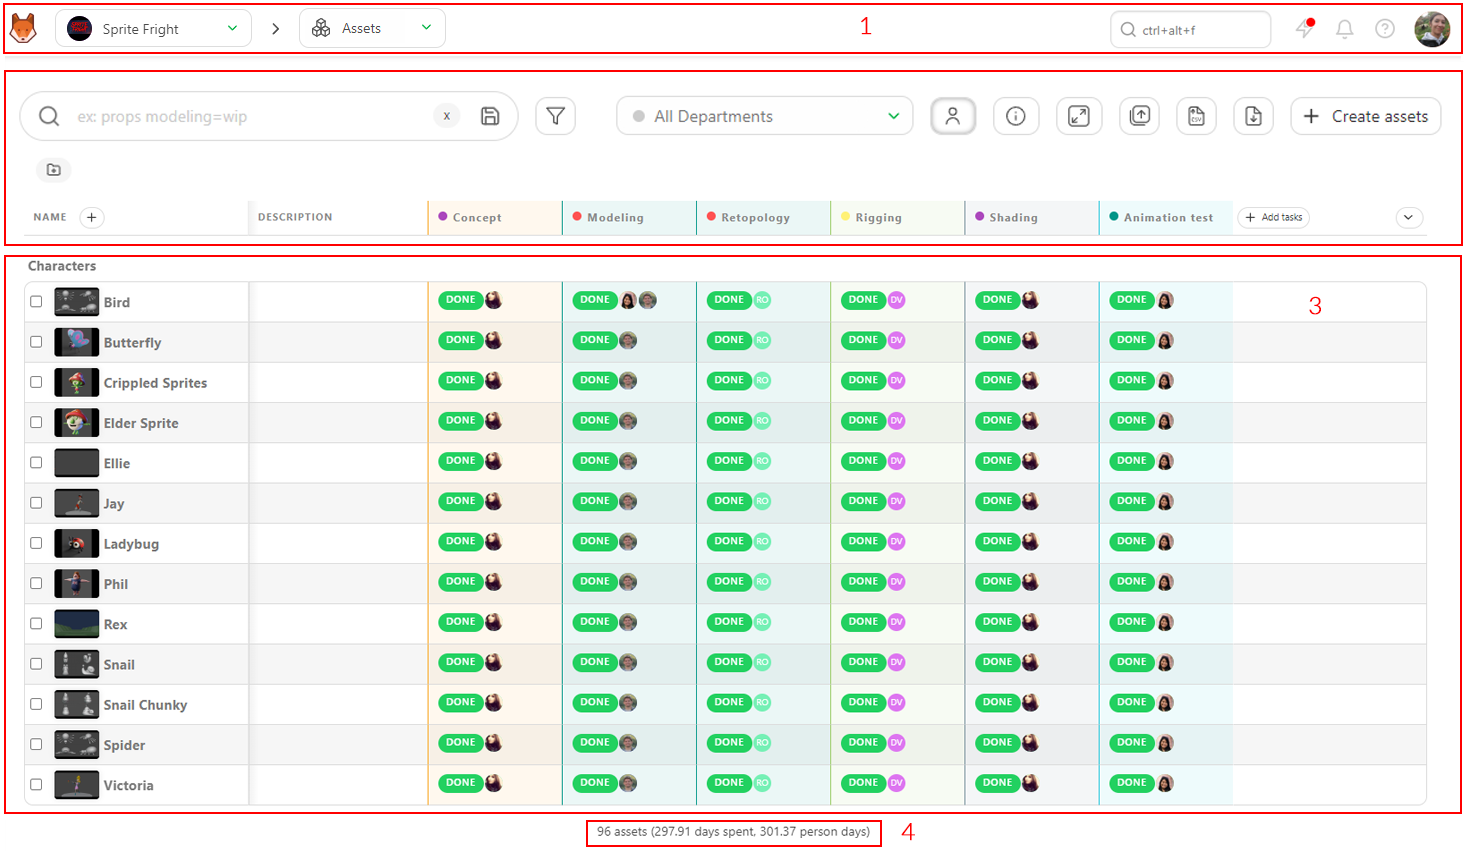
On the top part (1), you have the global navigation, which is always visible throughout all the production pages.
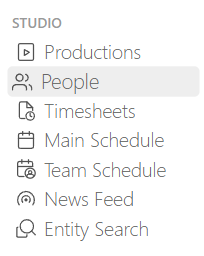
With the main menu button  , you can go to your productions and your tasks (it's common to all permissions). And because you are an administrator, you can access extra options, like the global view of the schedule, timesheets of your whole studio, and workflow customization.
You can choose between production. The name of the actual production is displayed now, but thanks to the dropdown menu, you can navigate from production to production (if you have several).
The next dropdown menu is here to help you navigate through the different pages of the production. You always start with the asset page, but you can switch to shots, sequence, statistics, team, and breakdown. This dropdown menu lets you change the production setting (including the workflow).
If you have defined your production as a TV Show, you will have an episode dropdown menu with the All assets, Main pack, and episode options.
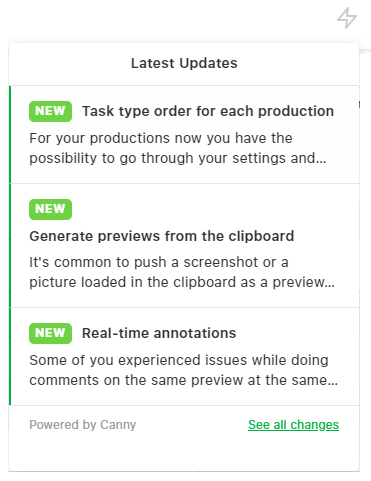
You have the global search and news from Kitsu on the right of the top screen. You can see all the new features with an animated gif.
 .
.
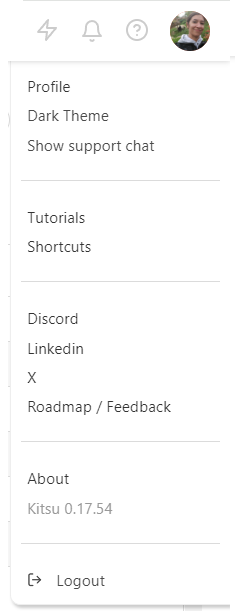
Then, the bell shows you your notification (assignation, comments, tag) , the last icon before your avatar is the documentation button.

Then, use your avatar to open your menu (setting, documentation, etc.).
 .
.
The second part of the screen is common to the asset and shot page. This part always sticks to the top of the page, even if you scroll down.
The first element on the left is the filter box. You can type anything you want for simple filtering, sequence, asset type, etc.
If you need more advanced filtering, please use the filter builder button.

You can then save all the filters and use them as your pages.
On the right part of the screen, there are some buttons (from left to right) to hide or display the assignation, hide or display the extra column, enlarge or reduce the thumbnail,

batch import thumbnail  , and finally import
  or export
  data.
data.
Below, you have the name of the column. the (+) next to Name  is here to create a new metadata column. Then, you have the name of the task type column.
On the far right of the screen, next to the scroll bar, is the option to hide and display a text column
 .
.
We have created a Studio and test metadata column in this example.
The last part (4), at the bottom of the screen, is the sum-up of your displayed page. It means the sum-up will update if you filter the page.
You can see the number of elements (assets or shots), the total number of estimated days, and the total number of already spent days.
# Add a New User
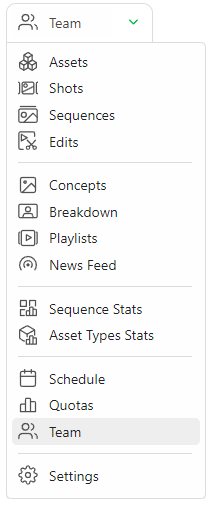
Each Artist required an account. Go to the dropdown menu , and under the Studio
section, choose PEOPLE page.
Then, click on the + Add a new user button.

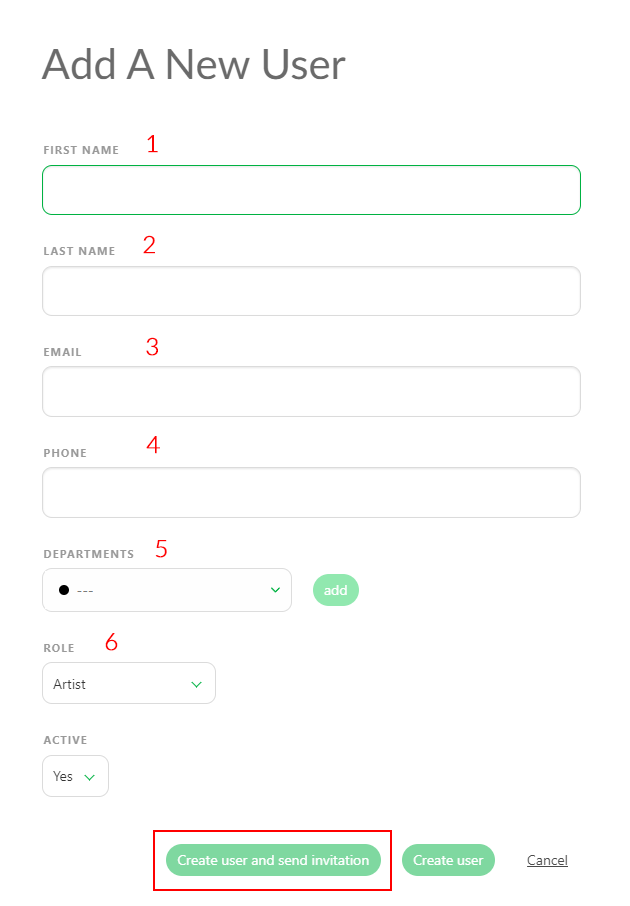
A creation window opens. You can enter the first (1) and last name (2), the email (which is mandatory to create the account) (3), and the phone number (4).
You can add the new user to a Department (or several) (5). See Department Documentation
Then you need to define the role of the user: ** Artist**, Supervisor, Production Manager, Studio Manager, Vendor or Client (6). If the Artist is working right now, keep him active; otherwise, select no. Validate by clicking the Confirm button.
See the permissions section for more information. Artists, supervisors, production managers, vendors, and clients only see their assigned productions.
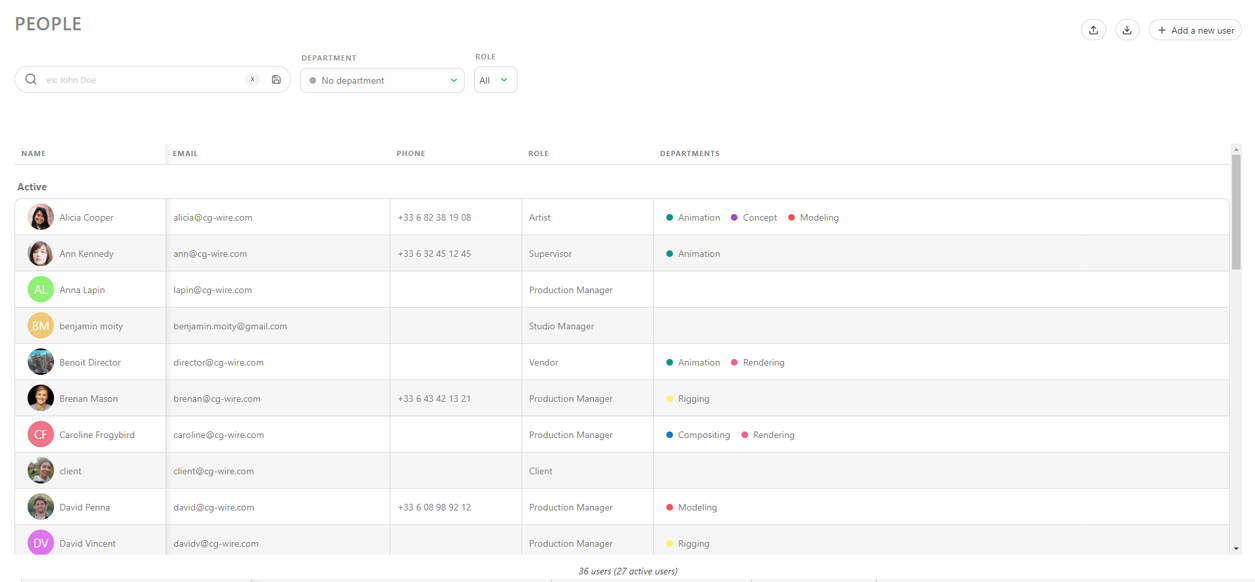
All the people are now part of your studio. They are added to a specific production when you add them to a team on a production. Otherwise, they won't have access to anything.
# Add a User to the Team
You need to add someone to a production to assign him a task.
On the dropdown menu at the top of the page, select the TEAM page.
On the Team page, you can see all the assignations for a specific project. Switch to the page's top if you want to check another project team.
# Assign Tasks to an Artist
We can now return to the ASSETS page via the dropdown menu.
 .
.
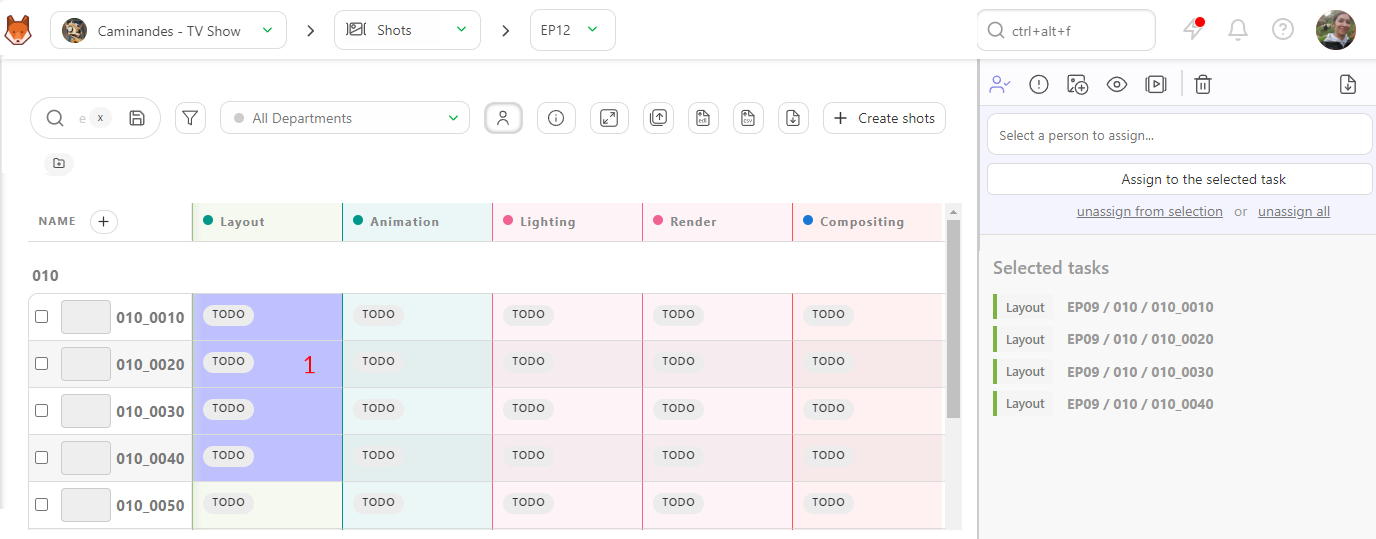
Now it's time to do your first assignment!
Click on the status (1) you want to assign.

The comment panel appears on the right of the screen with the action tools.
You can now do the assignment. Click on the text input to see the list of available people. Click on a person's name to perform and select him. Then click on the confirmation button to complete the assignation.

You can assign tasks to the same person in one step (1). Once the blue menu is visible, press ctrl on your Keyboard and select multiple tasks. You can even use the shift key to choose a range of tasks (2). When you have chosen everything you need, apply with the Confirm button.
In the same way, once you have selected someone, you can click on or unassign from selection to remove this assignation.
When you finish all the assignations, quit this mode using the Escape key, or the cross on the top right corner of the action box.
Now you can see the avatar of the Artist next to each status.
To unclutter the list, you can hide this information with the Hide
assignations button on the top of the spreadsheet  .
.
Once you assign someone, he is part of the production team. Depending In his position (Artist, Supervisor, Vendor), he only sees the production where he's assigned.
Now, everybody knows what to do and who is doing what!
# Select the status for the Artist board page
When you assign a task to an artist, they will see the task on their todo page when they log in.
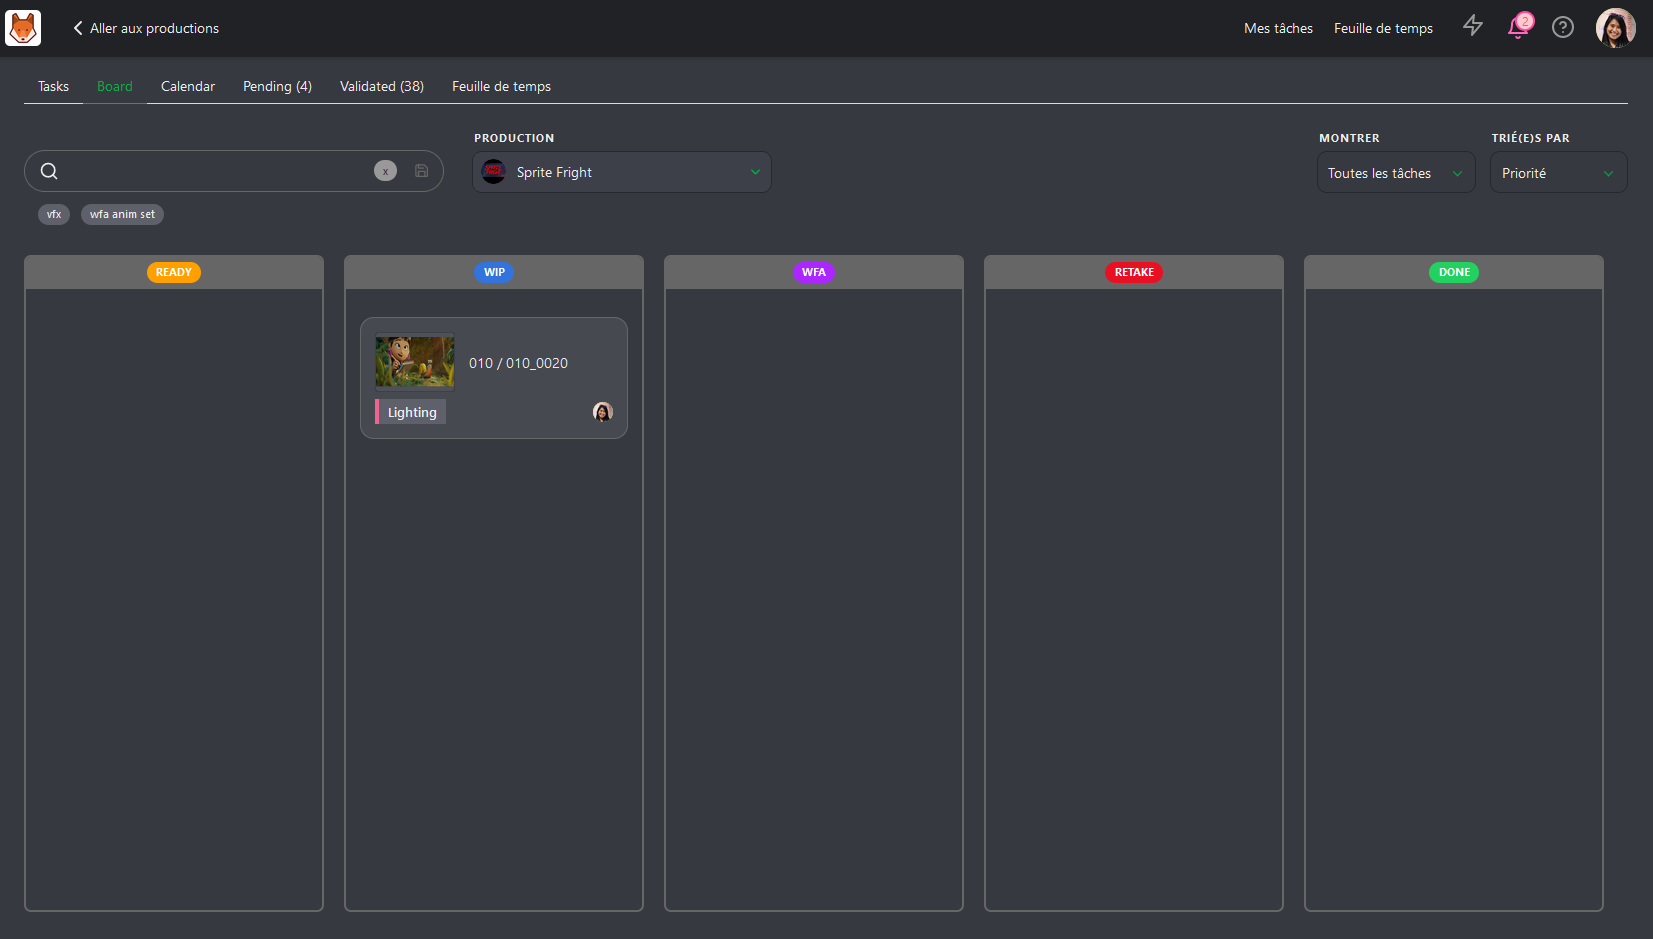
But they can also choose to display their task as a board view. Each Status will be a column, and the assigned task is a card that can be move from status to status depending on the progress of the task.
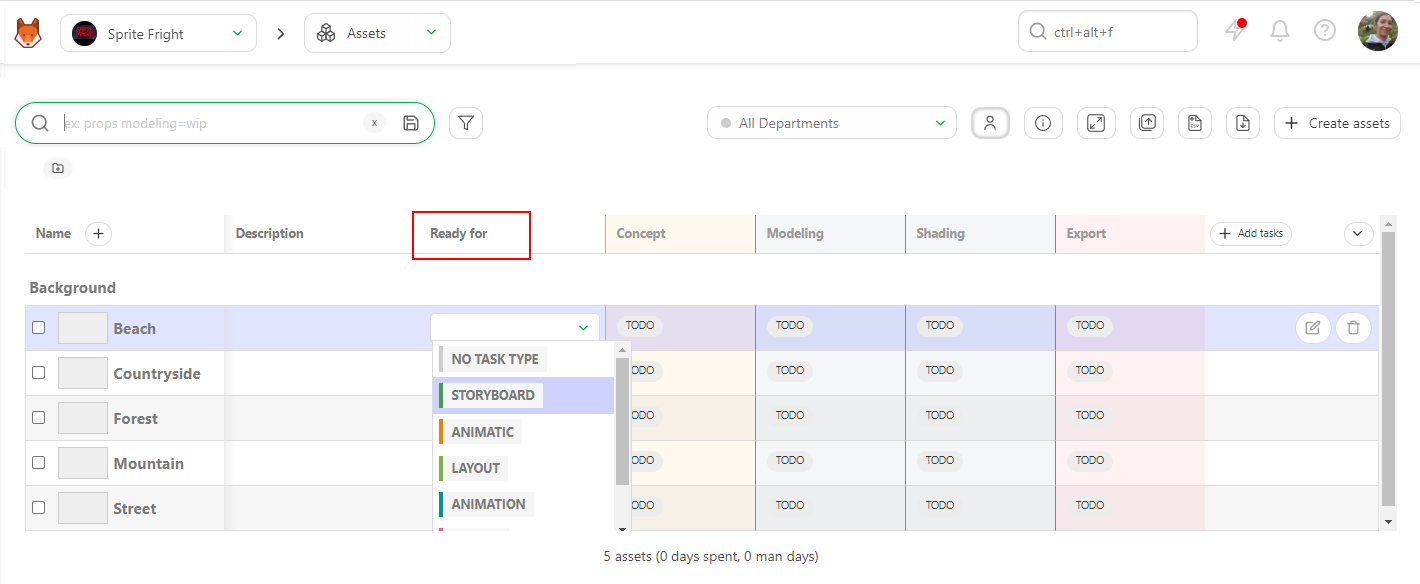
To setup the board view, you need to go to the setting page of your production.
Then go to the Task Status tab. You see the list of the status used on your production.
It will be the same status used as column on the board page. You can drag and move the satus to change the order as they will appear on the board view.

The next step is with the Board Status page.

Here you can choose which status will be displayed on the Board page depending on the permission.
Once it's done you artist should have a page like this.
# Add the Frameranges
At this stage of the production, the animatic should be done. This means you have the length (number of frames, frame range In, and frame range Out) for each shot. You can add this information to the spreadsheet. This way, you are sure that all the frames are calculated and none are missing or over-computed.
You may also be able to add a camera as an asset!
You need to edit the shots to fill in the frame range information. Click on the
edit button on the right
side of the shot line.
You can enter the shots In and Out on the new window. Then, save with the Confirm button.

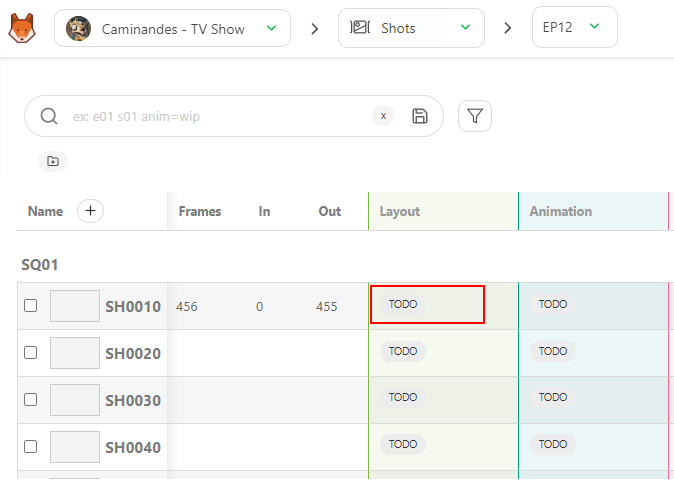
Now, the frame range appears on the general spreadsheet of the shot page.
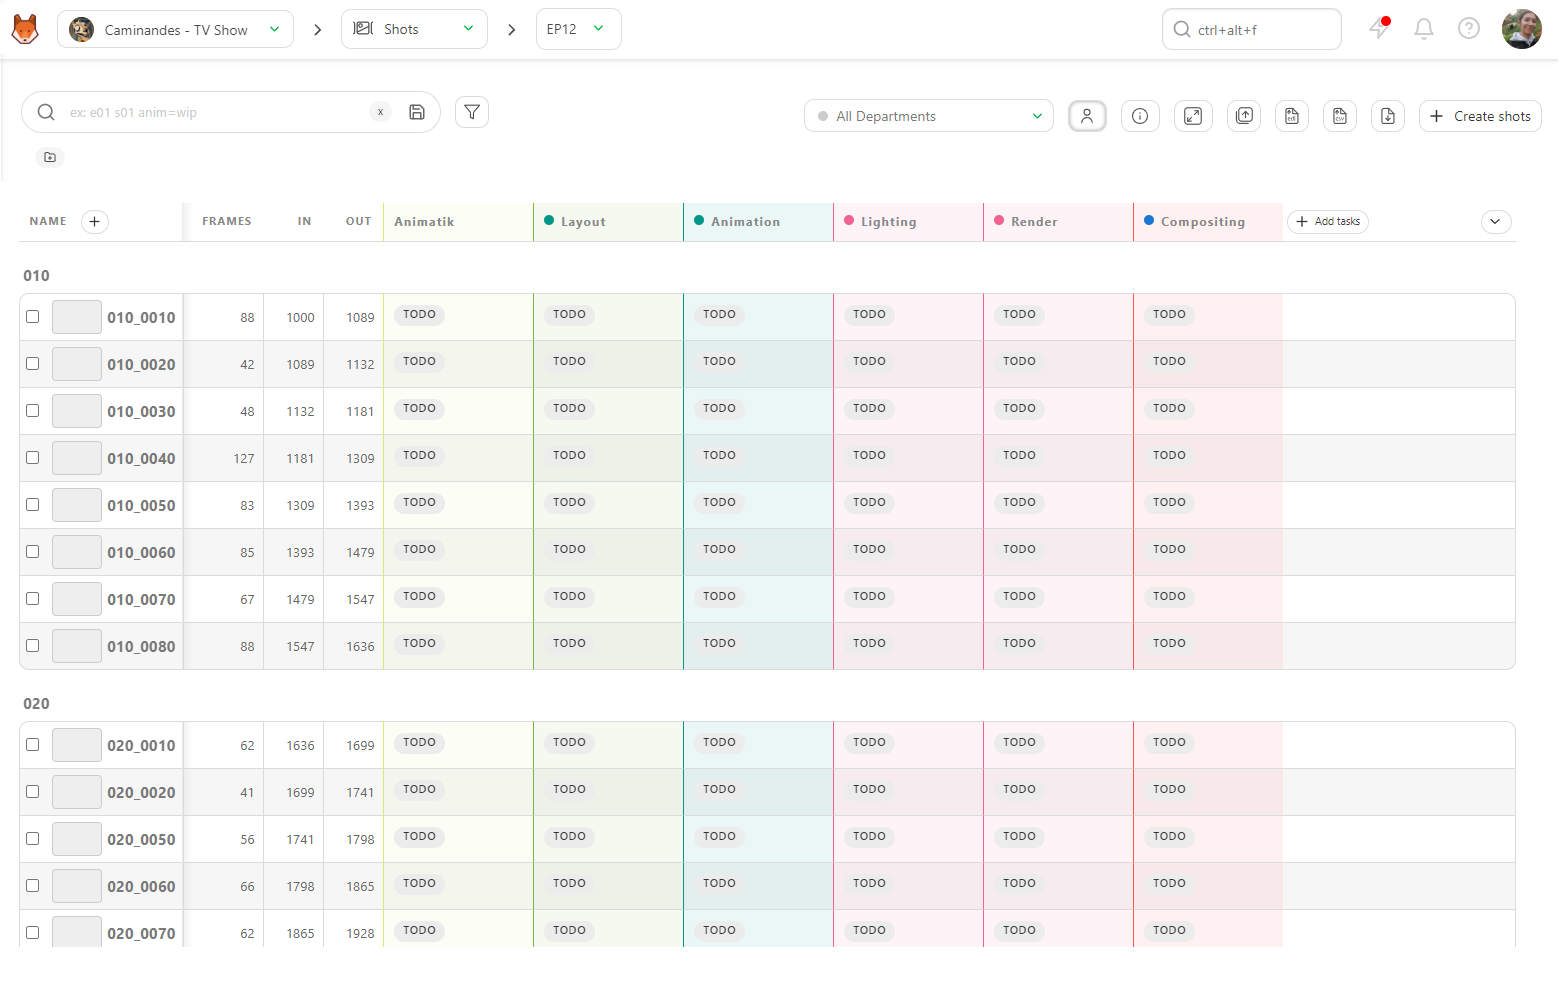
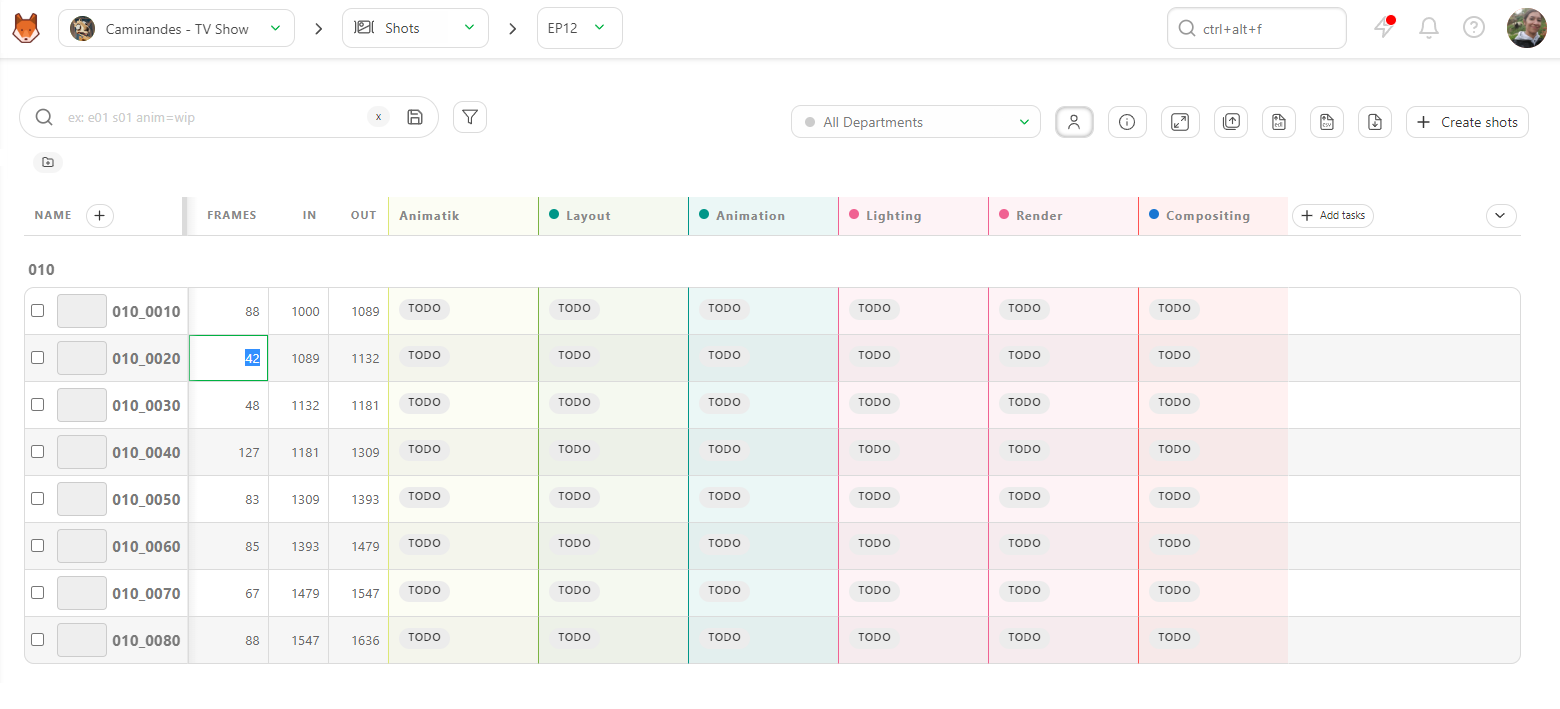
Now that you have unlocked the Frames, In, and Out columns, you can fill them directly from the global shot page.
Click on the case you want to fill in and add the data.
If you fill in the Frame In and the Frame Out, Kitsu will calculate the number of frames automatically.
You can also use the CSV Import to update your frame range quickly. Update Shots information with CSV Import
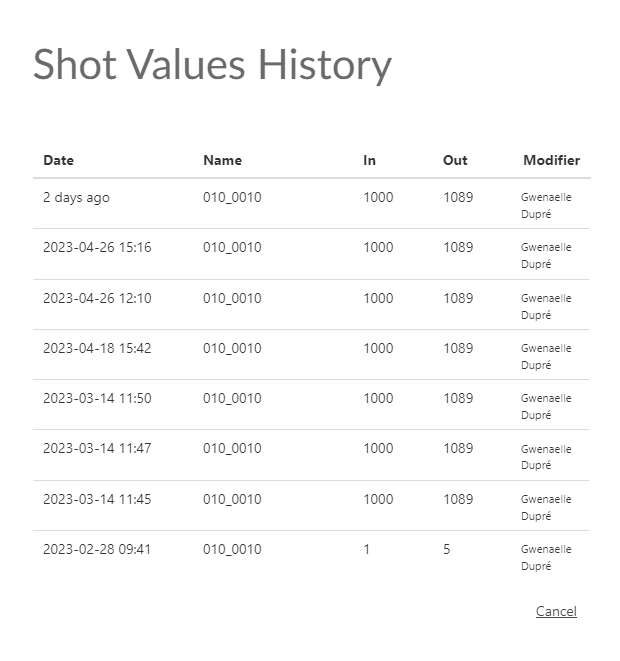
You can have access to the shot values history, too.
# Change Status and Add a Comment
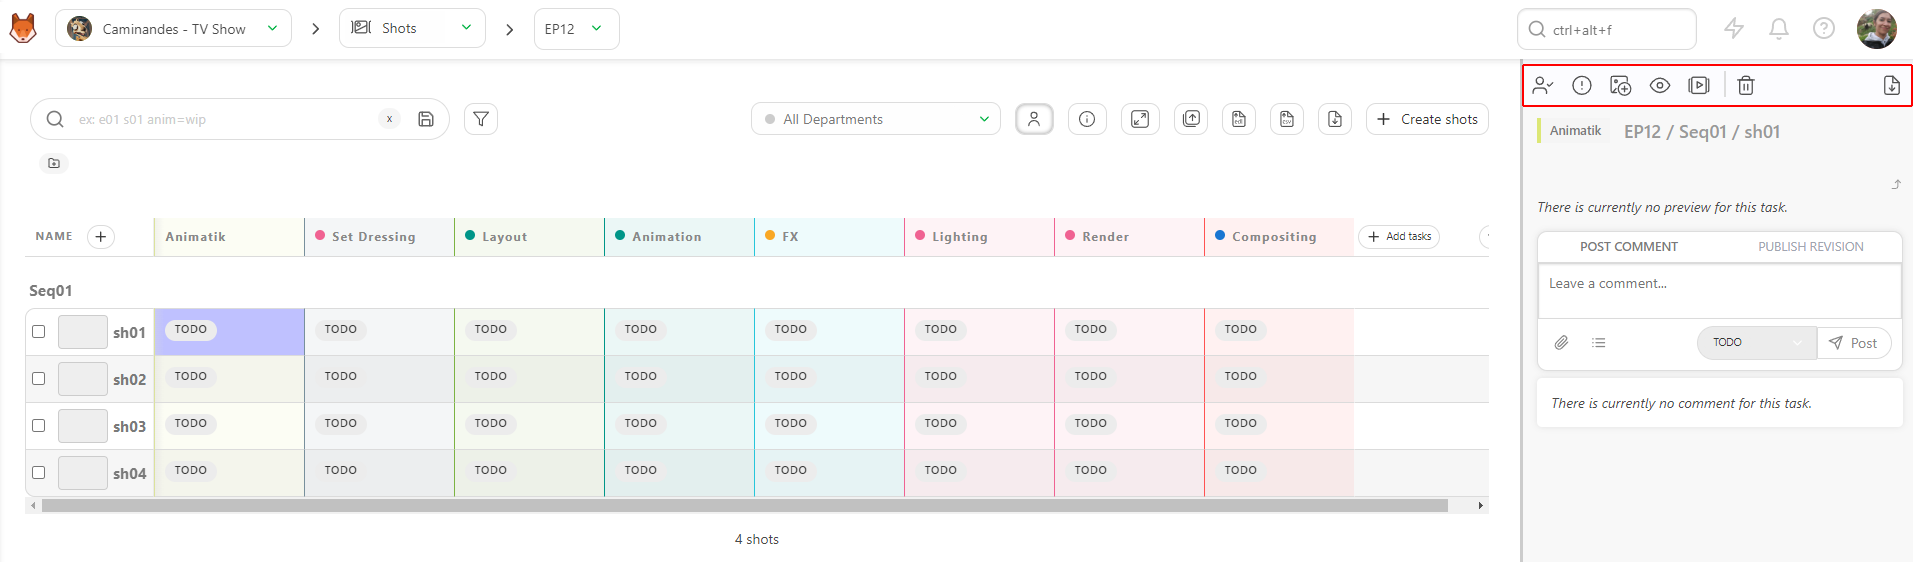
To change the status of a task and write a comment, you need to click on the status of the task.
It makes a panel appear on the right, and here, you can write a comment, change the status, and attach a file.
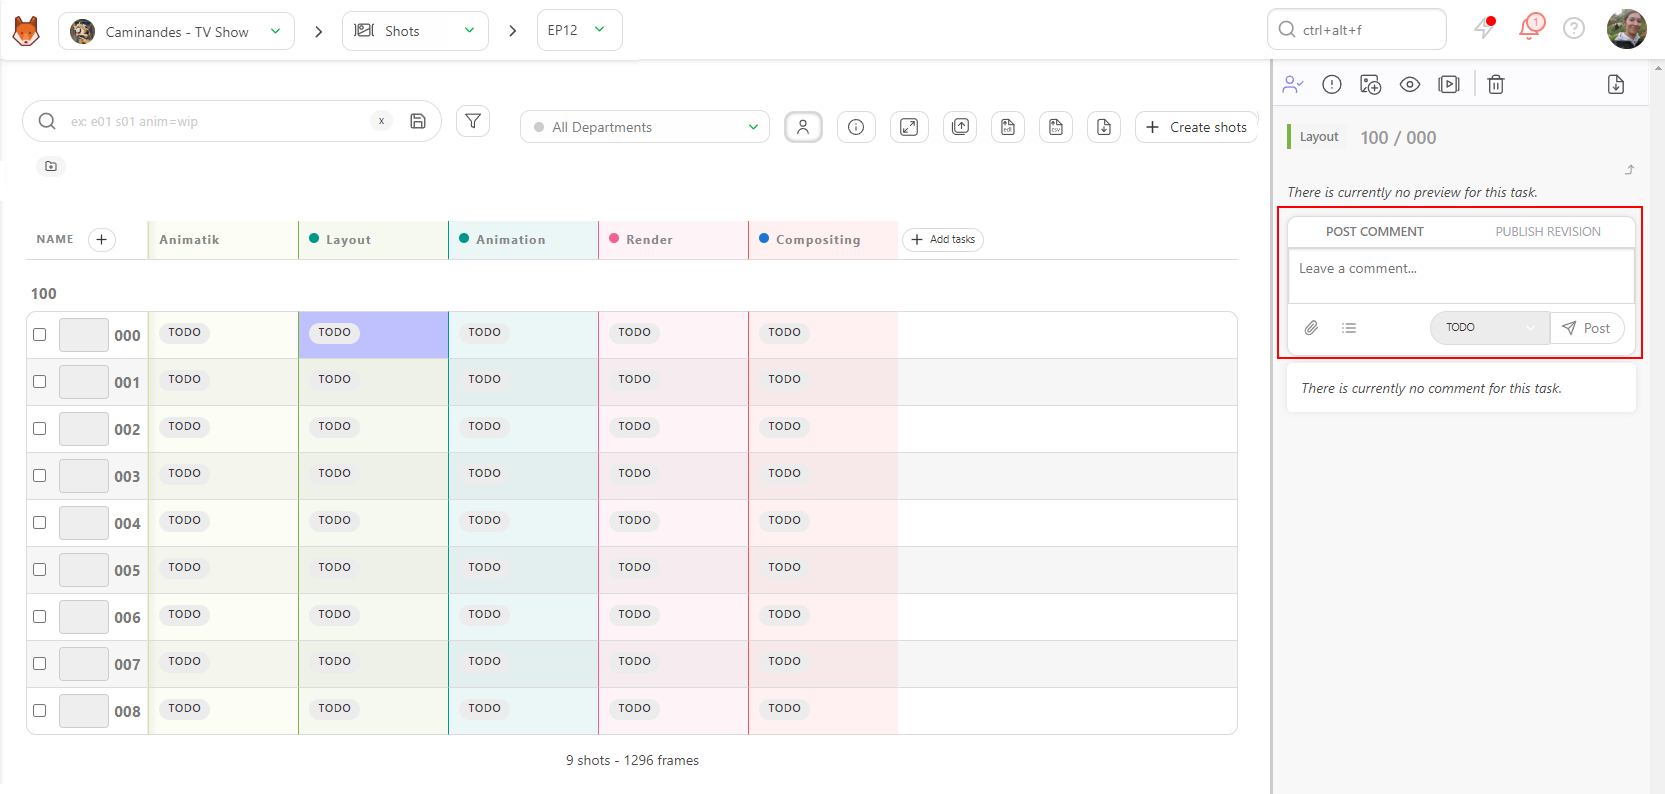
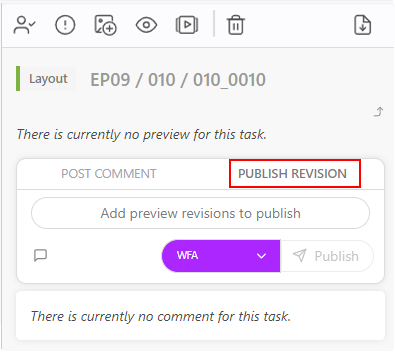
The Commen Panel is split into 2 tabs :
- POST COMMENT
- PUBLISH REVISION
To change the Status, stay in POST COMMENT tab.
The comment uses the Markdown language. If you need specific syntax, feel free to look at the markdown guide website: https://www.markdownguide.org/basic-syntax/
On the Leave a Comment... section, you can tag someone on the team in the comments. Type the @and it opens a sub-menu with the list of the team.
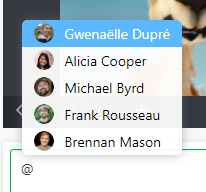
You can also tag a full department by typing '@' and the department's name.

You can add a checklist to your comments.
You need to click on the Add checklist button, and the first item of the checklist appears.
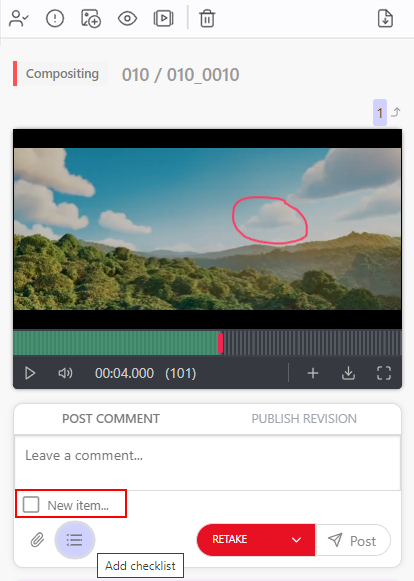
Type your comments, hit the Enter key to add another line to your checklist, or click the Add Checklist button again.

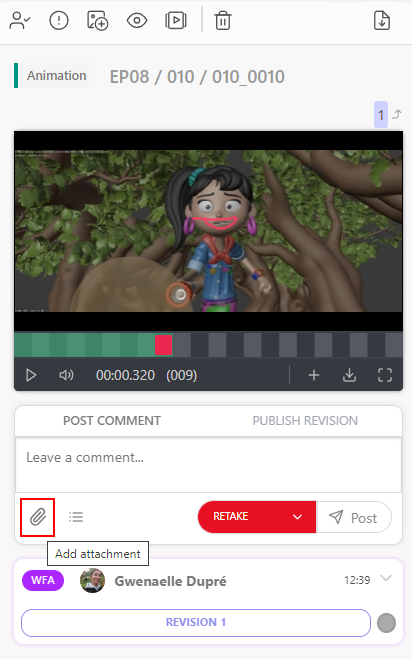
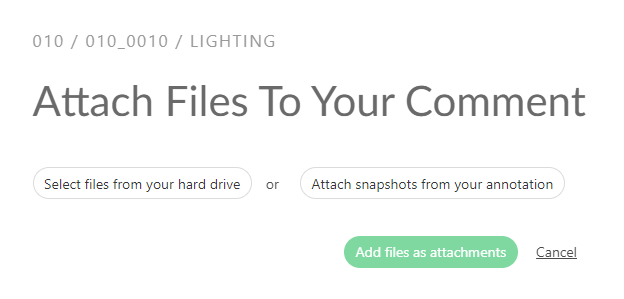
Besides your comment, you can also attach a file as a picture. Click on the Add attachment button.

Select a file from your hard drive or past a screenshot here.
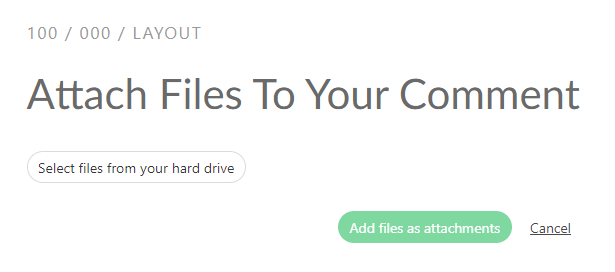
Validate the attachment by clicking on Add file as attachment.
Then select the Status that you need on the dropdown menu.

Then click the Post button to post it to the world.
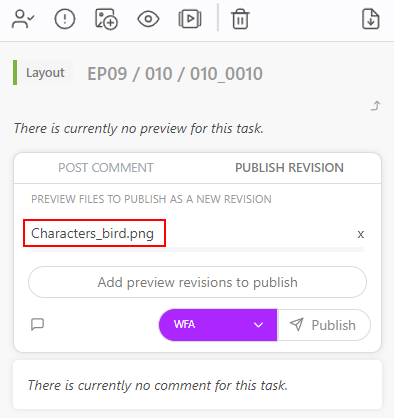
# Publish a Preview as a Version
To publish a preview, picture, or video, select the PUBLISH REVISION tab on the comment panel of the task.
Kitsu will automatically switch to the Publish Revision tab when you use status with the option IS FEEDBACK REQUEST, like the WFA Status.
You can add one or several previews to any comments. It can be a picture (.png, .jpg, .jpeg, .gif), a video (.mp4, .mov, .wmv),
or an .glb file. You can review all the previews from the browser or mix everything.
For the .glb file you can also review it as wireframe, or add a .HDR file to check the lighting.
See the Customization section for more details. Pipeline Customization
Other files like .pdf, .zip, .rar, .ma, or .mb, however, need to be
downloaded to be reviewed.
Then, click on the Add preview revision to publish button. The explorer opens and lets you choose your file or several files.
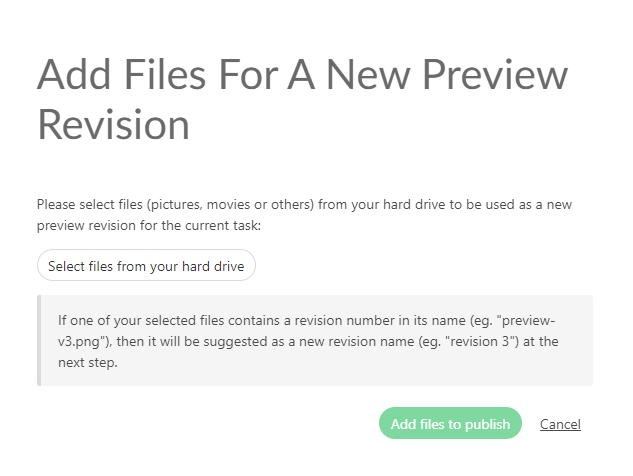
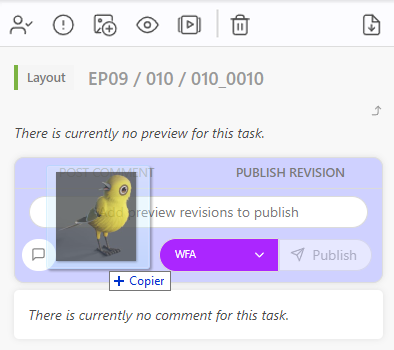
You can also copy-paste a screenshot to this screen.
You will see a preview of the attached files.
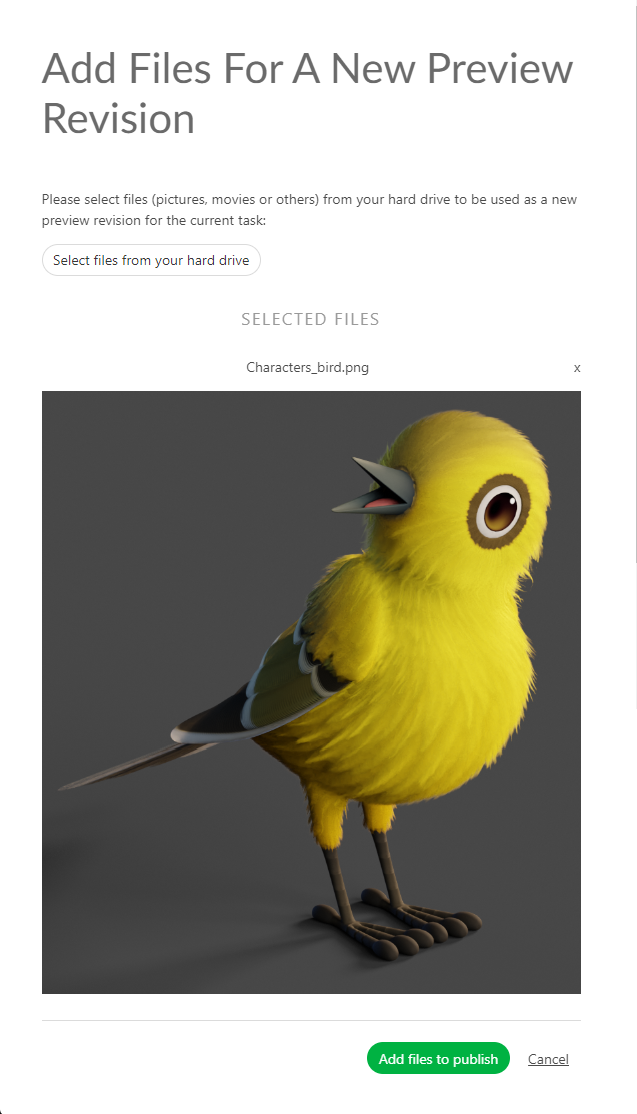
Once your file is selected, you will see its name near the Attach preview button.
You can also drag & drop the file in the comment section.
On top of your preview, you can add a Comment.
Click the Leave a Comment button to unfold the comment section.

You can select your status and publish your preview with the Post Button.
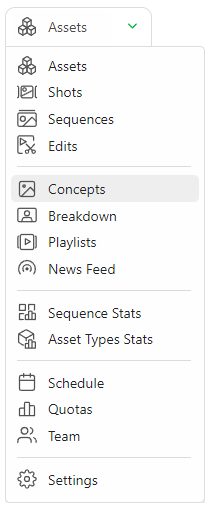
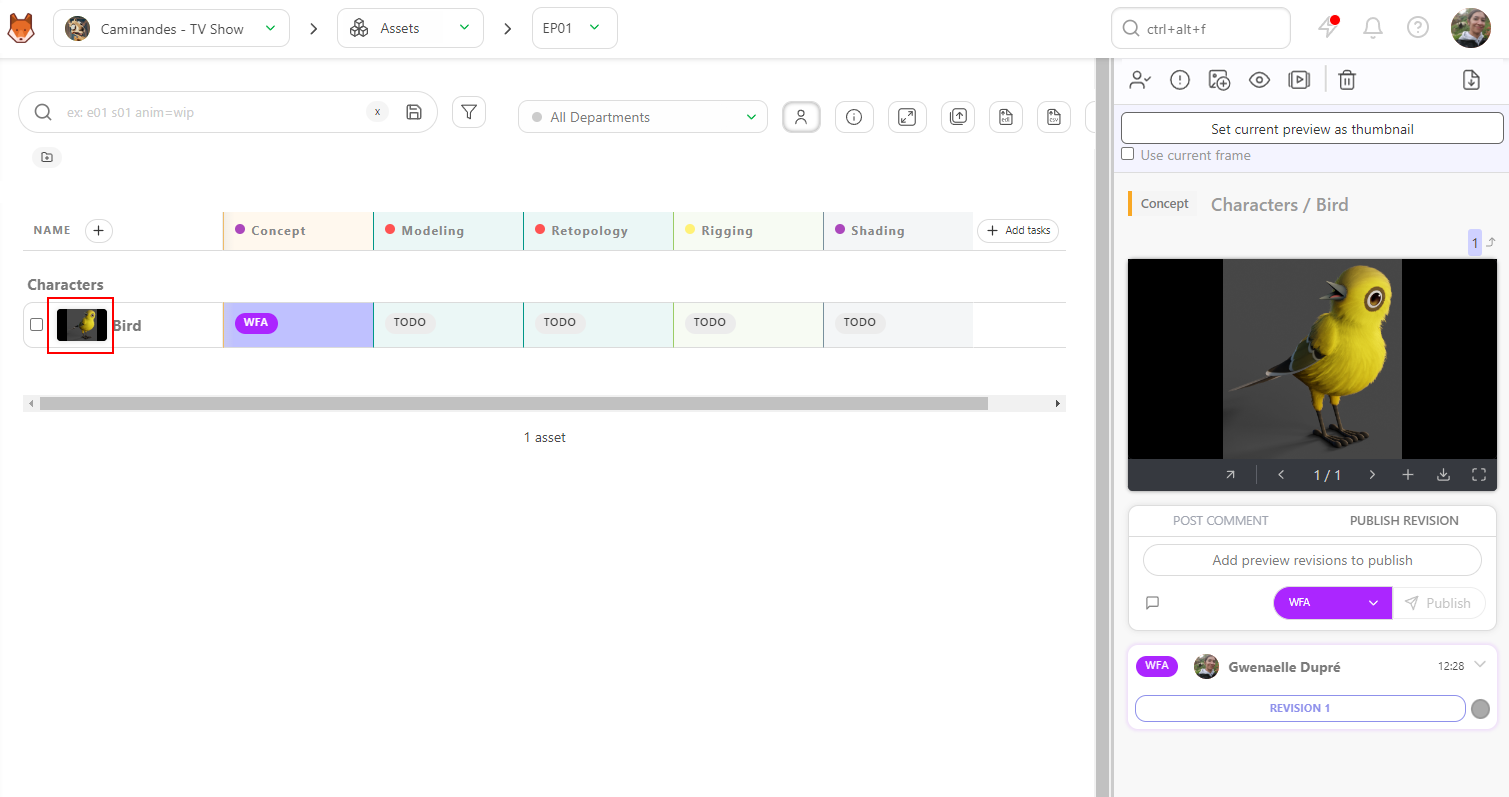
# Publish a Concept
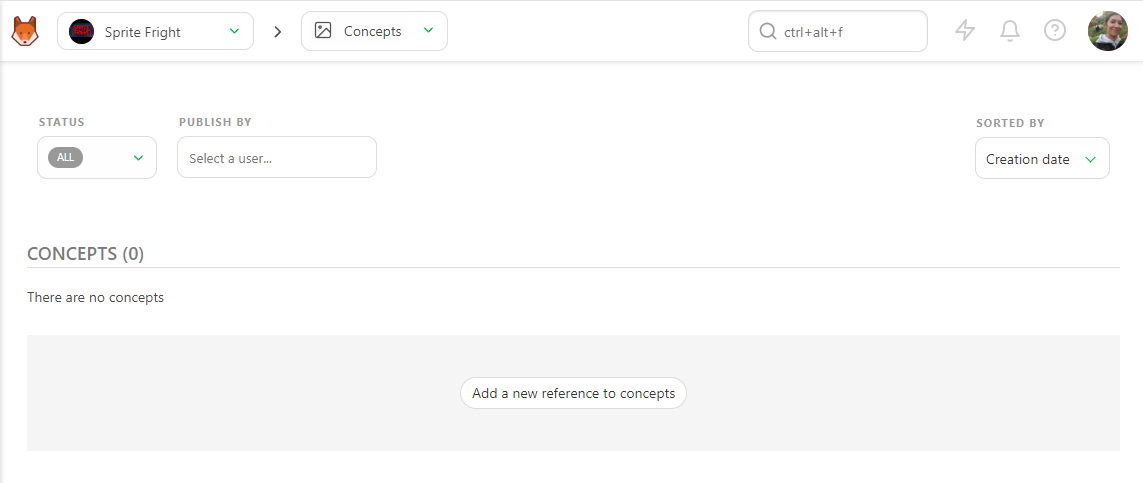
To publish a Concept, go to the Concept page with the navigation menu.
To upload a concept, click the Add a new reference to concepts button.
You can upload one or several concepts at the same time.
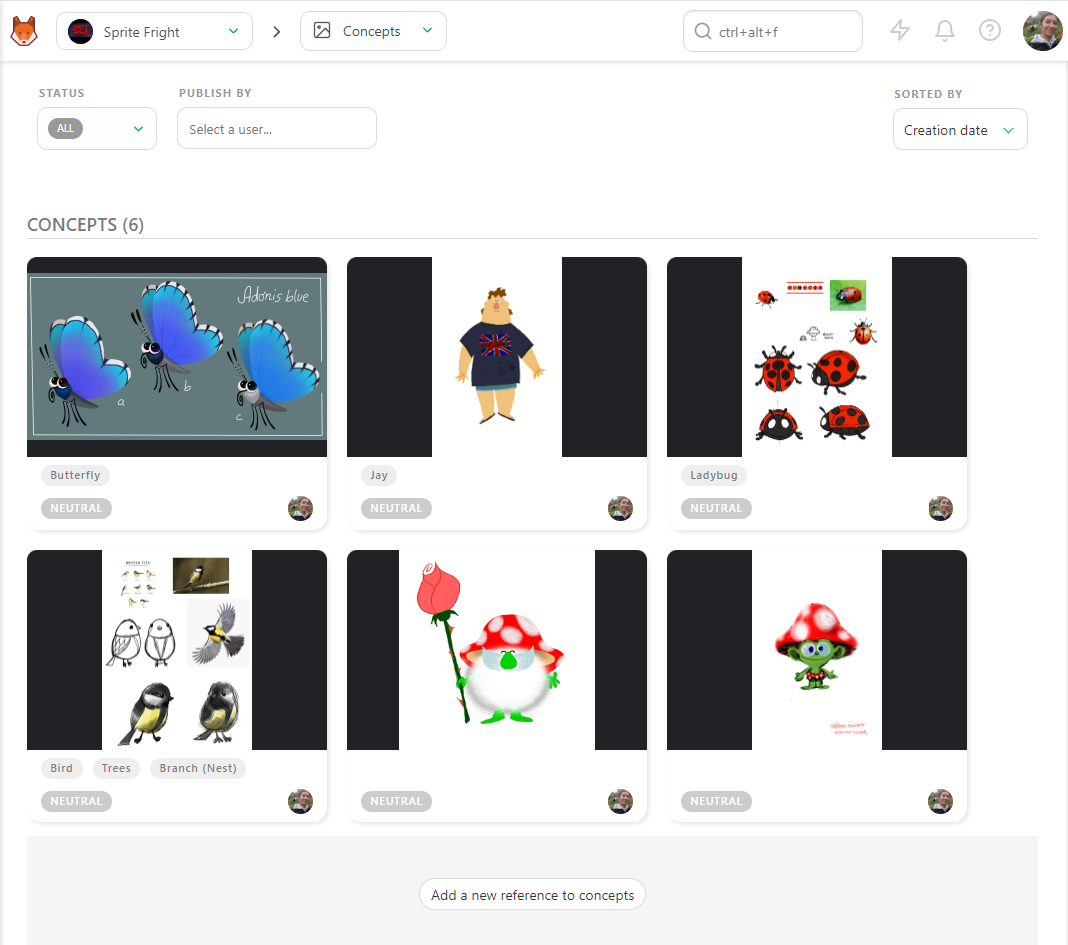
Once you upload your previews, the concept page will look like this.
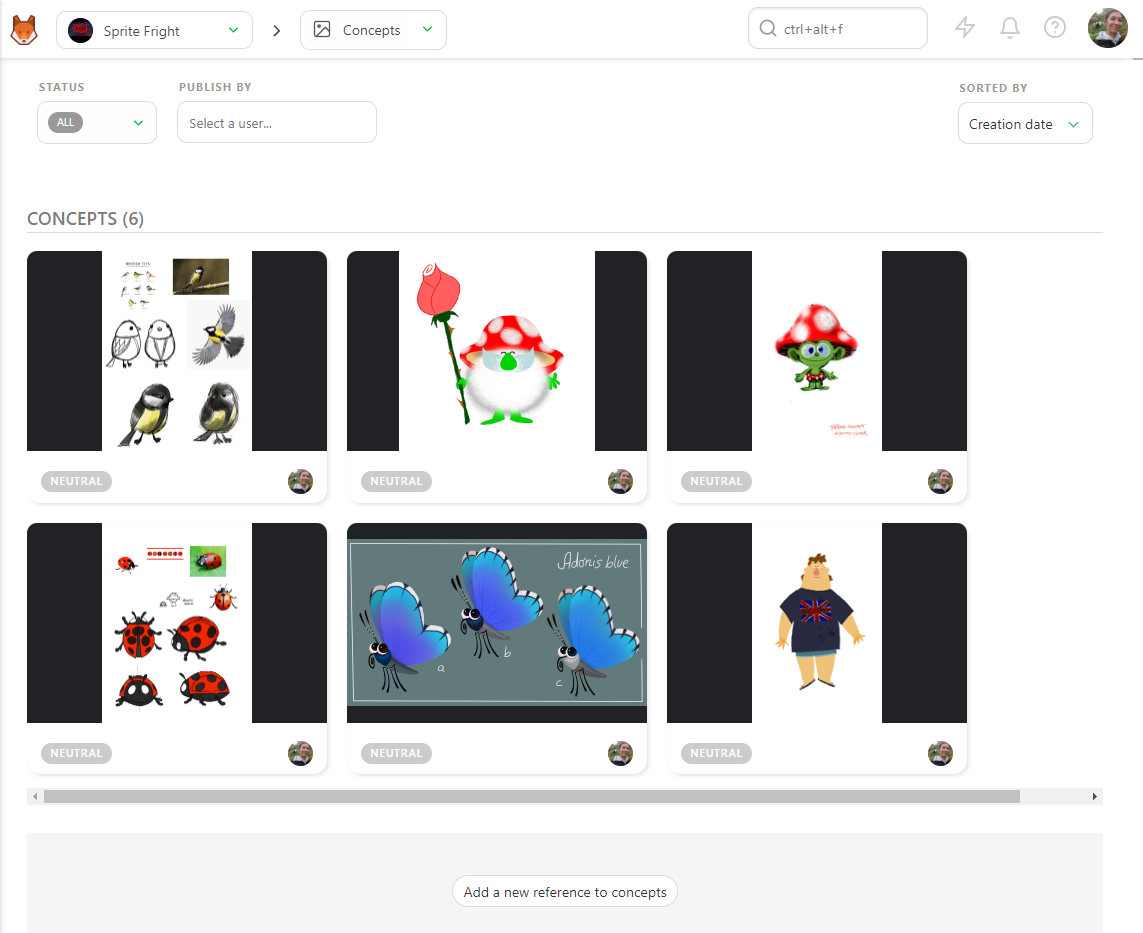
You can interact with the concept in two ways: click on the picture to see an enlarged view. The second is to click on the status part to open the Comment Panel on the right.
You have two options on the comment panel: link a concept with an existing asset or delete the concept. You can also comment and change the status of the asset.
The idea is to have one version per Concept. If it's not validated, you need to upload a new concept, not to have multiple versions of the same concept.
One concept is one task.

# Link a Concept to an Asset
Once concepts are uploaded, you can link them to the assets.
You can see the links on the status part of the assets.
Click on the status part of the concept; it will open the comment panel on the right.
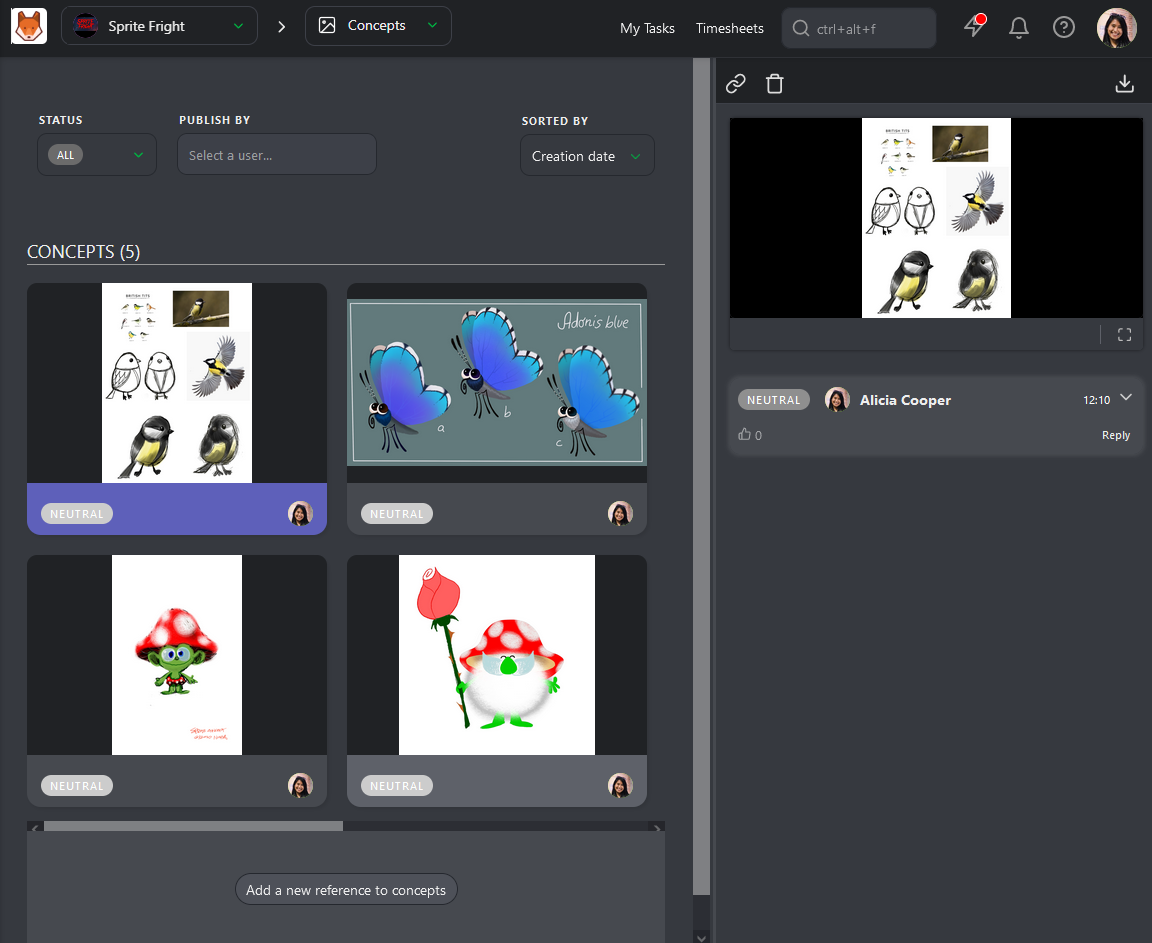
On the comment panel, you have two options on top of the panel: Link a concept to an asset and delete the concept.
To link an asset, click on the Link  button.
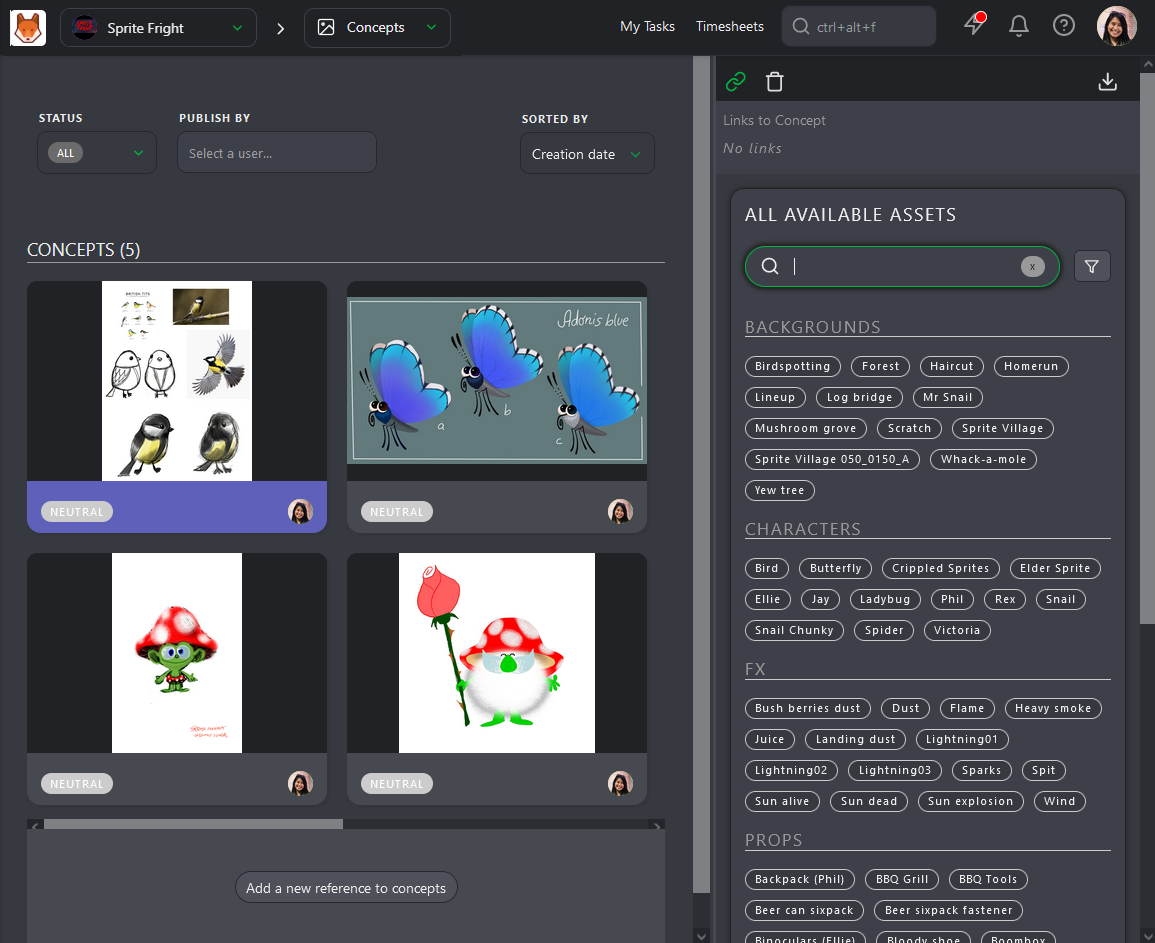
Kitsu will display all the Assets available to link with the concept uploaded.
On top of the comment panel, Kitsu will list the linked assets. For now, there are No Links.
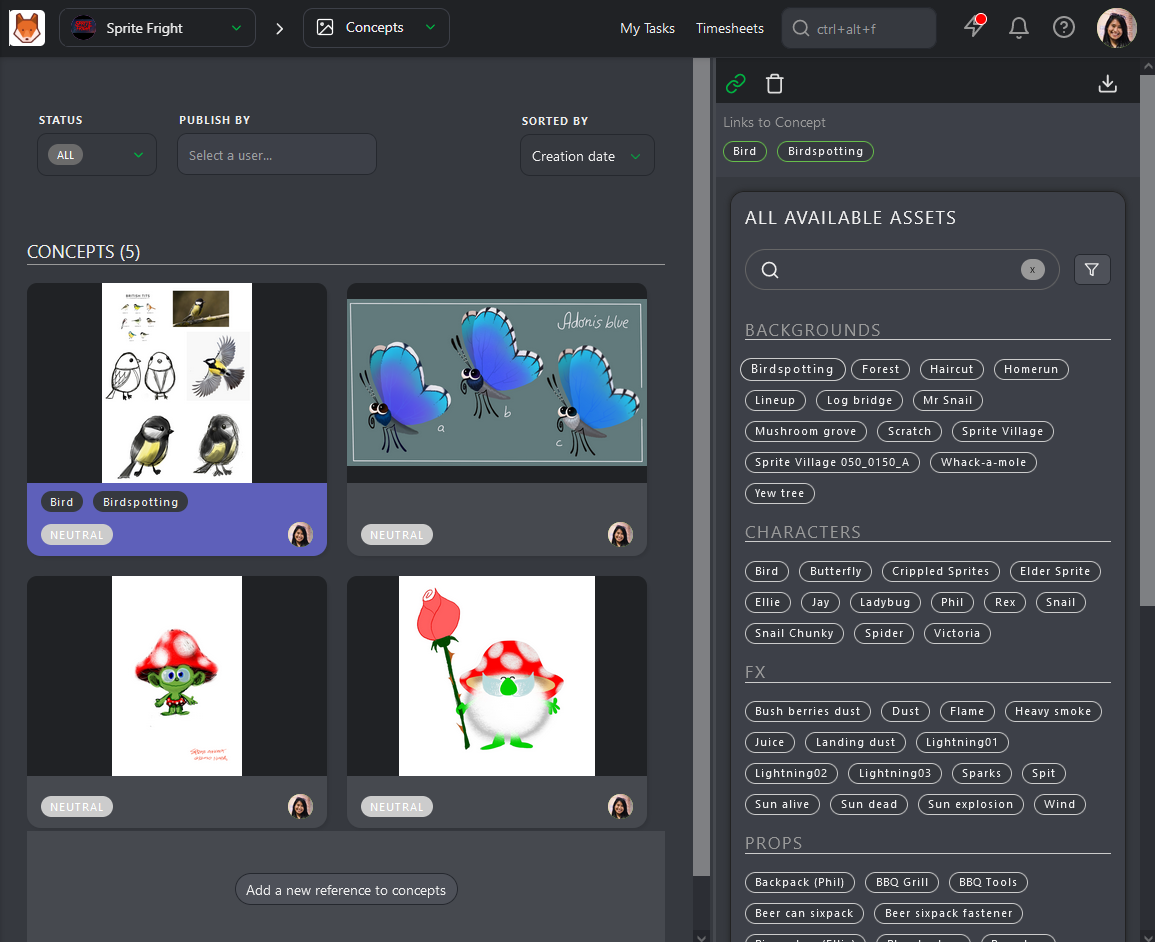
To link an asset, you have to click on it. You will see the name of the assets linked on the top of the screen, but also under the preview of the concept.
Once a concept is linked to an asset, you can see the concepts on the detail page of an asset.
Return to the asset page, and click on the asset name you want to see the concept.
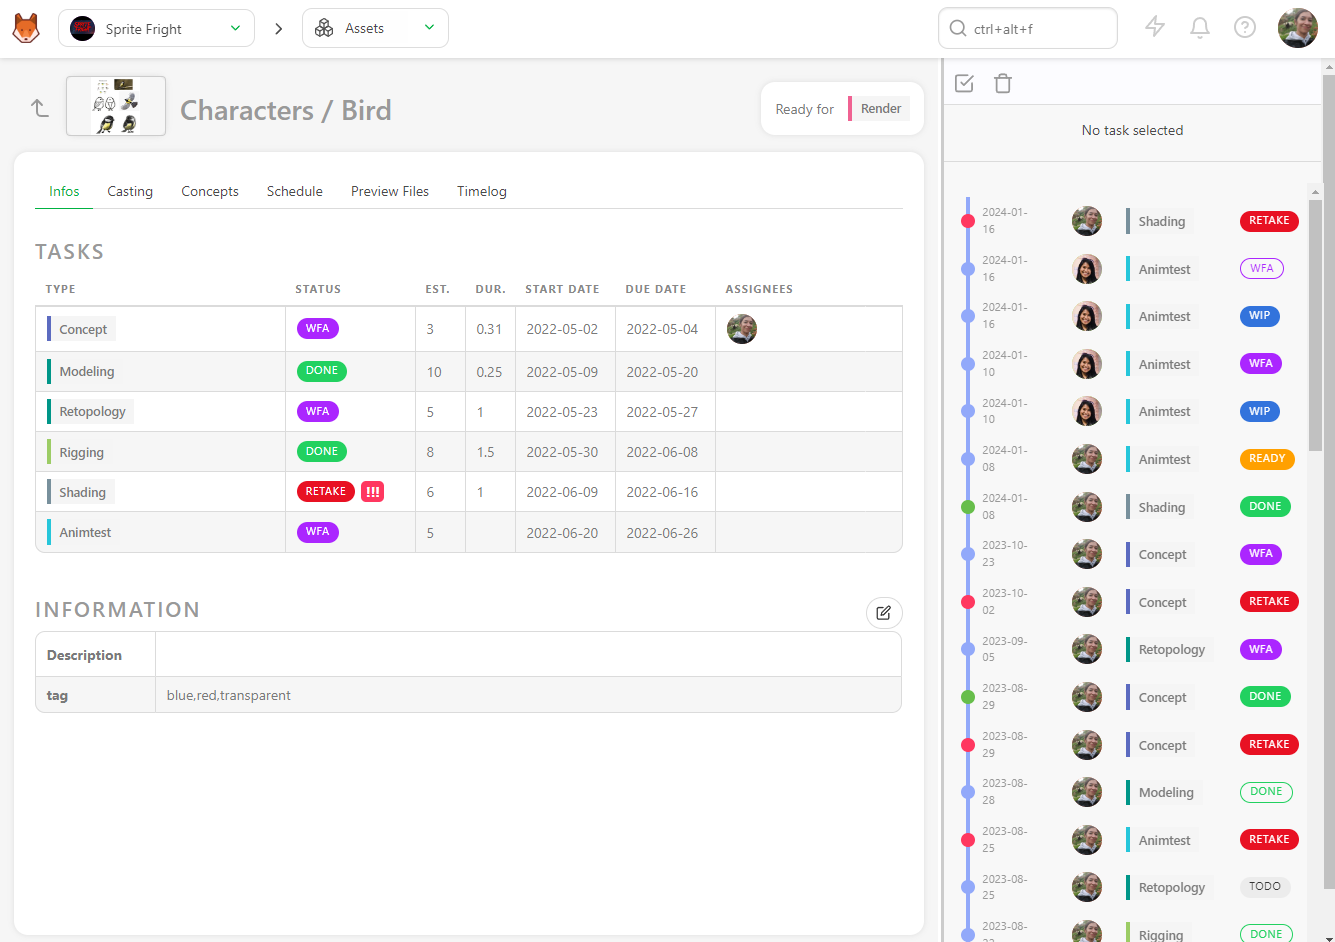
Per default, the casting detail is displayed on the second part of the screen. Use the dropdown menu to choose the concept.
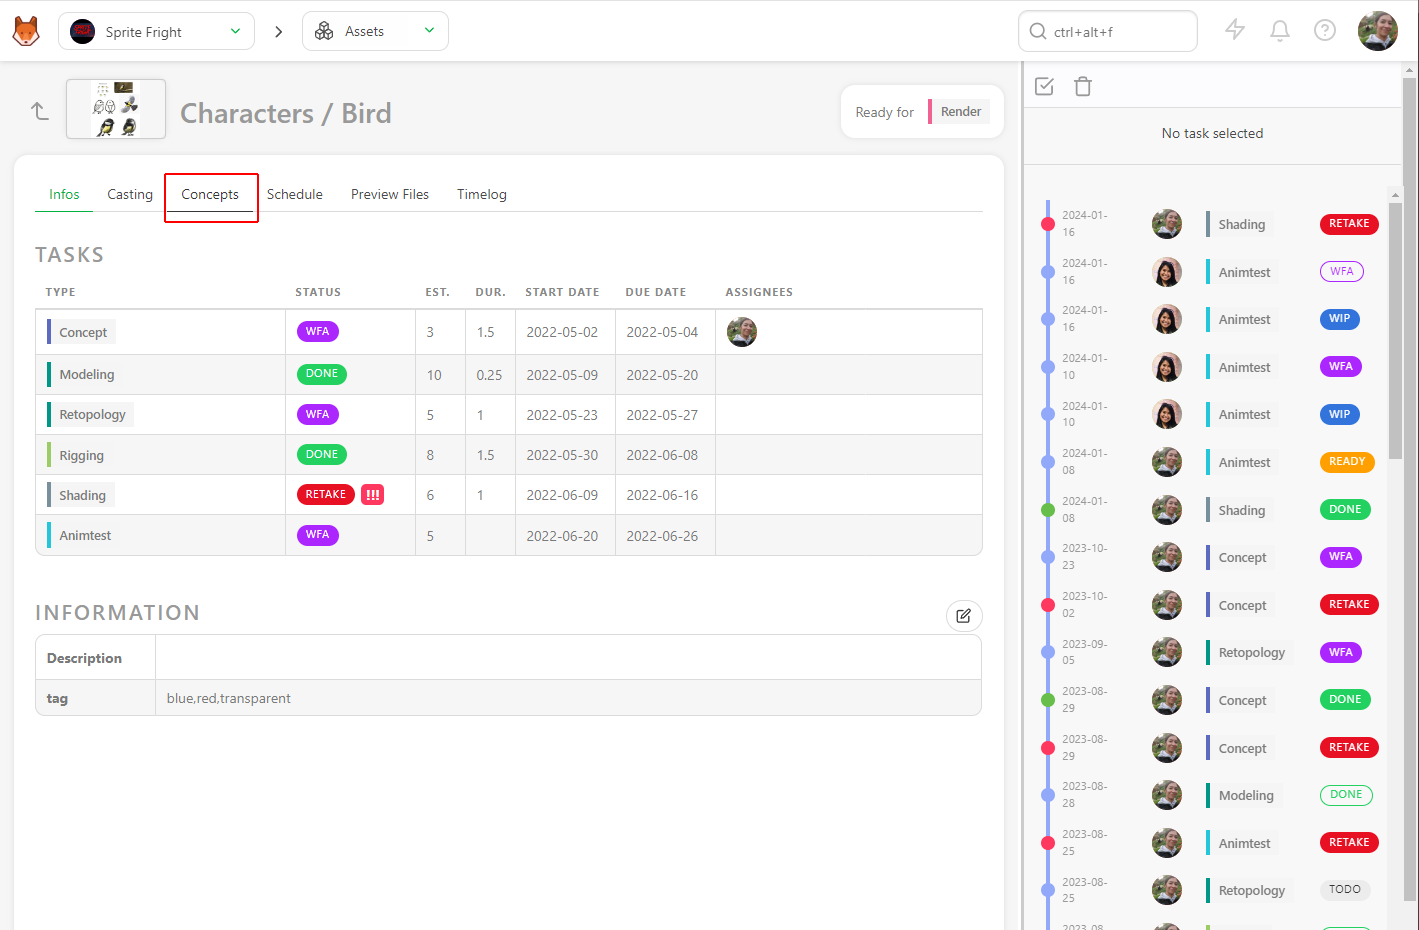
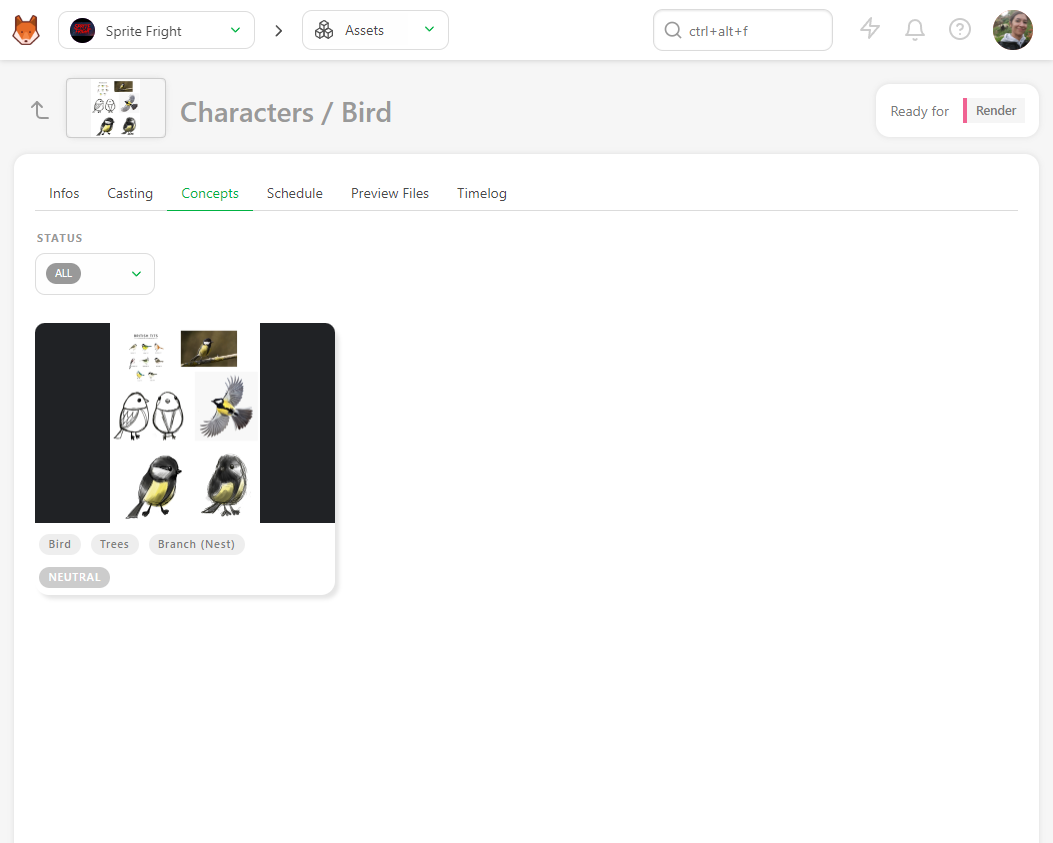
Once in the concept section, you will see all the concepts created for this asset. You can filter them per status.
# Add a Thumbnail
To define a preview as a thumbnail, the preview MUST have been uploaded as a revision.
To publish a preview, picture, or video, select the PUBLISH REVISION tab on the comment panel of the task.
You can use the preview as a thumbnail on the asset or shot task. It helps to recognize the assets/shots on the main pages. On the list page, click on the status you want, then on the right panel, click the Preview button (1).
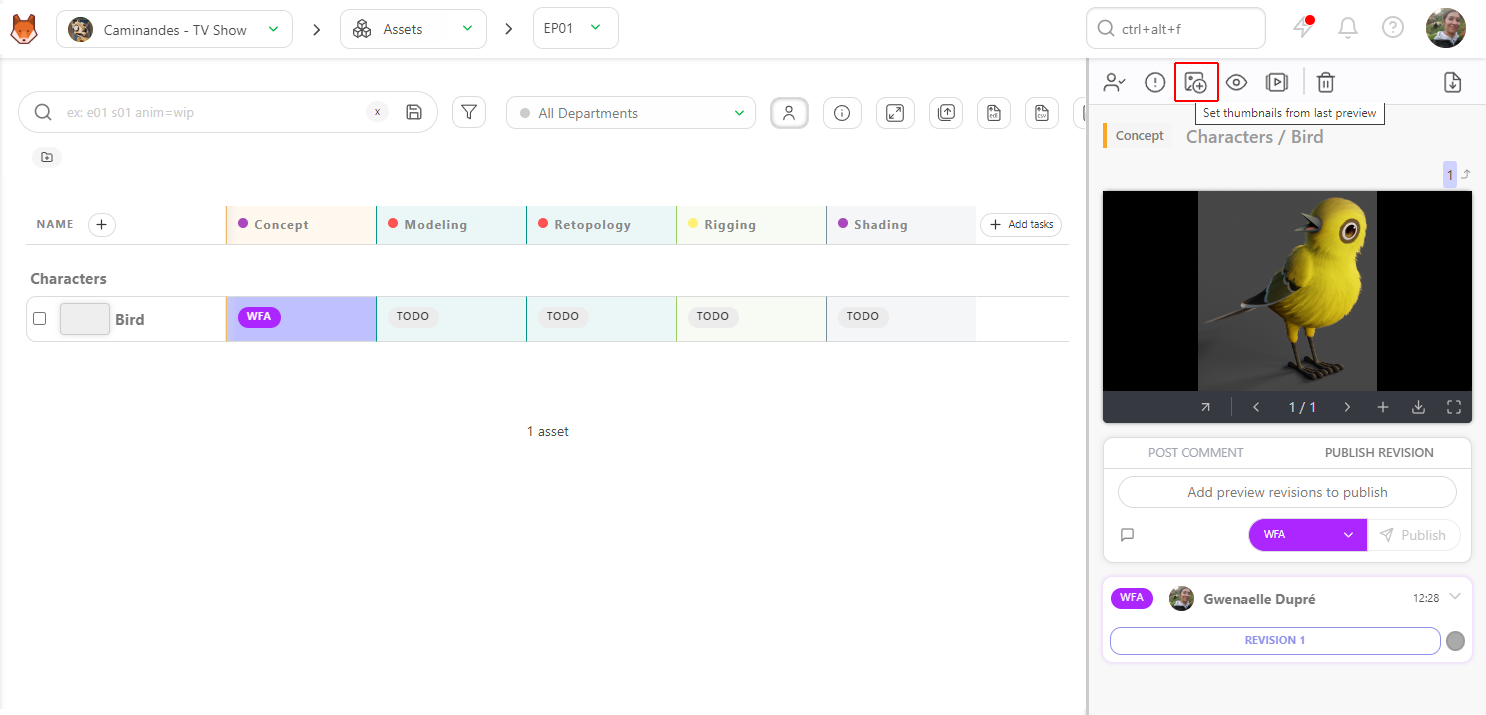
Once you have clicked on the button, you can choose if you want to pick the first or any frame; once the frame is selected, you see the thumbnail appear, and the button turns gray.
# Perform a Review
When an artist needs a review, he changes the status of his task, too  .
.
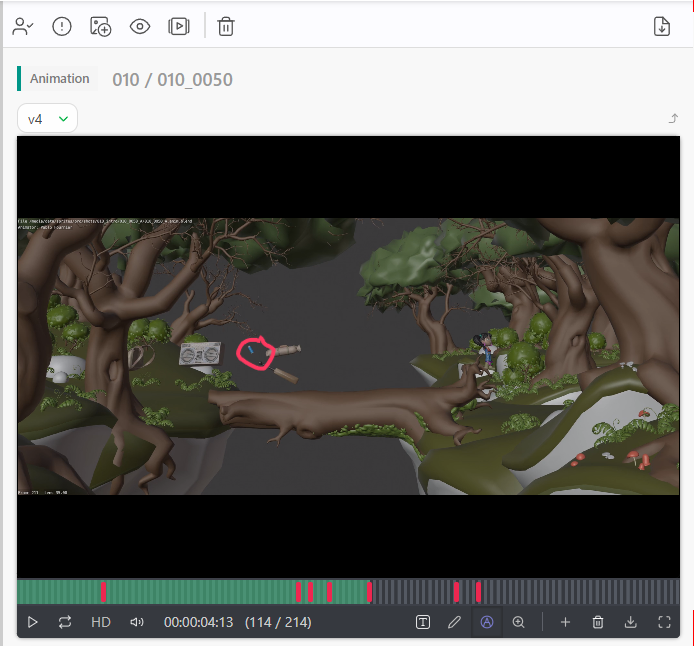
Click on status to open the right panel and start the review.
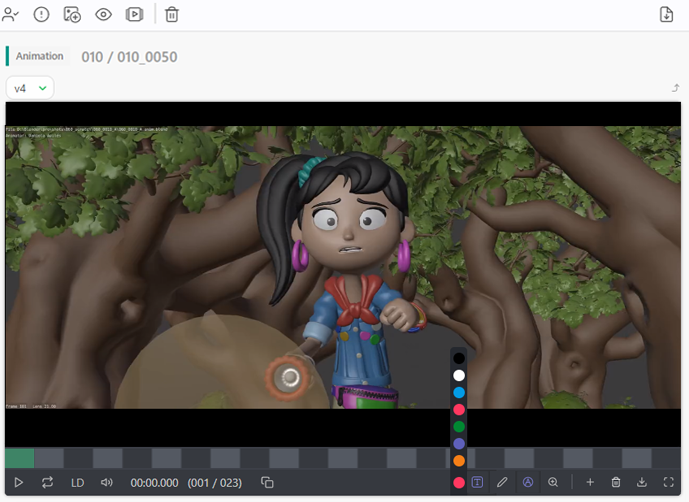
You can watch the version from the right panel, enlarge it by grabbing the side of the panel, or even go fullscreen  .
.
For the 3D file (.glb file) you can also review it as wireframe, or add a .HDR file to check the lighting.
You can move around the 3d file with a drag and move with your cursor, and zoom in or out with the scroll.

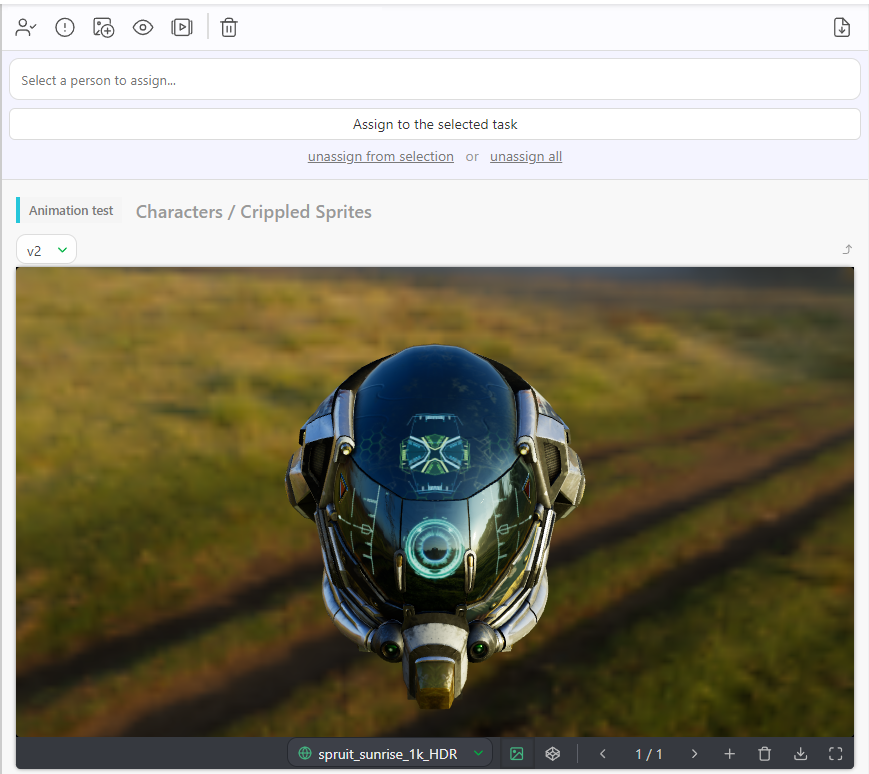
See the Customization section for more details. Pipeline Customization
You can draw directly on the preview with the Pencil tool and select a color  .
.
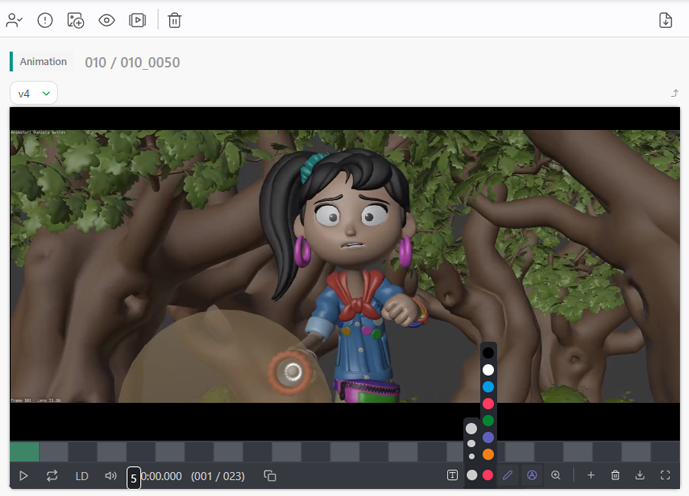
You can also add text on the frame.
If you need to see the preview without your comment, hide your annotation, you can click on the Fountain Pen button.
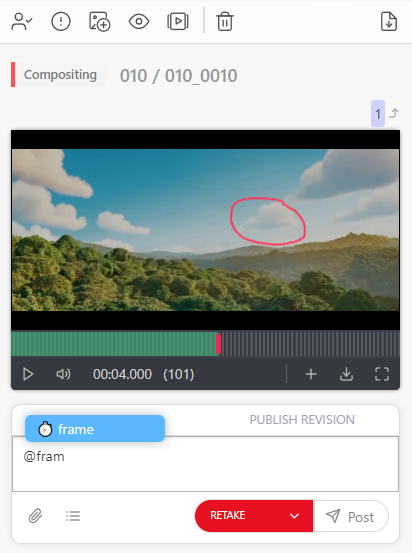
You can tag a frame (whatever version you are in), type the @and it opens a sub-menu with the team list, and start typing frame.
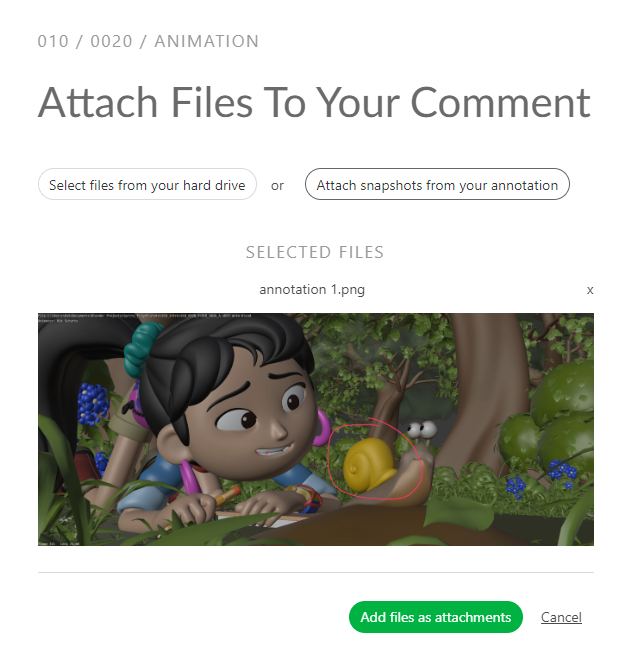
You can also export your drawings on each frame by attaching the screenshots as attachments.
Click on the Add attachment button.
You can also choose to Attach snapshots from your annotation on the attachment option.
Once you click the button, Kitsu will grab all the frames with annotation and display the result. You can publish them with Confirm.
If you need to delete your line, click the pencil icon again, and the cursor changes to a multi-directional cross  , and then you can select your line and move it around.
Select the line with the directional cross, then press the delete icon 
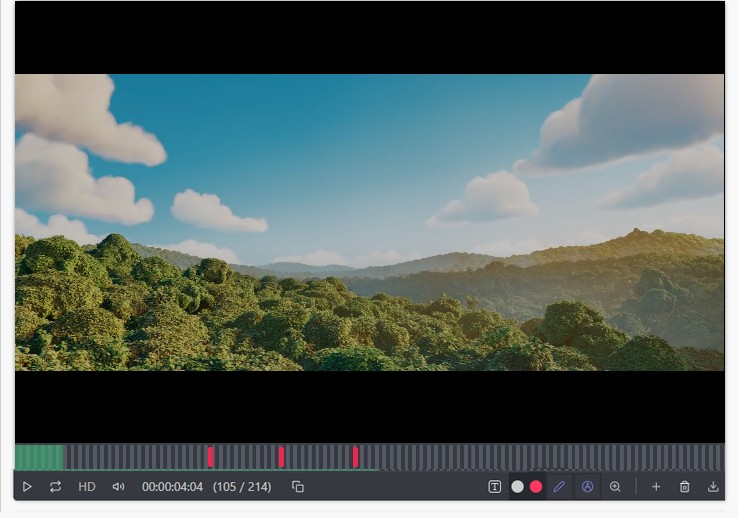
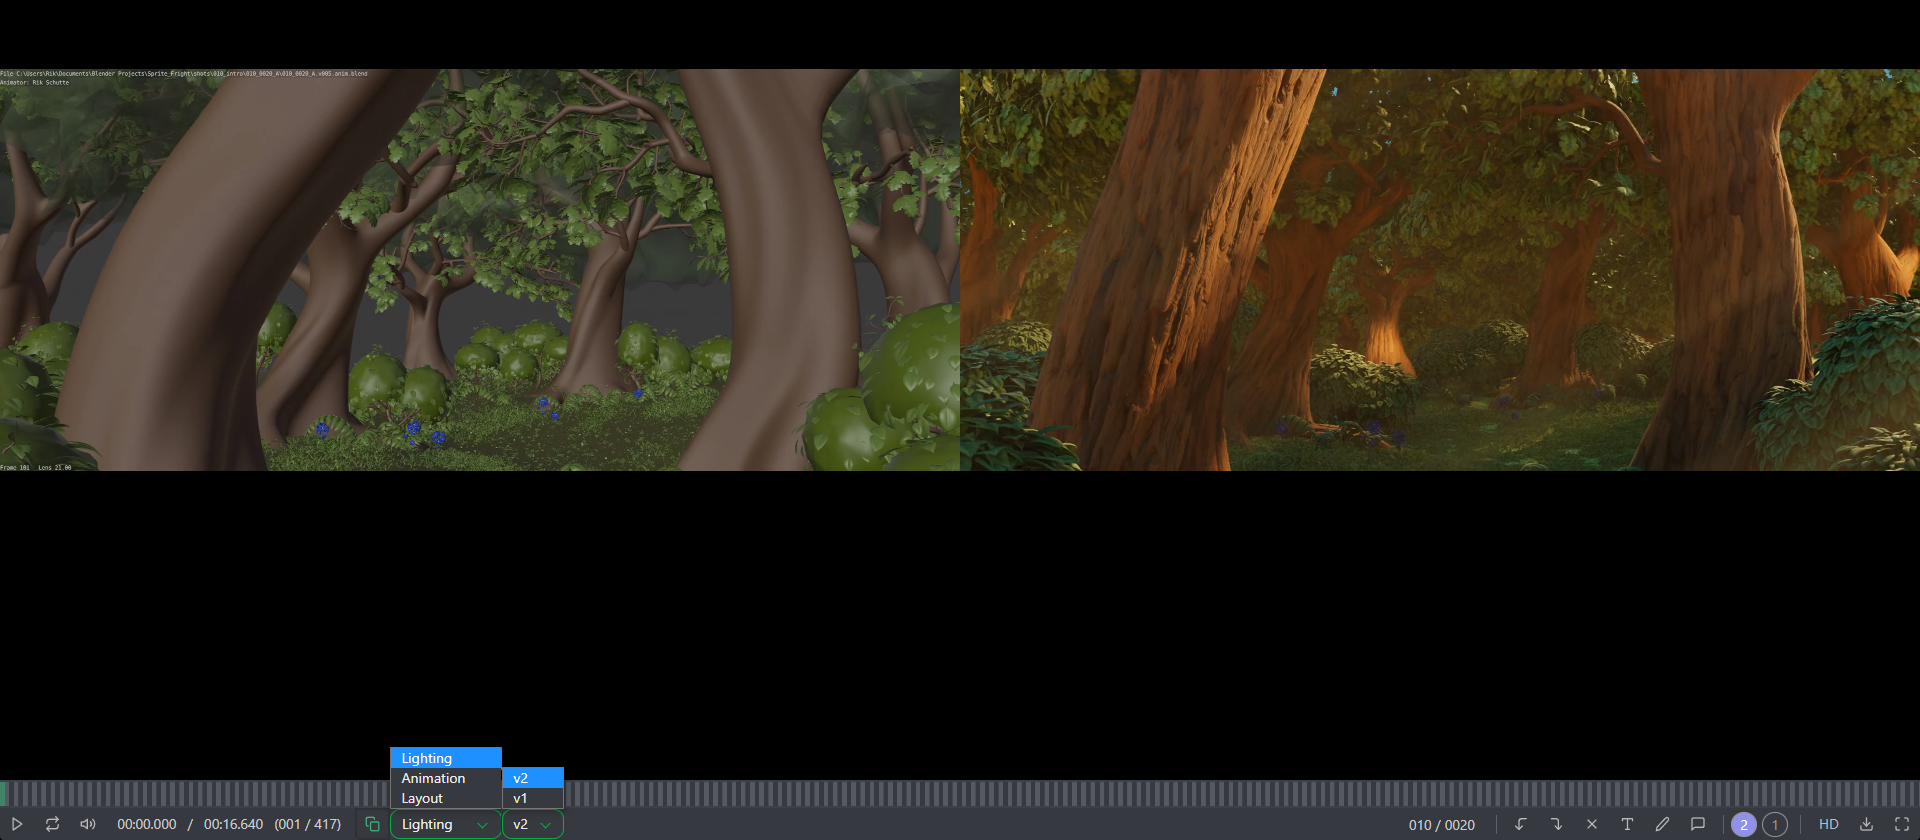
If you go into Full-Screen, you can compare two task types or versions side by side when you click on the Compare button
 .
.
From there, you can change the status too if you want the Artist to perform some changes.
Alternatively, you can change it to  to notify the Artist that his work is validated.
# Review a Concept
Once your artists upload the concept, you can review it with the supervisor or the director.
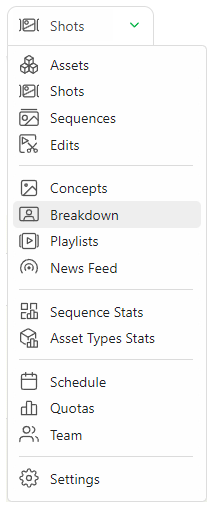
To review the concept, you use the navigation menu at the top of the screen and select the concept page.
You can see all the concepts uploaded, the status, assignation, and linked assets.
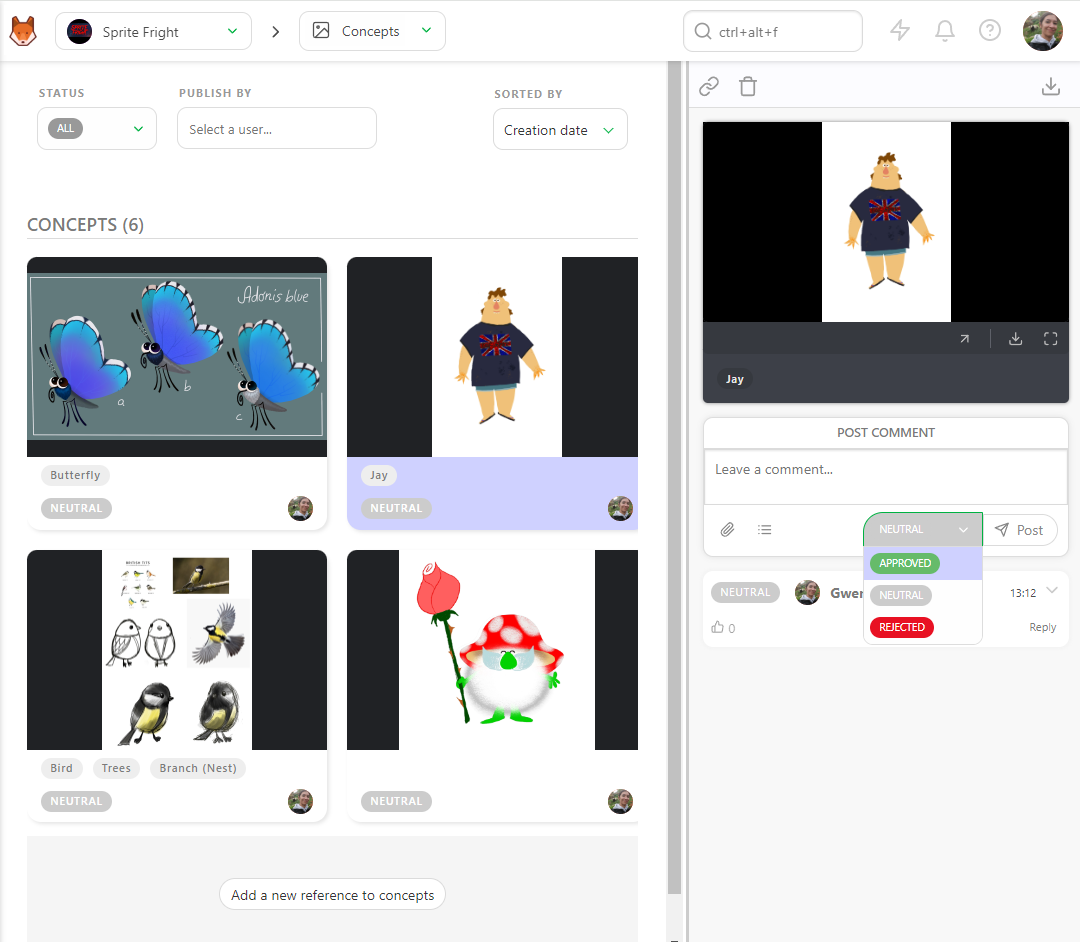
To review a concept, click the status part to open the comment panel. You can enlarge the comment panel or go fullscreen.
Then, write a comment, select the status Approved or Rejected, and validate with the Post button.
You can filter the page with the Status filter to display all the Neutral status concepts.
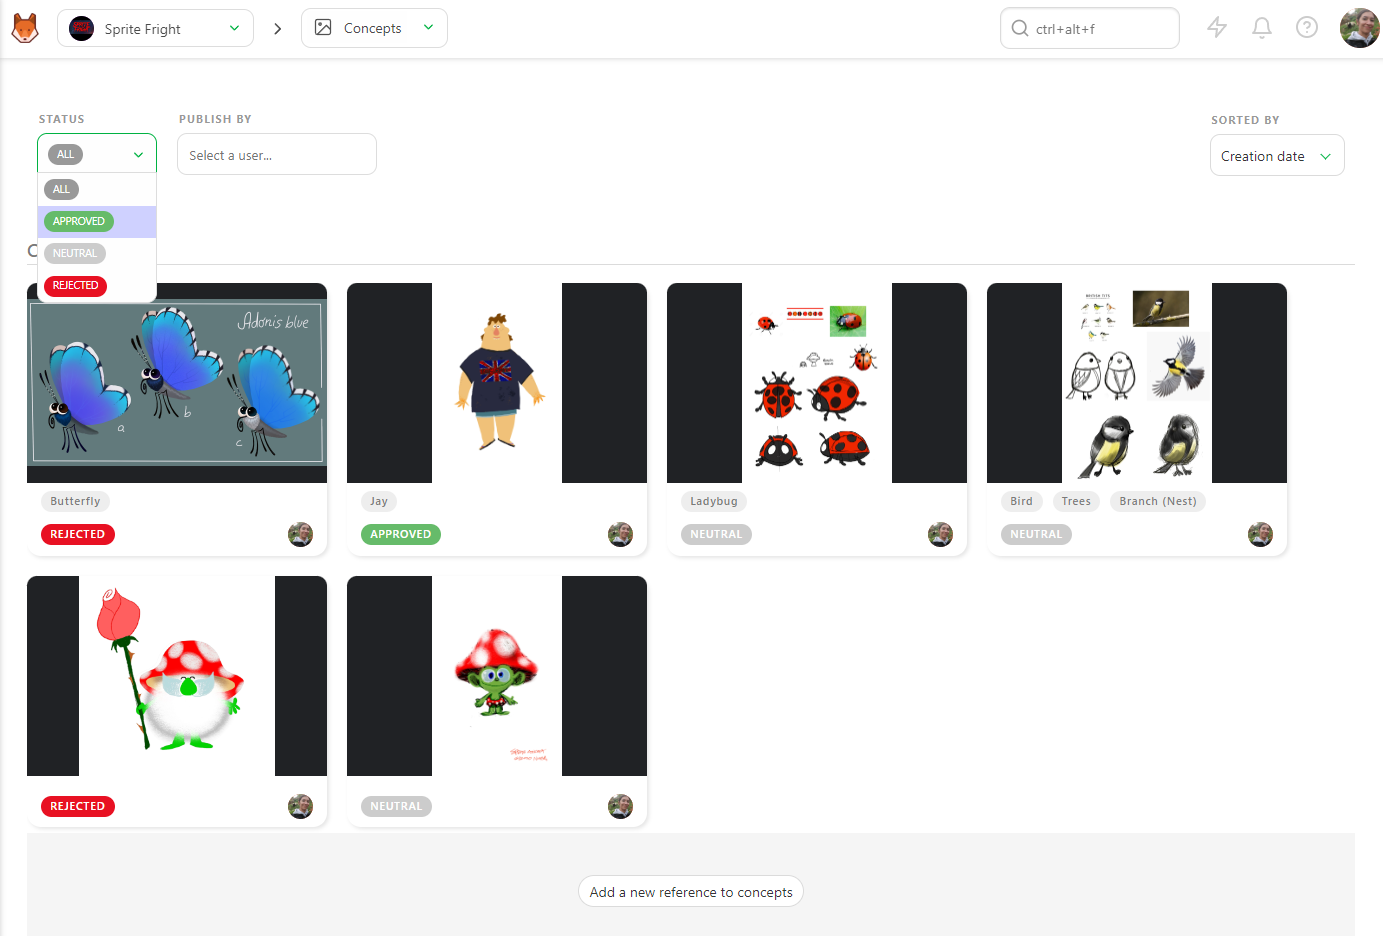
You can also filter per artist and change the order sort.
# Create a Breakdown List
Filling out the breakdown helps you with the assembly of the shots. With the breakdown, you have all the details of the assets you need to add to create your shot, and we are sure to omit nothing.
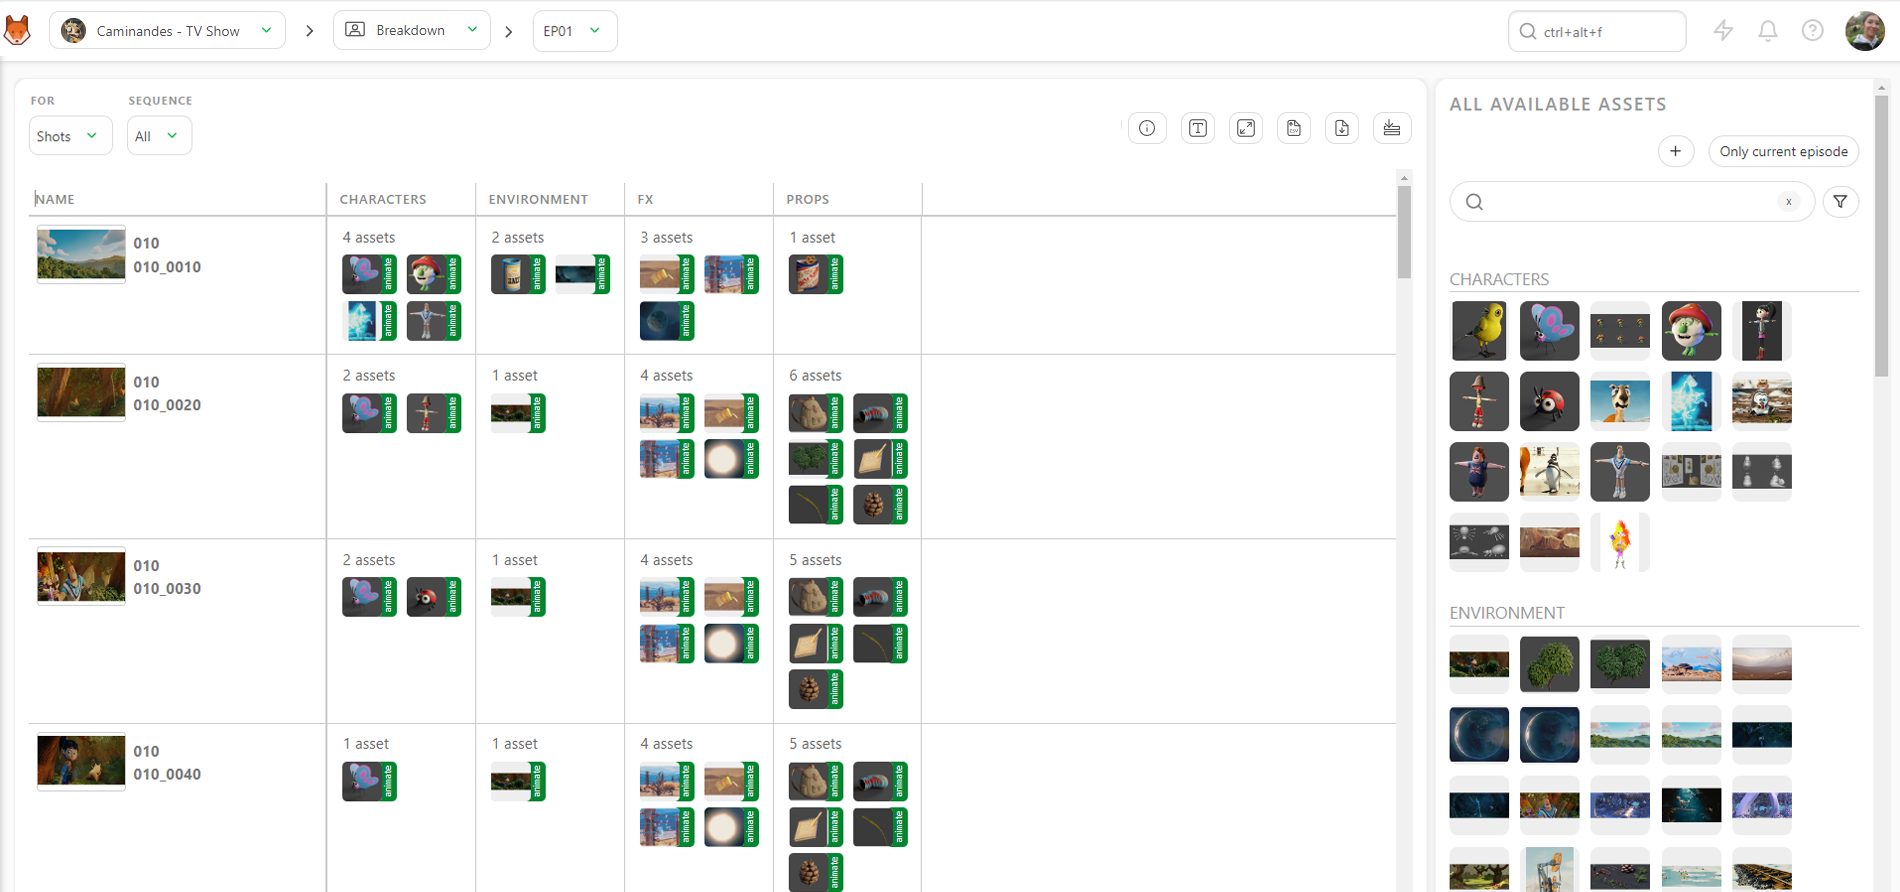
On the dropdown menu, choose BREAKDOWN.
On the left of the breakdown page is the episode/sequence/shot menu (1); you can choose between those you created. They are the right part of the screen; all the assets created are available for this production (main pack and episodes) (3). Moreover, in the middle section, it is your selection for the shot (2).
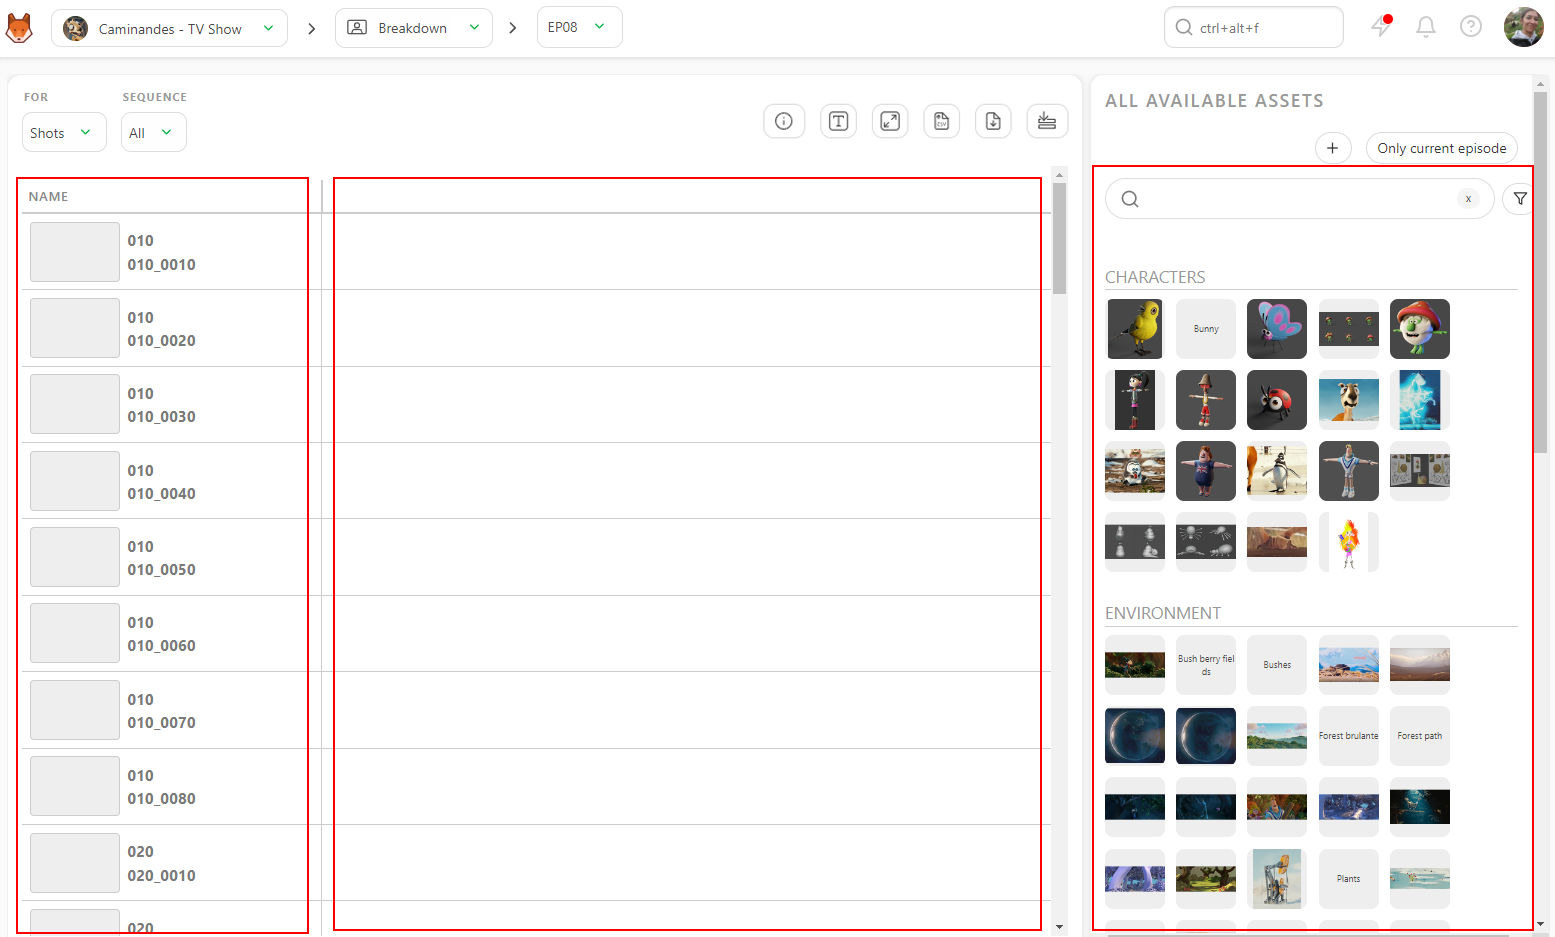
So now you have to select the shot you want to cast.
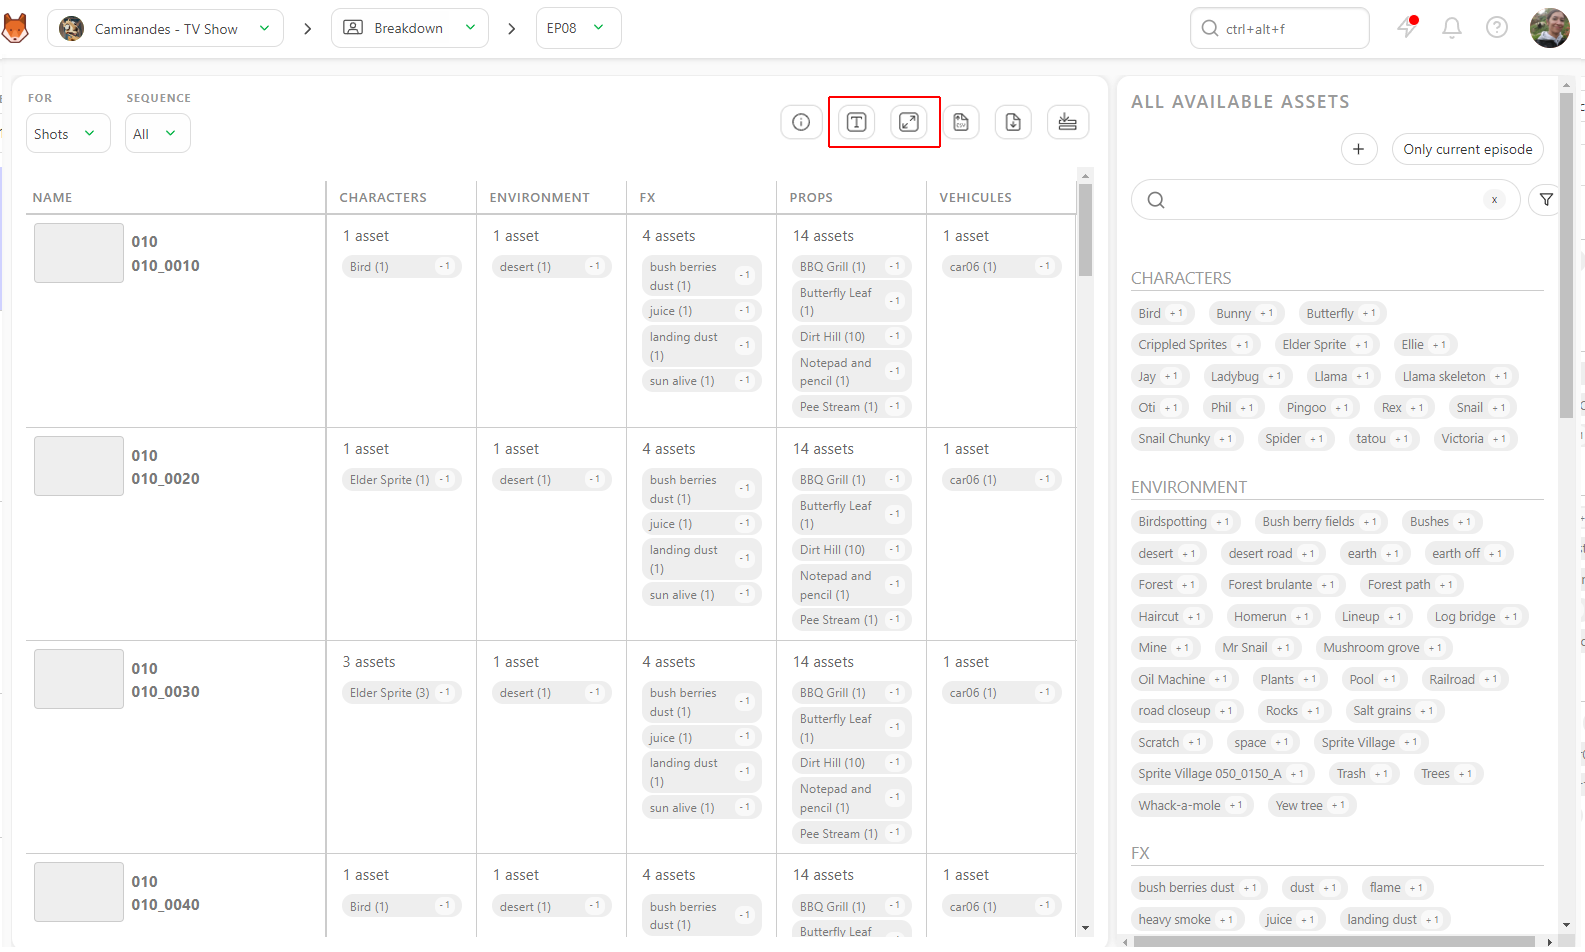
You can display the assets as text if you don't have thumbnails yet or enlarge the thumbnails size.
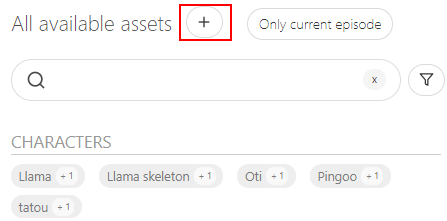
You may also realize an asset needs to be added to the list during your breakdown.
You can create a new asset directly from the breakdown page. Click the + on the right of the All available assets.
You can also choose multiple shots at the same time. Click on the first shot, hold the shift key, and click on the last shot of your selection.

Then click on the assets you want to assign: characters, backgrounds, ... from the right part (3). If you have selected multiple shots, your selection is applied to the numerous shots.
Copy a shot filled with assets and paste this asset selection into another shot.
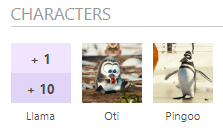
You can see a +1 or +10 when you pass over the asset. It's the number of times you add this asset, and you can click on it as many times as you need.
You can also link all your assets to episodes on a TV show without specifying a sequence or shot.

This way, you can link all your assets to one or several episodes before the storyboard/animatic stage.
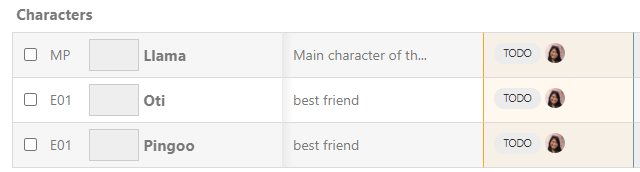
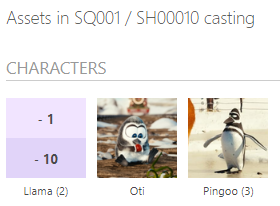
You can now see the asset in the middle of the screen (2). Next to the asset's name is the number of times it has been added. In this example, we have added the character asset Llama two times.
If you add an asset twice by mistake, you must go to the screen's middle part to select assets for this shot (2). From there, click on -1. When you finish this shot, go on with the other shots. Your selection is automatically saved.
If a new asset is created during the storyboard, return to the asset page (using the dropdown menu) and create the needed assets. The tasks previously created are applied immediately to these new assets. However, you have to do the assignment, and then you can continue with the breakdown.
Now, your Breakdown page should look like this.
You can also make a breakdown list for your assets if you need to assemble them and keep track of the separate parts.
On the top left corner of the screen, choose asset in the dropdown menu below FOR.

You can now access a second dropdown menu to choose your asset type: Character, Environment, Props, FX, ...

You can fill the asset breakdown page the same way as the shots. First, select one or more assets on the left part and then add the right part's elements.
# Change Asset Status
For example, when an asset is validated at the Concept stage, it can be used for the storyboard. Then, when it's validated at the Modeling stage, you can use it for the layout and so on.
It's useful to know the global status of the state of life of an asset, especially when the breakdown is complete.
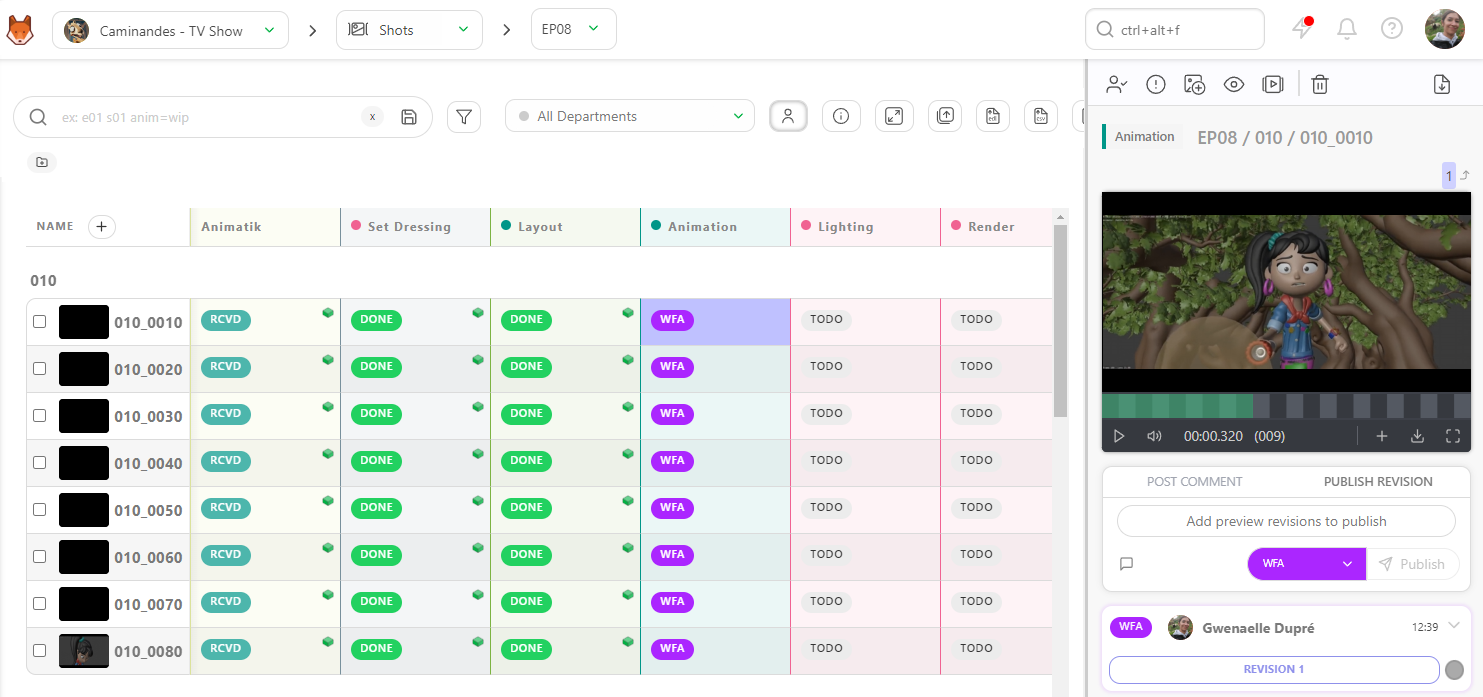
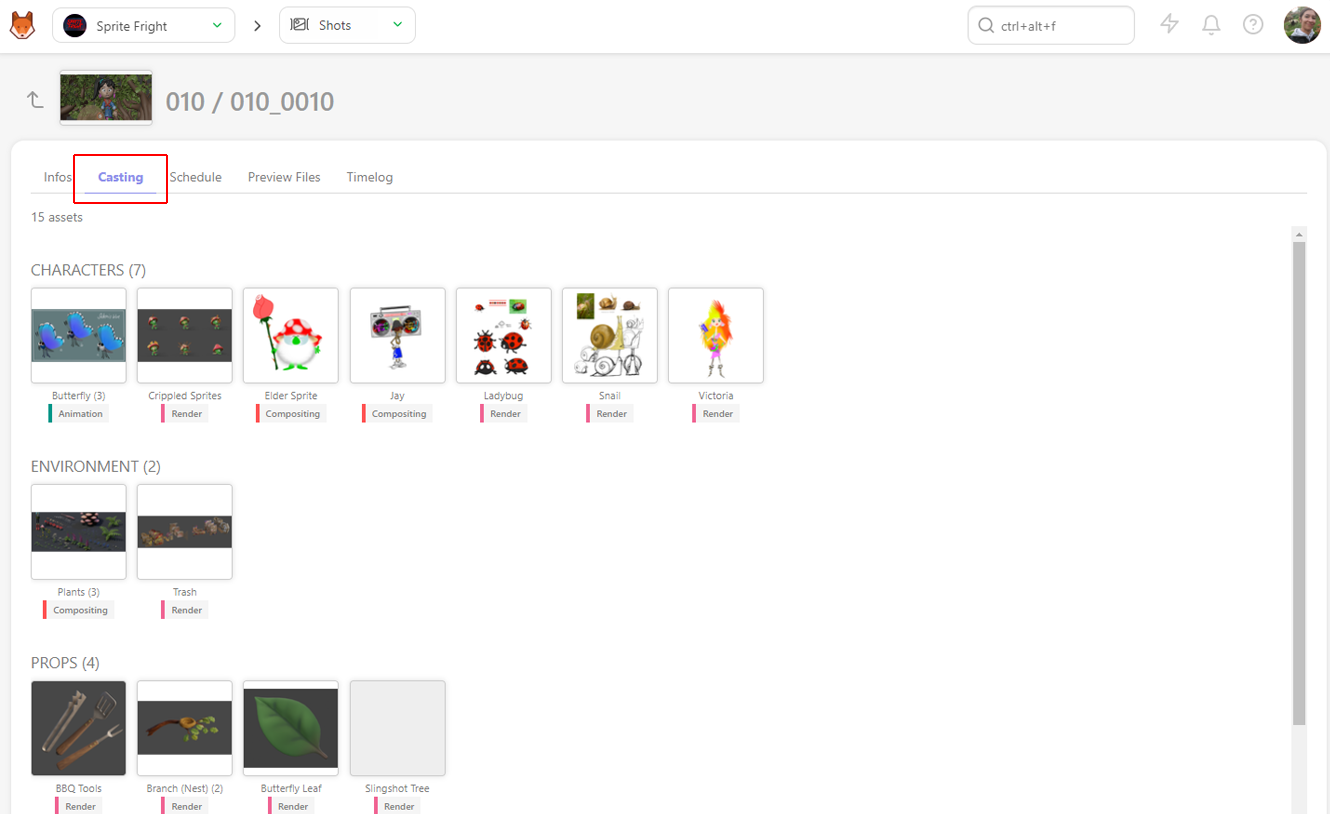
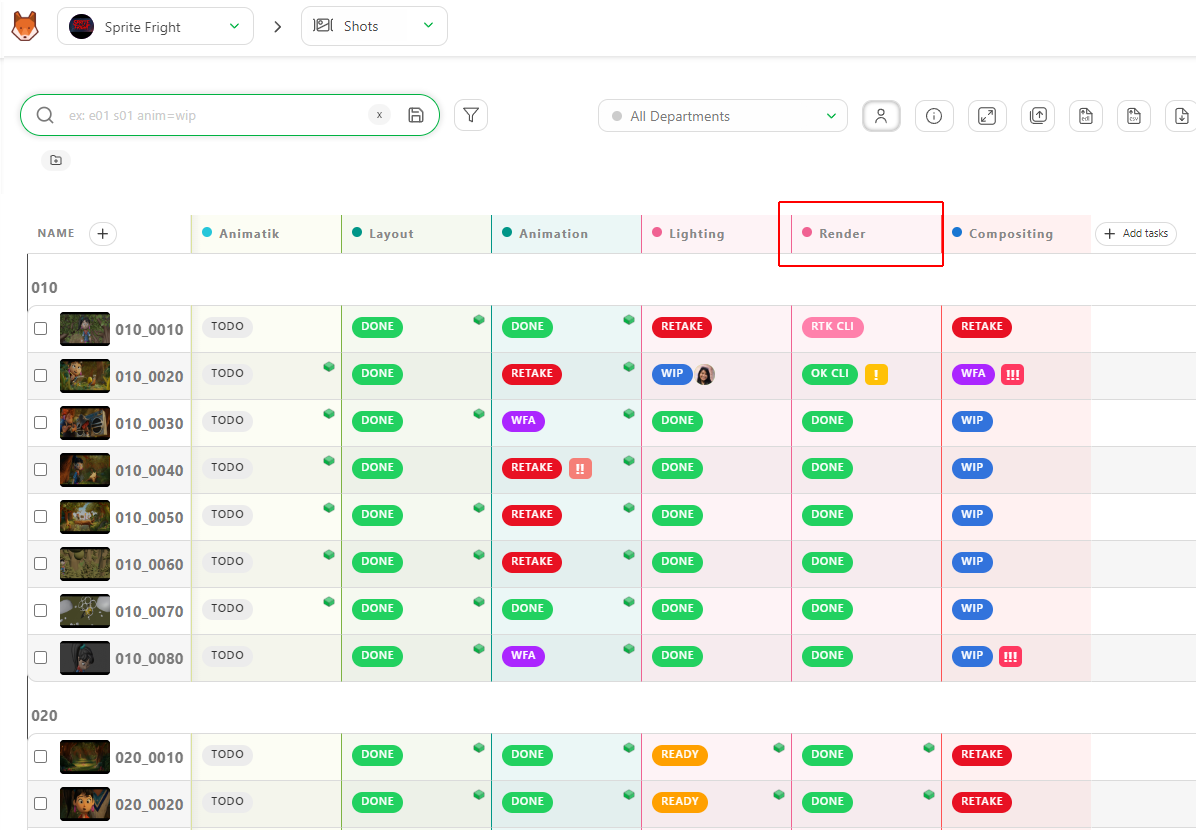
On the global page of the shot, you will see a green box: all the assets cast in this shot are ready for this specific task.
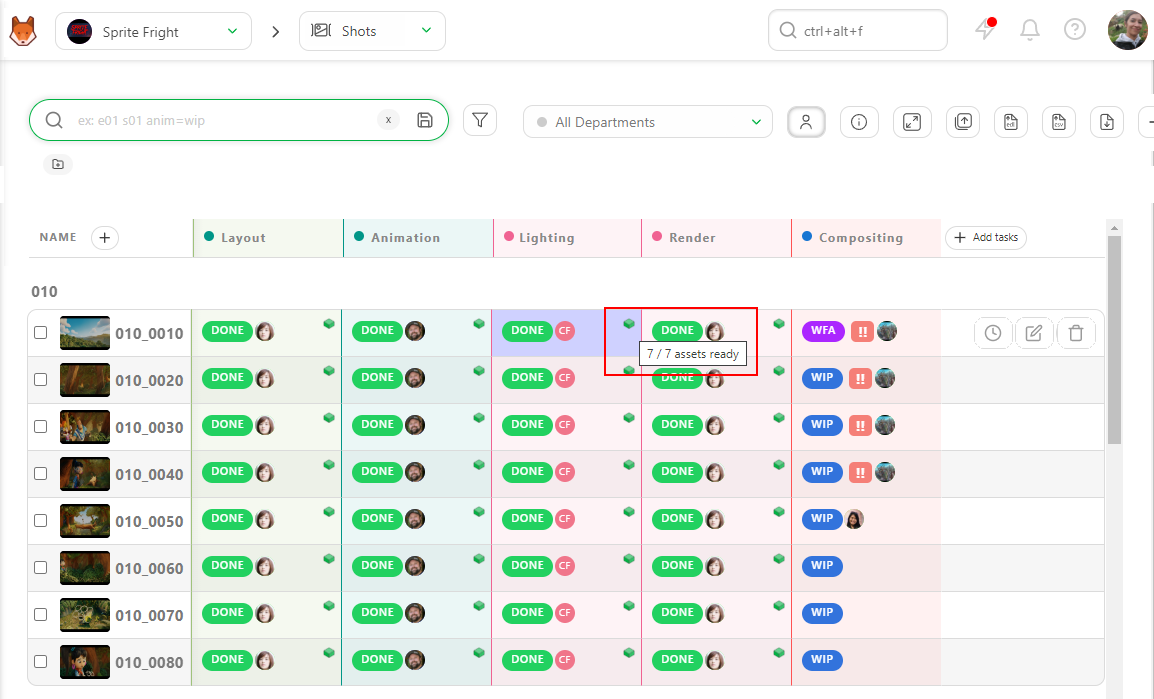
If you don't see the green box, Kitsu will display how many assets are ready.

Then, you can click on the shot's name to go to its detail page. Then, you will see all the assets cast in this shot and their status.
It's the fastest way to know if you can start a shot for a specific task.
# Add an Estimation for a Task
Click on the name of a task type.
The new page is the Supervisor view. You have more detailed information specific to this specific task type.
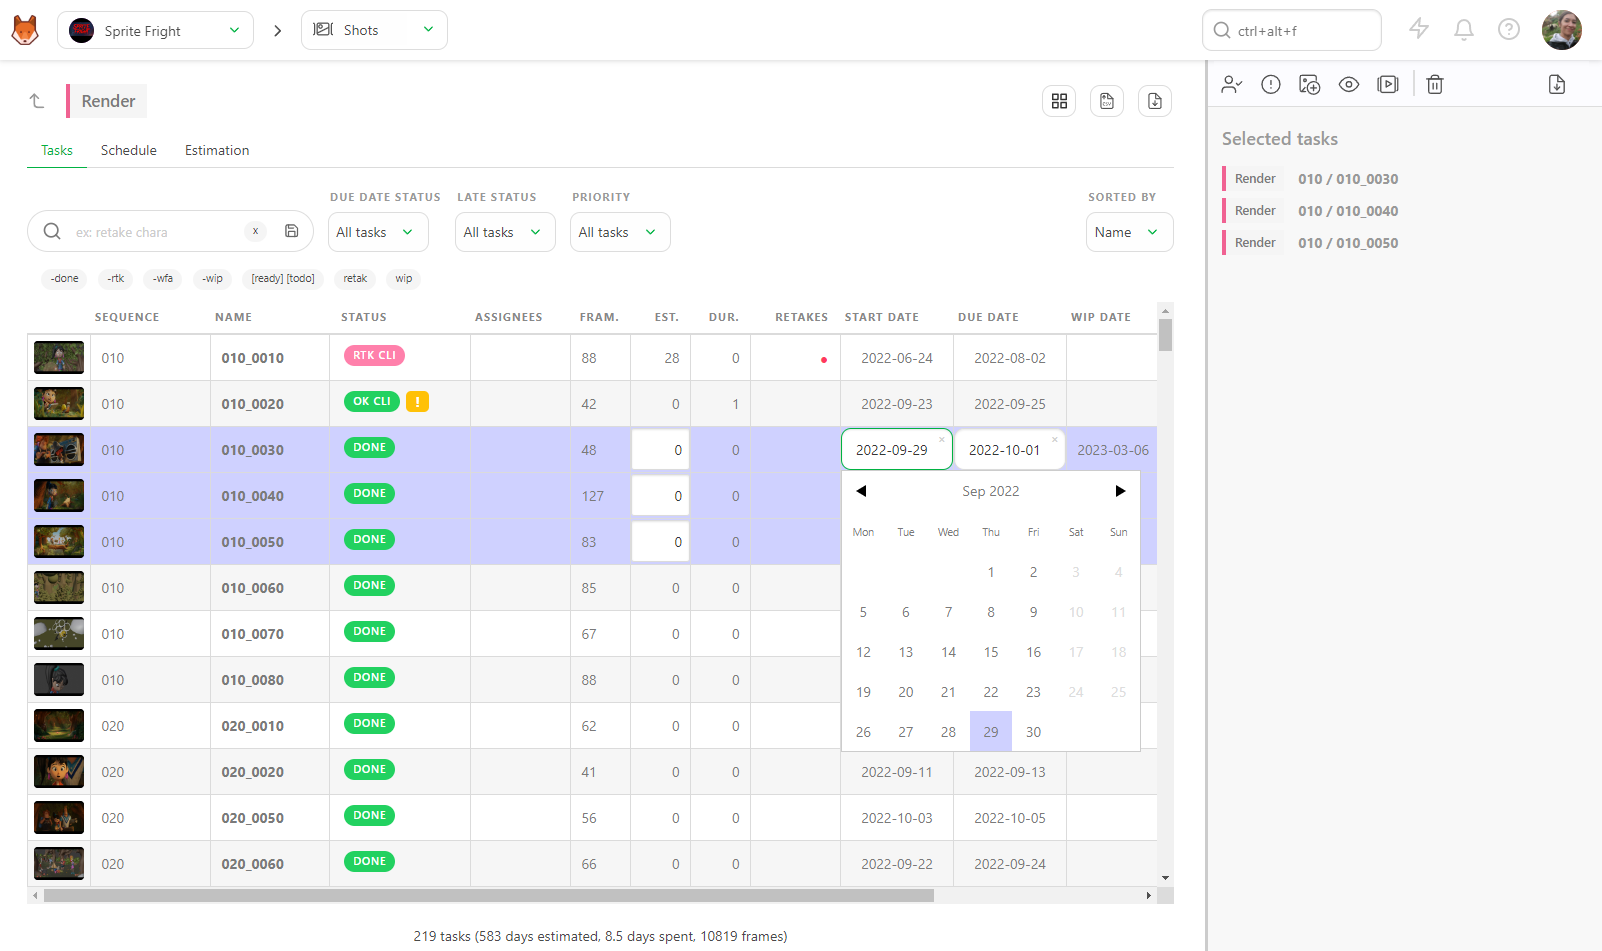
To add an estimation to a task, click on the line and type the number of days you estimate. You can select multiple assets or shots at the same time.
You can also define a Start date by clicking on it. A calendar will open and let you choose your start date.
The Due date is automatically calculated with the Estimation.
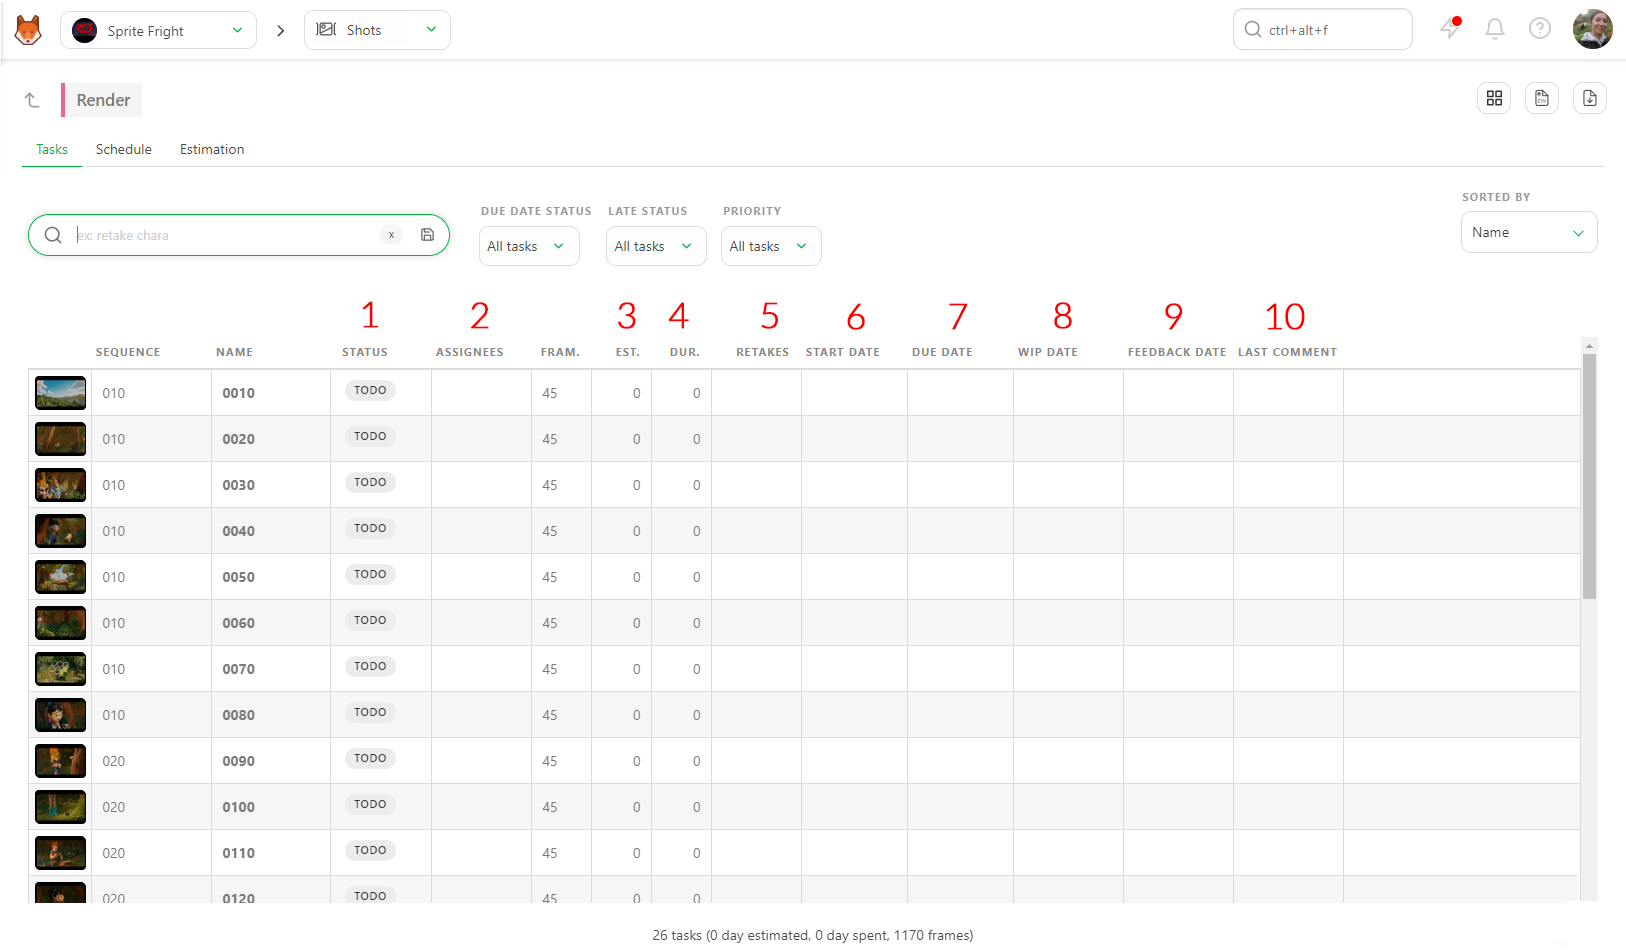
To go further in detail with the Supervisor's view :
- (1) You can see and change the status of a task
- (2) You can assign people to tasks
(1) and (2) are filled with the action menu.
- (3) You can add an estimation for the task (in day unit)
- (4) Kitsu calculates the sum of the timesheet fed by the artists
- (5) The number of back-and-forths with the retake status
- (6) You can add a start date for the task (with the calendar)
- (7) Kitsu calculates the due date with the Start Date and the estimation
- (8)(9) the Wip and Feedback dates are automatically filled
- (10) The last comment section helps you keep an eye on the last activity of this task type.
(7) to (10) is automatically filled.
To help you set a correct estimation, you can use the Estimation Tab.
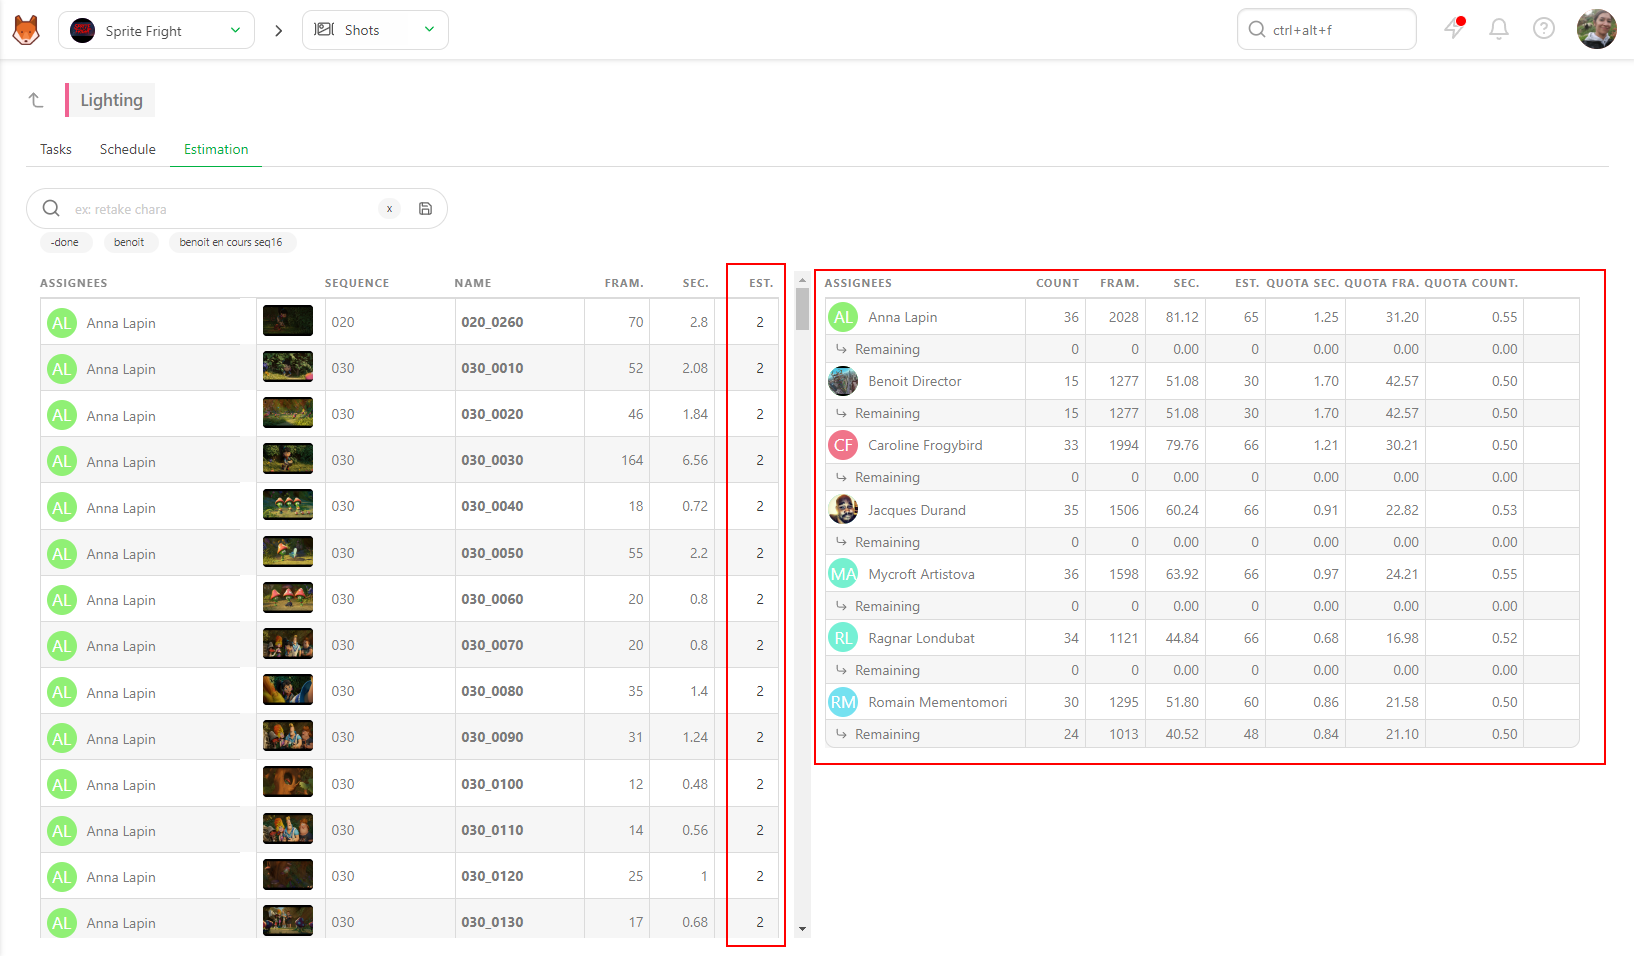
The left part of the screen lists the shots with the assignation and the number of frames (1). Depending on the FPS you have set for the production, the number of Seconds will be automatically calculated (2).
On the right part of the screen, you can see the full team of the department (depending on the assignments you made), the number of shots they have to do, the number of frames and seconds, and the average Quota. You will also have the Remaining line, which gives you the actual situation of your team.
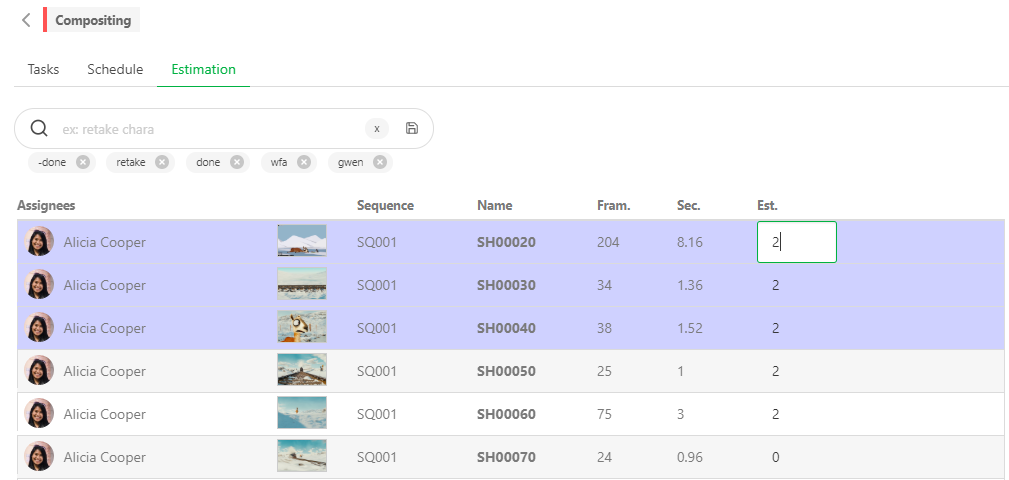
And the last column is the Estimation. To modify the estimation, hover the line with your mouse and click the editing zone.
You can also select multiple shots simultaneously to edit them all at once.
Every time you change the Estimation (in the number of days) on the right part, you can see in real-time that the Average Quota is updated.
For more information about the Schedule tab, go to the Task Type Schedule
# The Timesheets
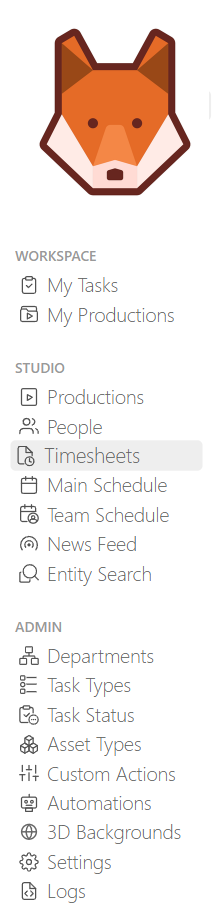
As Studio Manager, you can use the main menu to check the timesheets.
Open the main menu with the button.
On the menu, choose the Timesheets page.
Per default, Kitsu will display the timesheet of all the production, but you can choose to see the timesheet for a specific production only.
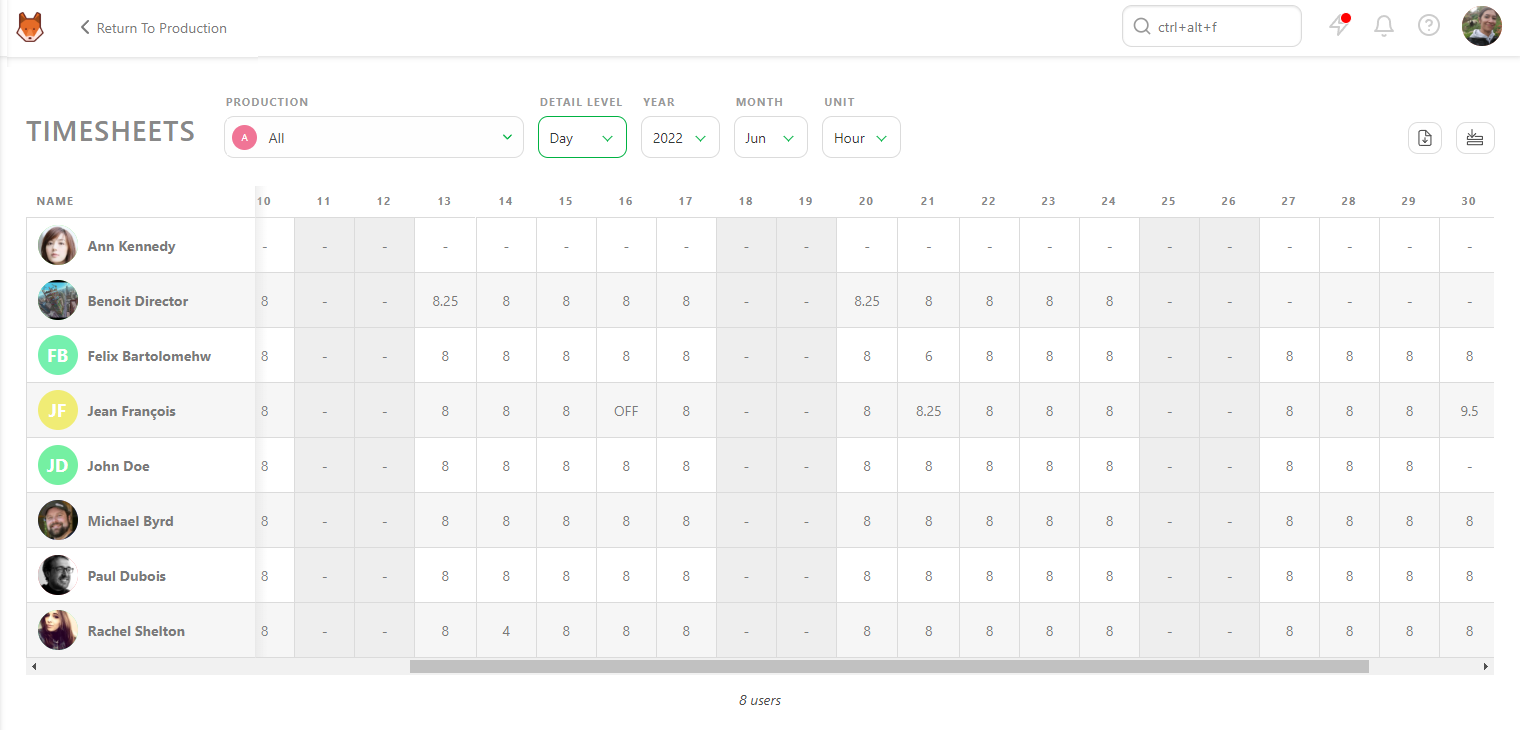
You can choose which month or year you want to display.
You can also choose the detail level: day, week, month.
Each week, Kitsu highlights the overdue time per ArtistArtist.
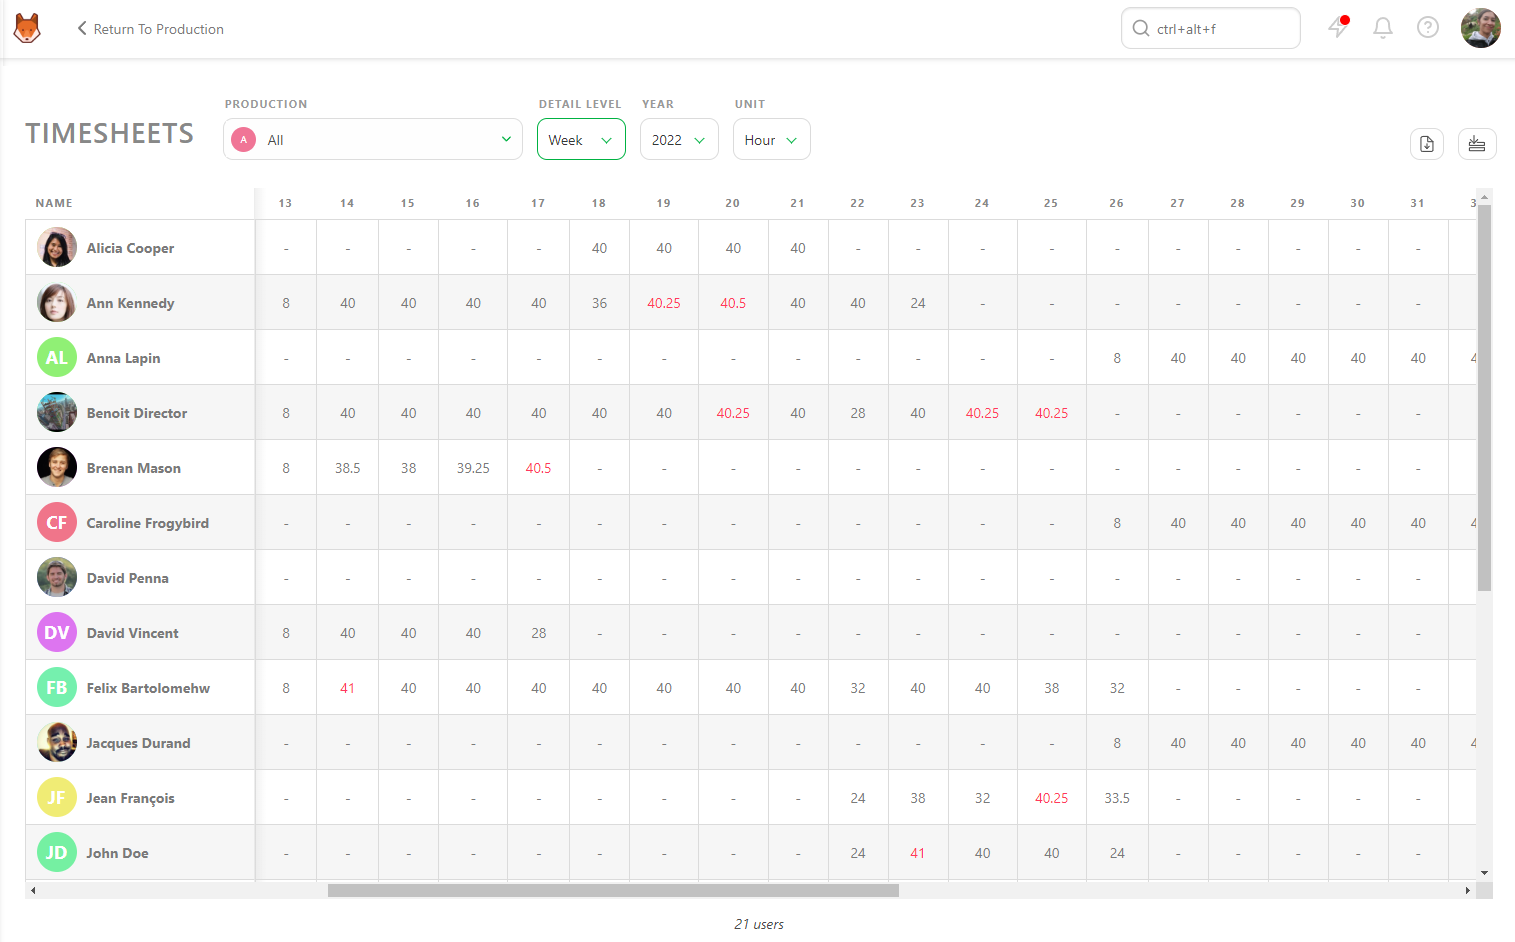
If you click on a number, a side panel opens with the details of the time spent per task this week.
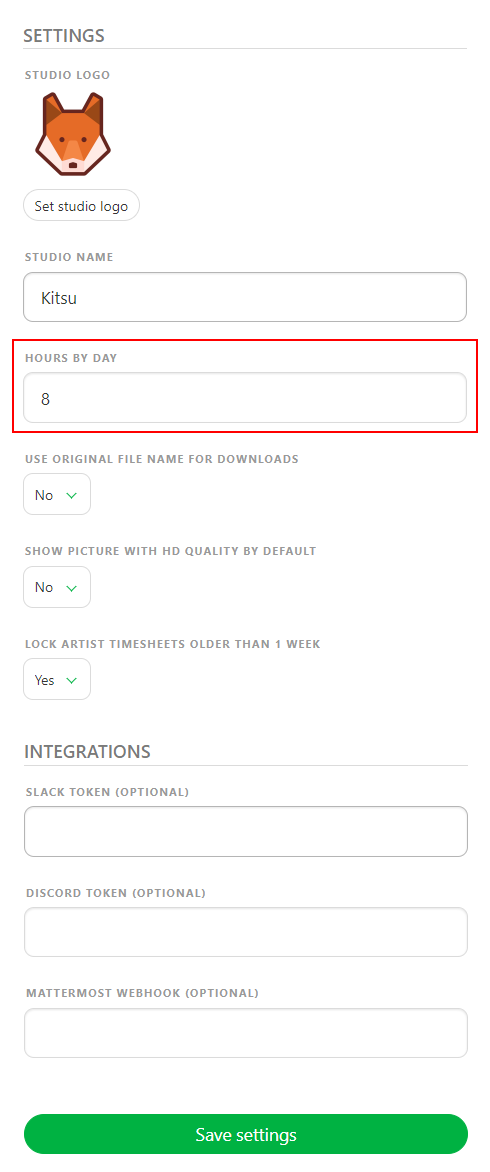
You can also set up several working hours per day.
Go back to the main menu and select Settings.